Copy Data Tool in Azure Data Factory

In the previous post, we looked at the different Azure Data Factory components. In this post, we’re going to tie everything together and start making things happen. Woohoo! First, we will get familiar with our demo datasets. Then, we will create our Azure Data Lake Storage Account that we will copy data into. Finally, we will start copying data using the Copy Data Tool.
Demo Datasets
First, let’s get familiar with the demo datasets we will be using. I don’t know about you, but I’m a teeny tiny bit tired of the AdventureWorks demos. (I don’t even own a bike…) WideWorldImporters is at least a little more interesting. (Yay, IT joke mugs and chocolate frogs!) But! Let’s use something that might be a little bit more fun to explore.
Let me present… *drumroll* 🥁
LEGO Data from Rebrickable
LEGO! Yay! I love LEGO. Rebrickable is an online service that will show you which LEGO sets you can build from the sets and parts you already own. Fun! :)
They also have a database of all official LEGO sets and parts (including themes and colors) that you can download for free as CSV files or JSON files.
The CSV files are automatically generated and can be found on rebrickable.com/downloads. The available CSV files are:
- colors
- elements
- inventories
- inventory_parts
- inventory_sets
- inventory_minifigs
- minifigs
- part_categories
- part_relationships
- parts
- sets
- themes
The JSON files can be downloaded through their API. This is free to use, but requires an account and an API key to use.
Alternative: Movie and TV Data from IMDb
Movies! Yay! I also love movies. If you prefer working with movie or TV data, you can get a subset of the IMDb data from datasets.imdbws.com. These files are refreshed daily, and you can find the descriptions and details on imdb.com/interfaces. Make sure you read the terms and conditions for usage. I will (most likely) not use these datasets in my posts, but they are fun to experiment with.
Create Azure Data Lake Storage Account
Before we can start copying data, we need to create the Azure Data Lake Storage Account to copy data into. Go to the Azure Portal and navigate to the Create Storage Account page.
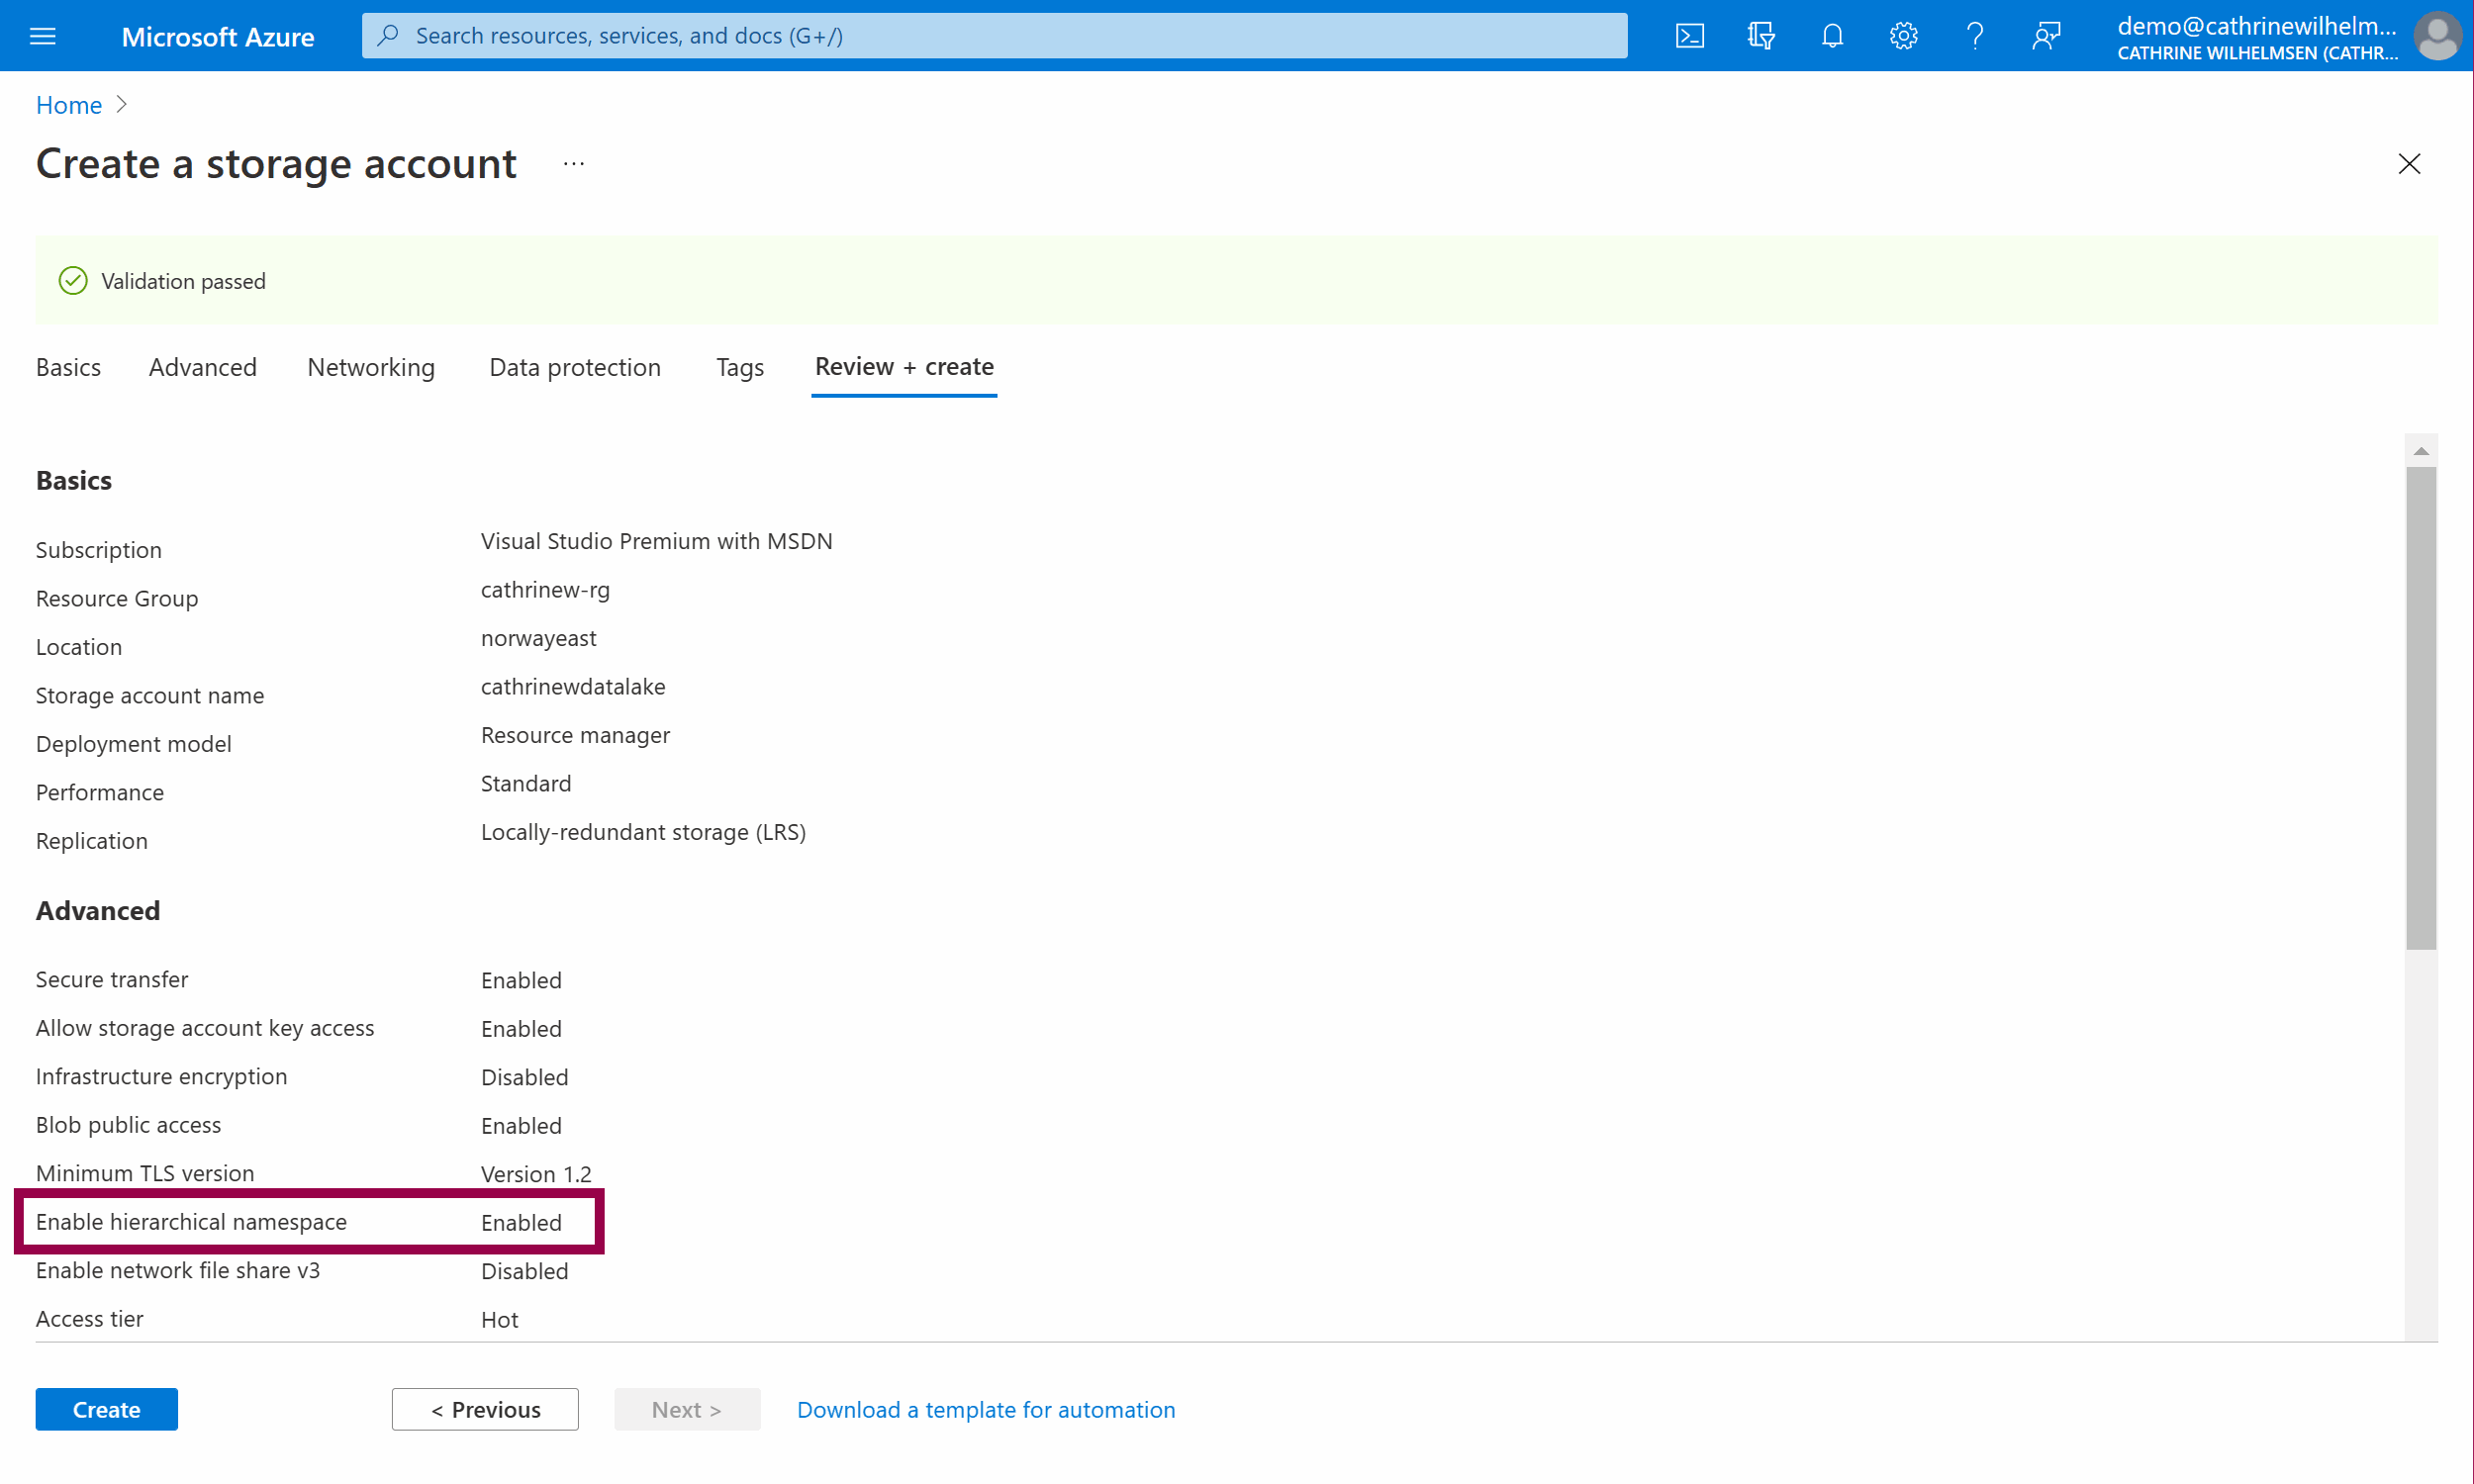
Under Basics, choose the same resource group and region you used while creating your Azure Data Factory. Give your storage account a unique name, I chose cathrinewdatalake. To keep costs down for these demos, choose Standard performance and change redundancy to Locally-redundant storage (LRS).
Under Advanced, under Data Lake Storage Gen2, select enable hierarchical namespace. This is what turns your storage account a data lake instead of a regular blob storage account.
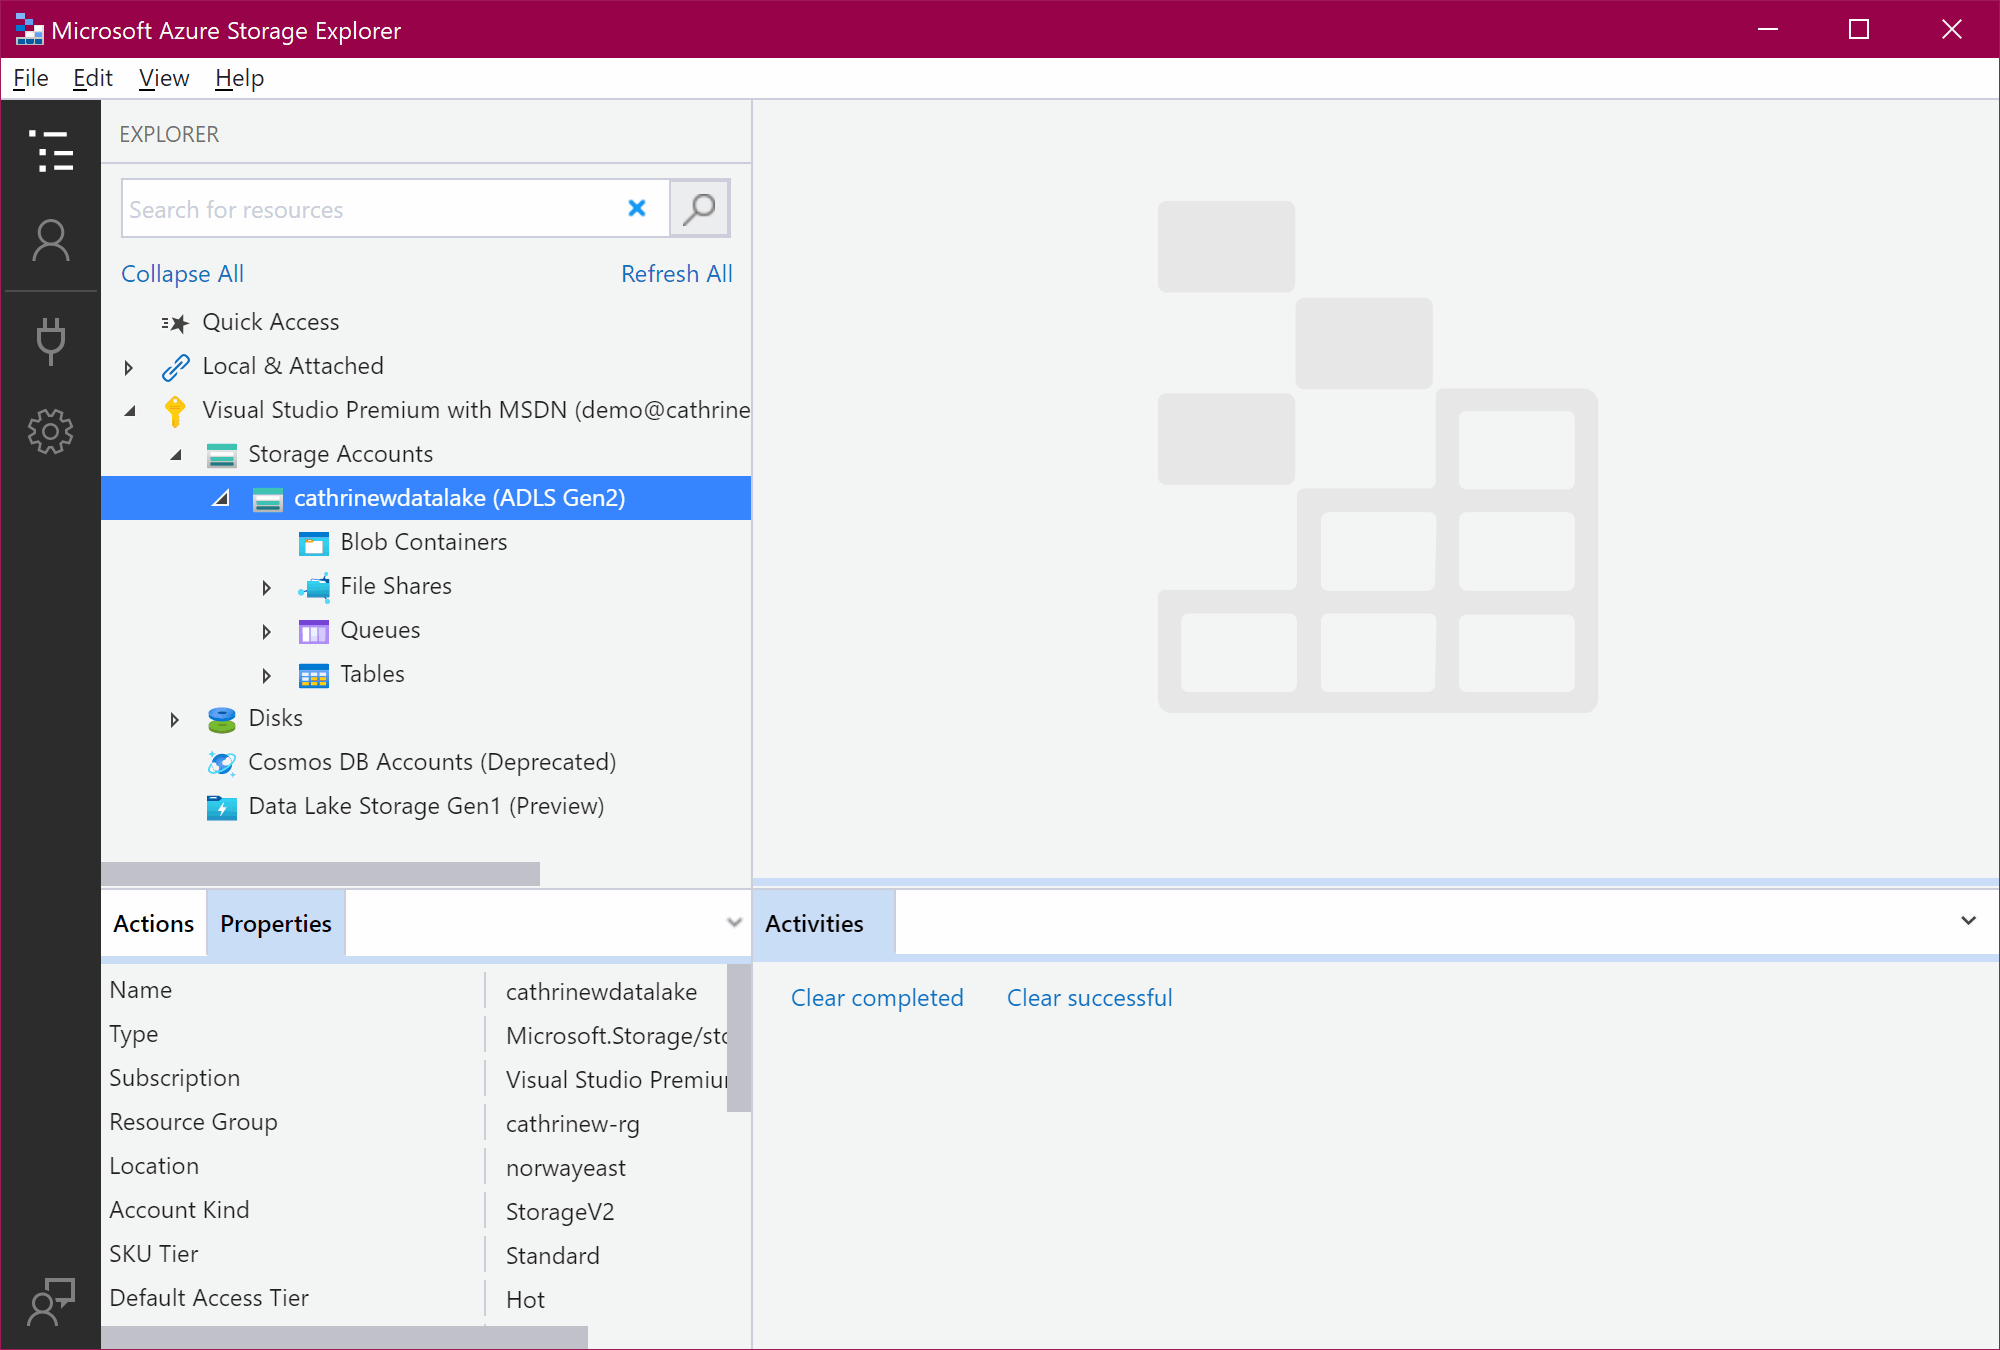
Download and Install Azure Storage Explorer
I also recommend downloading and installing Azure Storage Explorer. It’s completely free! You can view the content of your storage accounts in the browser, but I much prefer using Azure Storage Explorer.
Oh, and, it looks nice 🤩
Ok. Finally! Are you ready to copy some data?
Copy Data Tool
In this example, we are going to copy the themes.csv file from Rebrickable into a blob container called lego in our Azure Data Lake Storage Account.
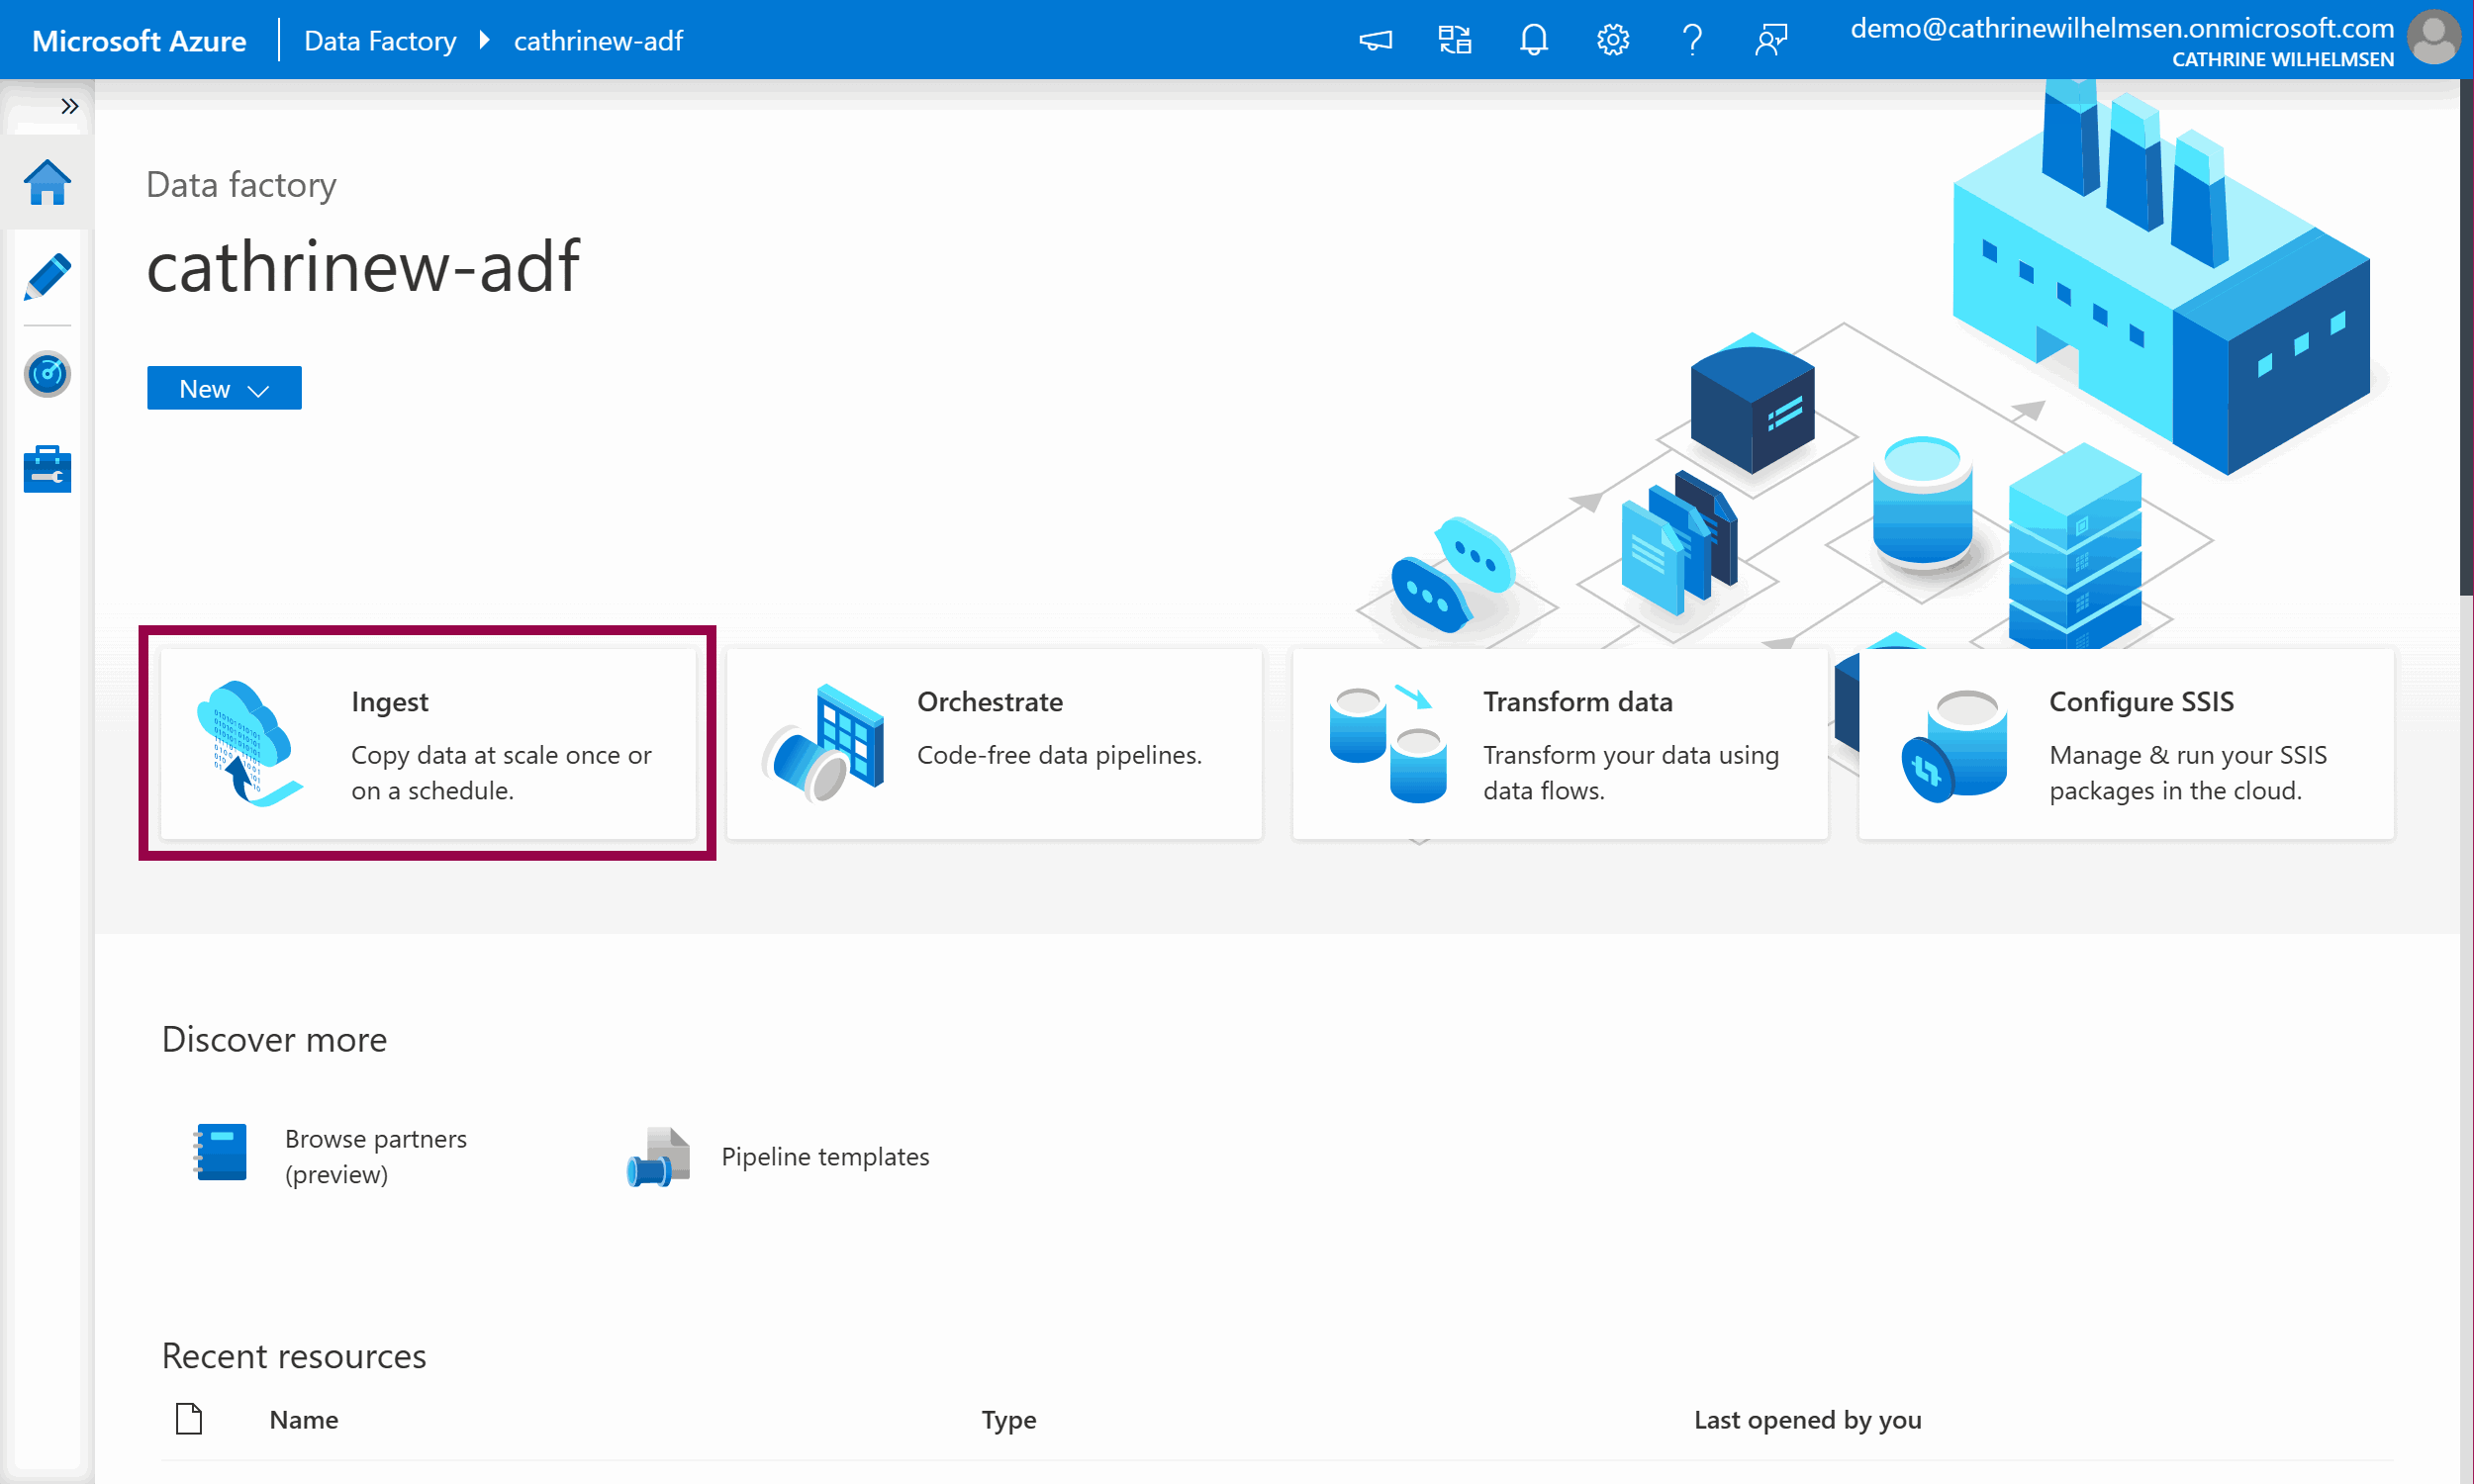
From the Azure Data Factory Home page, click Ingest:
This opens the Copy Data Tool. Let’s walk through each step!
1. Properties
On the Properties page, choose the built-in copy task. This will create a single pipeline. (The other option, metadata-driven copy task, was released in July 2021. It will create a full, dynamic, metadata-driven framework. You may want to return to this after finishing this series, but for now we will start with a single pipeline.) Keep the default run once now option:

Click next to move on to the Source properties.
2. Source
On the source dataset page, choose HTTP from the source type dropdown, then click create new connection:
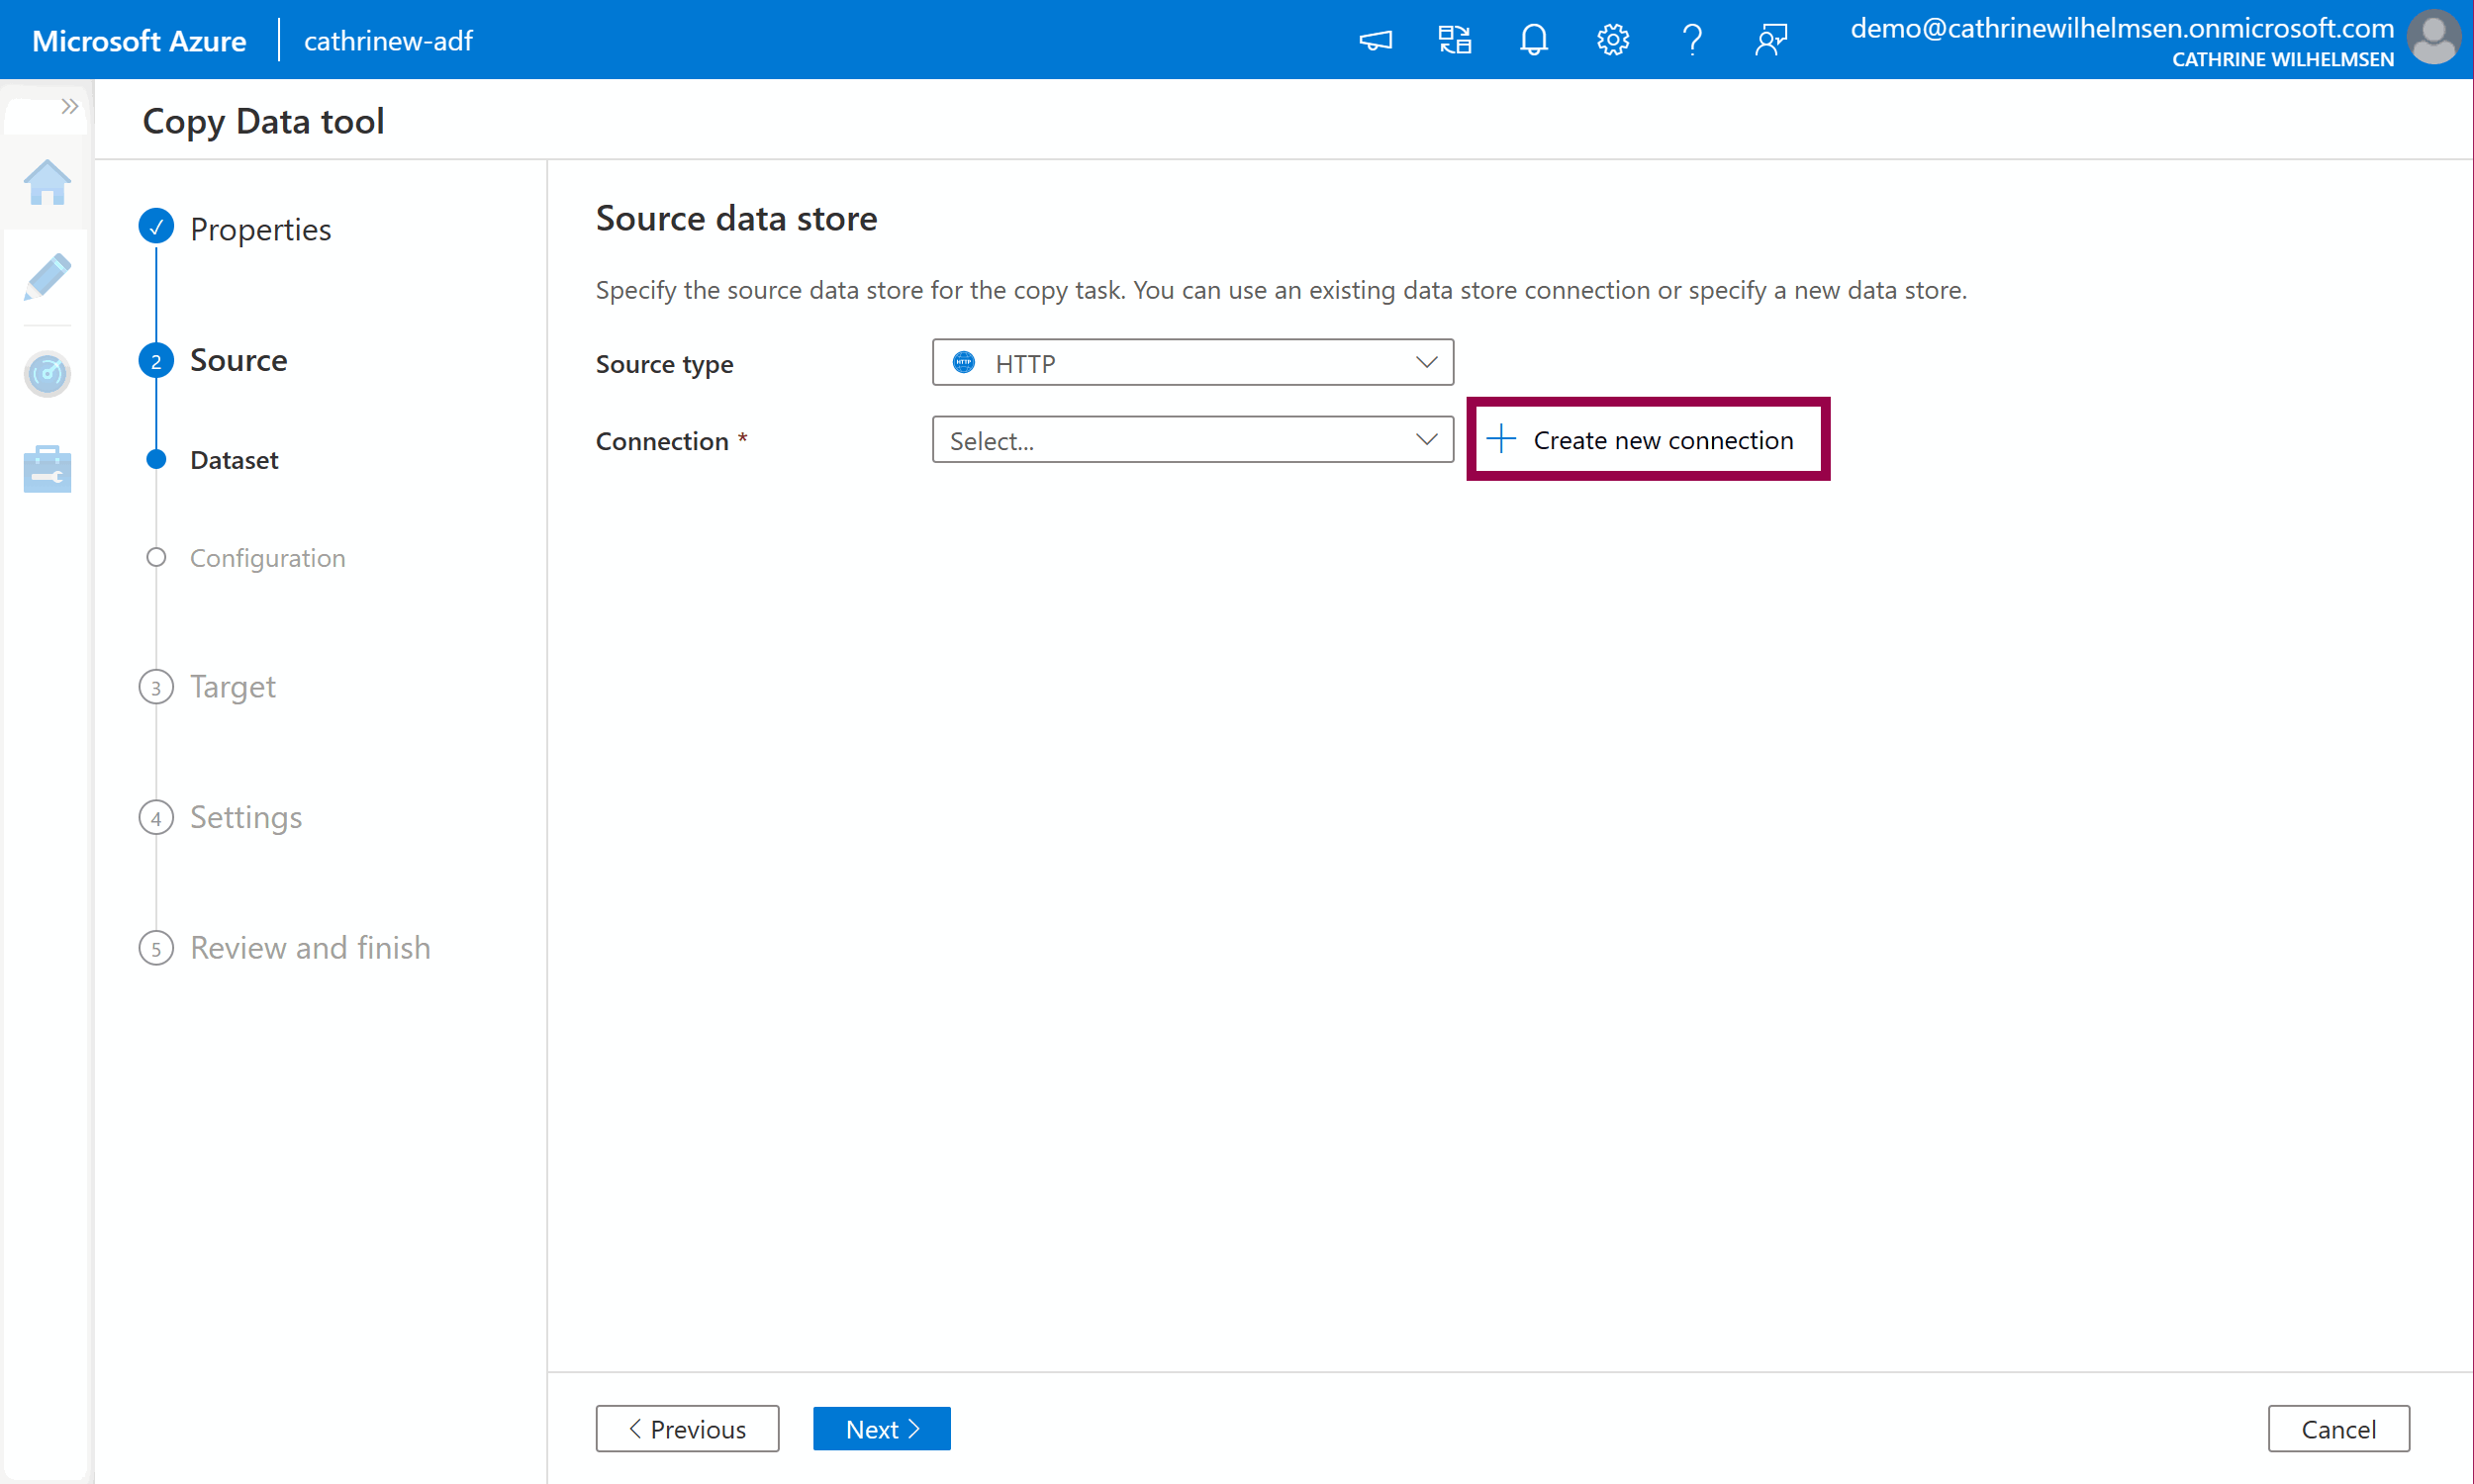
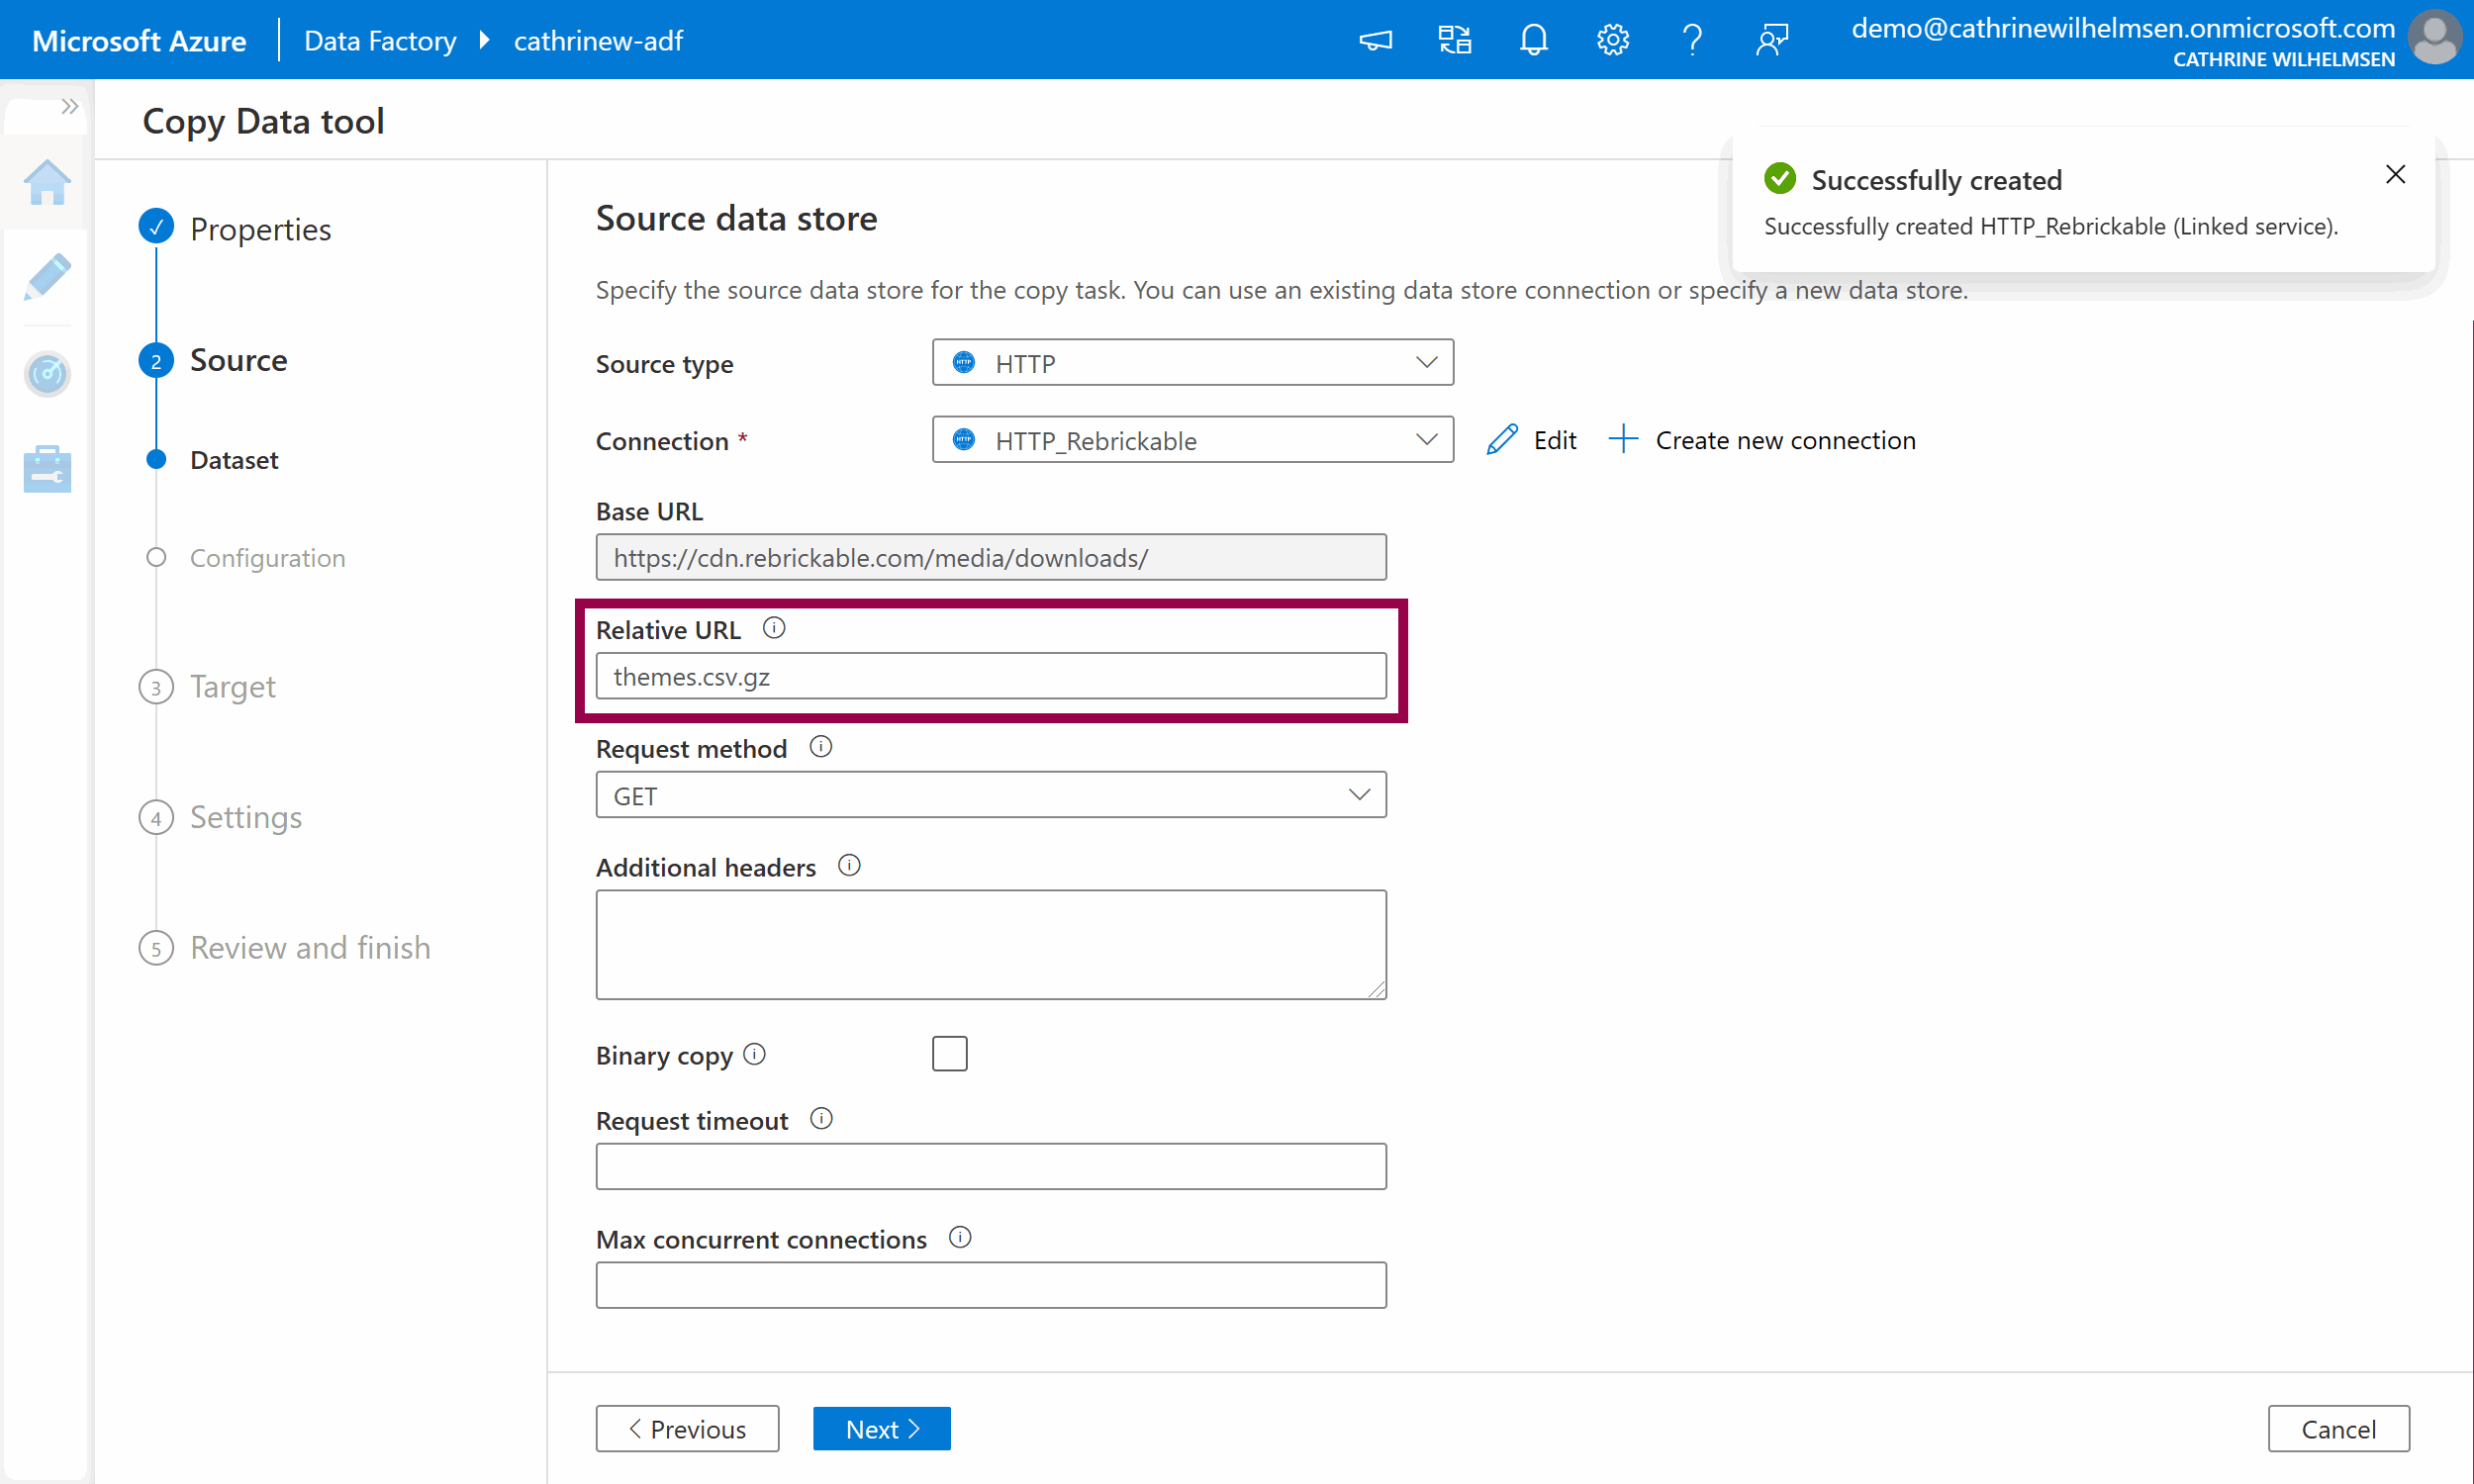
Give the linked service a name and description, and use the base URL https://cdn.rebrickable.com/media/downloads/. (You can find this URL by inspecting the links on rebrickable.com/downloads. Keep the last slash.) Change authentication type to anonymous. Click create:

I chose the name HTTP_Rebrickable because I like to prefix my linked services with the connection type.
The linked service has now been created, yay! Since we specified the base URL in the Linked Service, we only have to specify the file name themes.csv.gz in the relative URL. Keep the other default options. Click next:
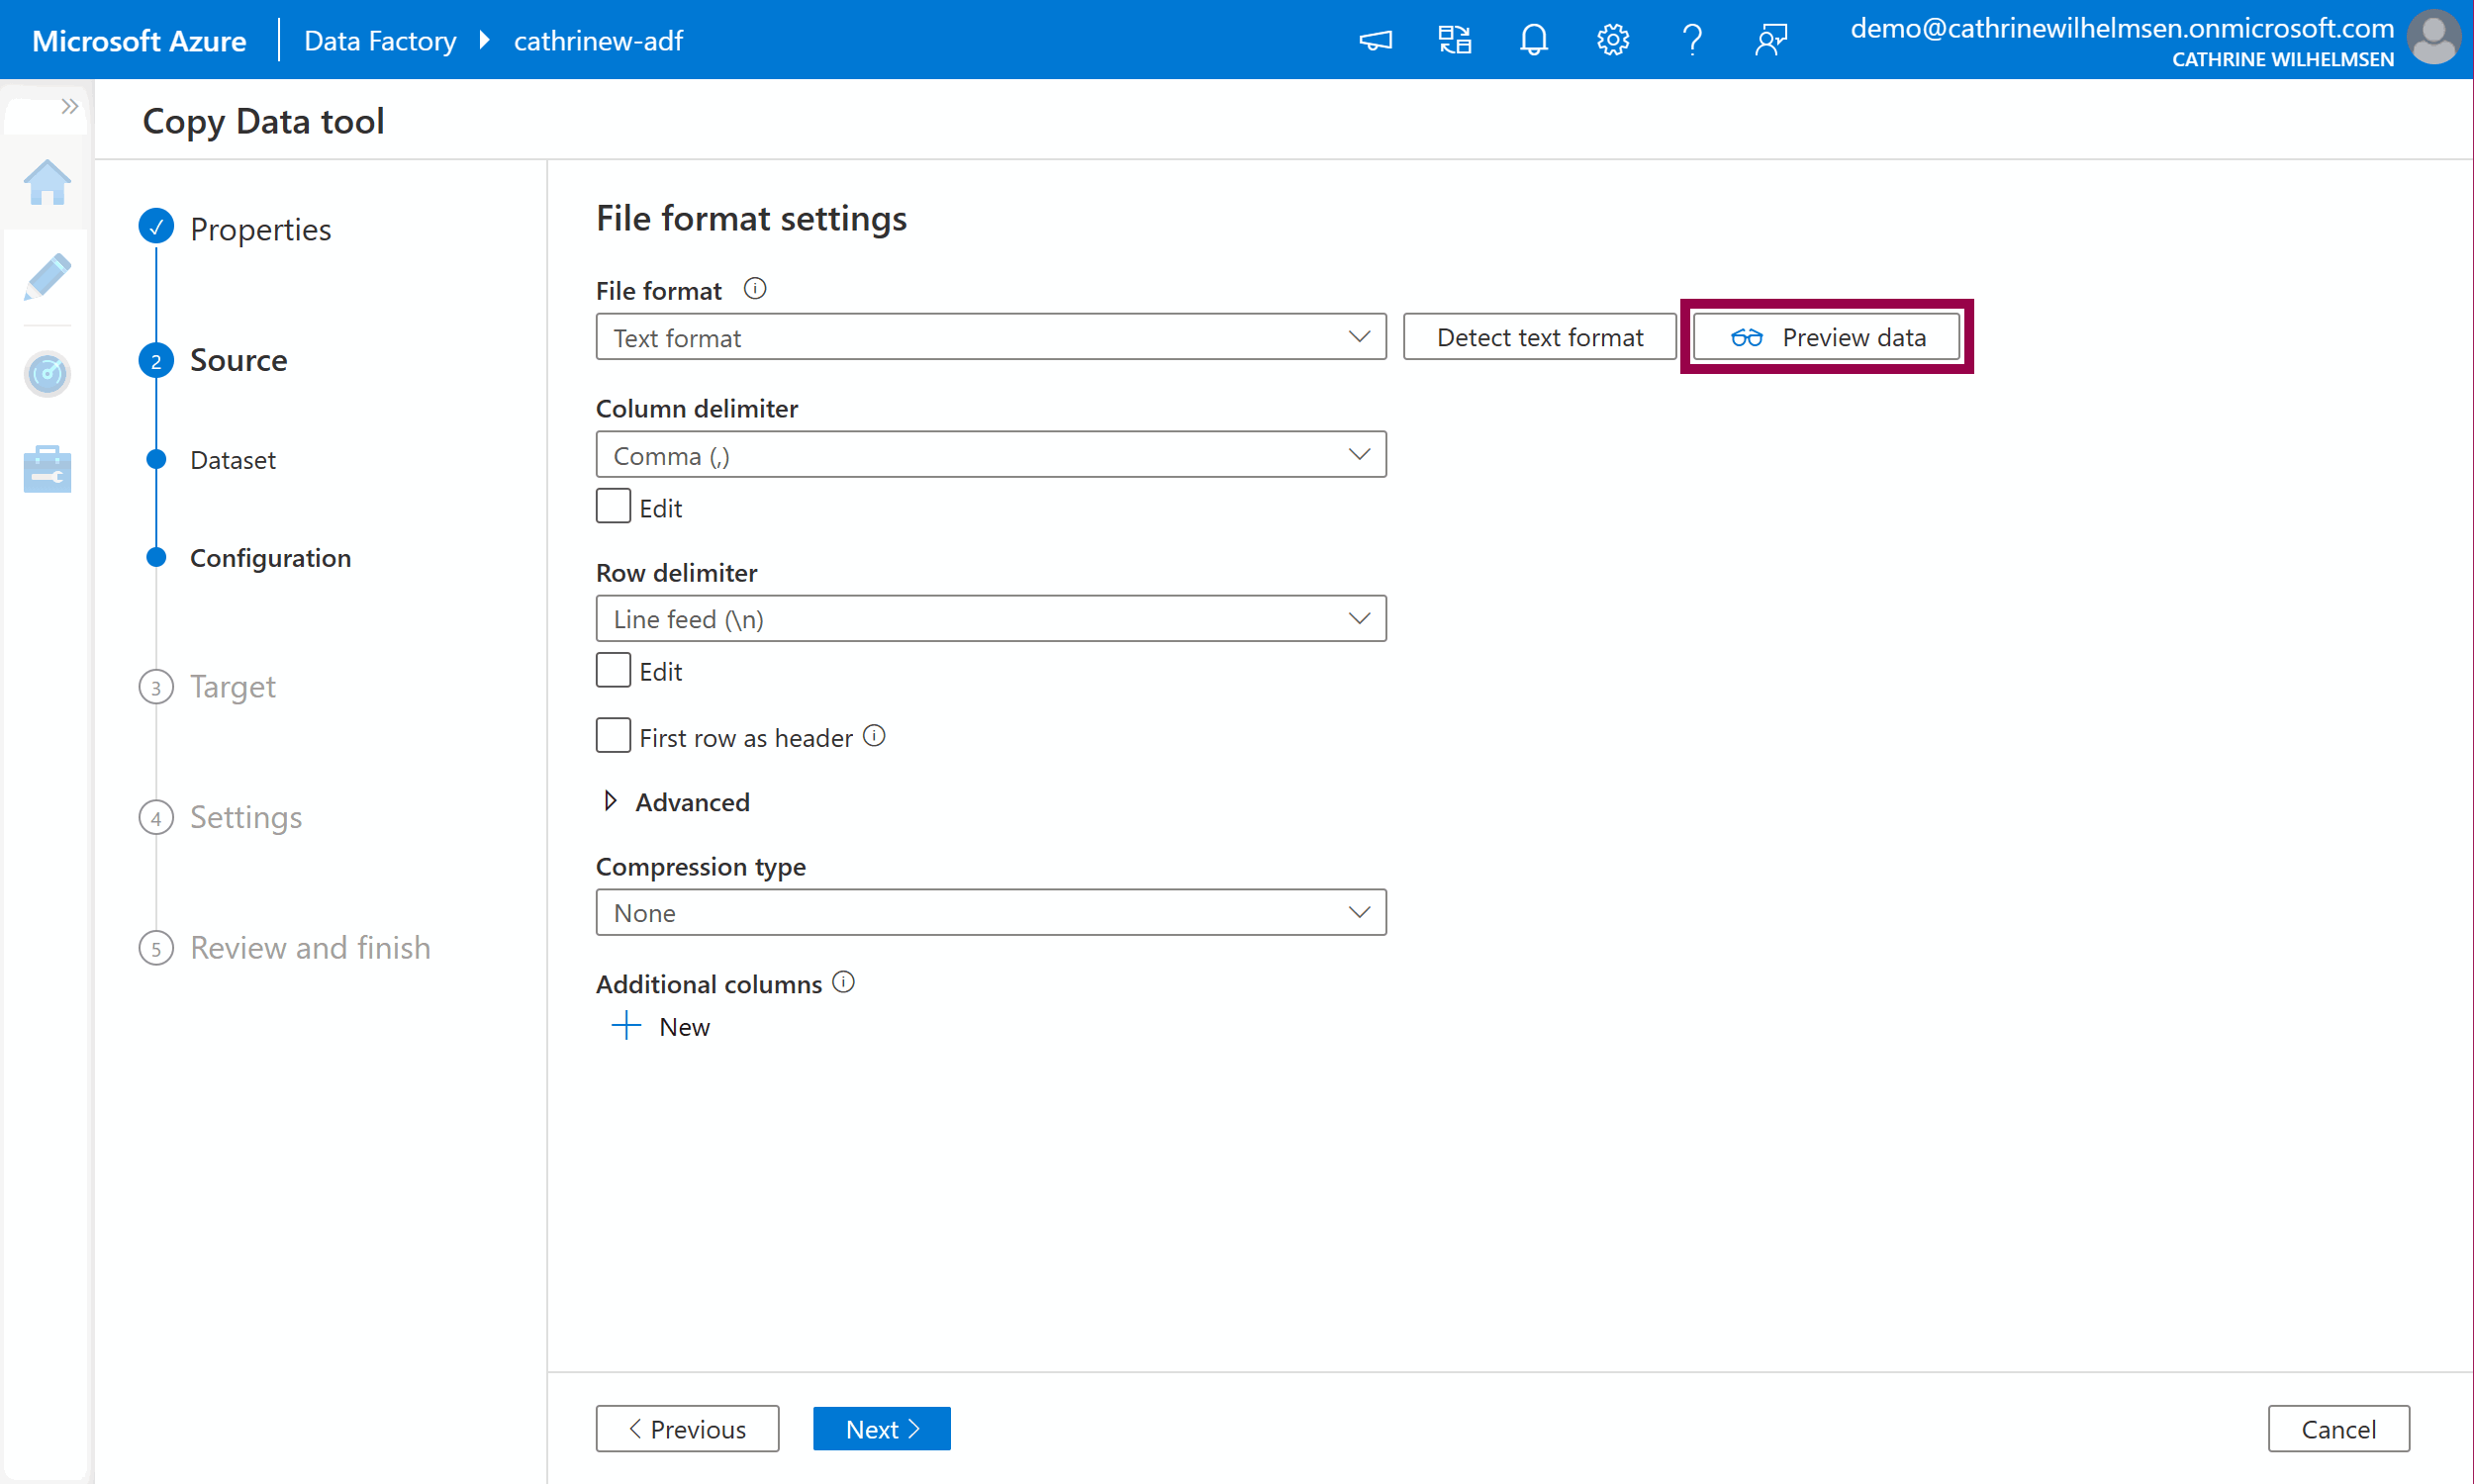
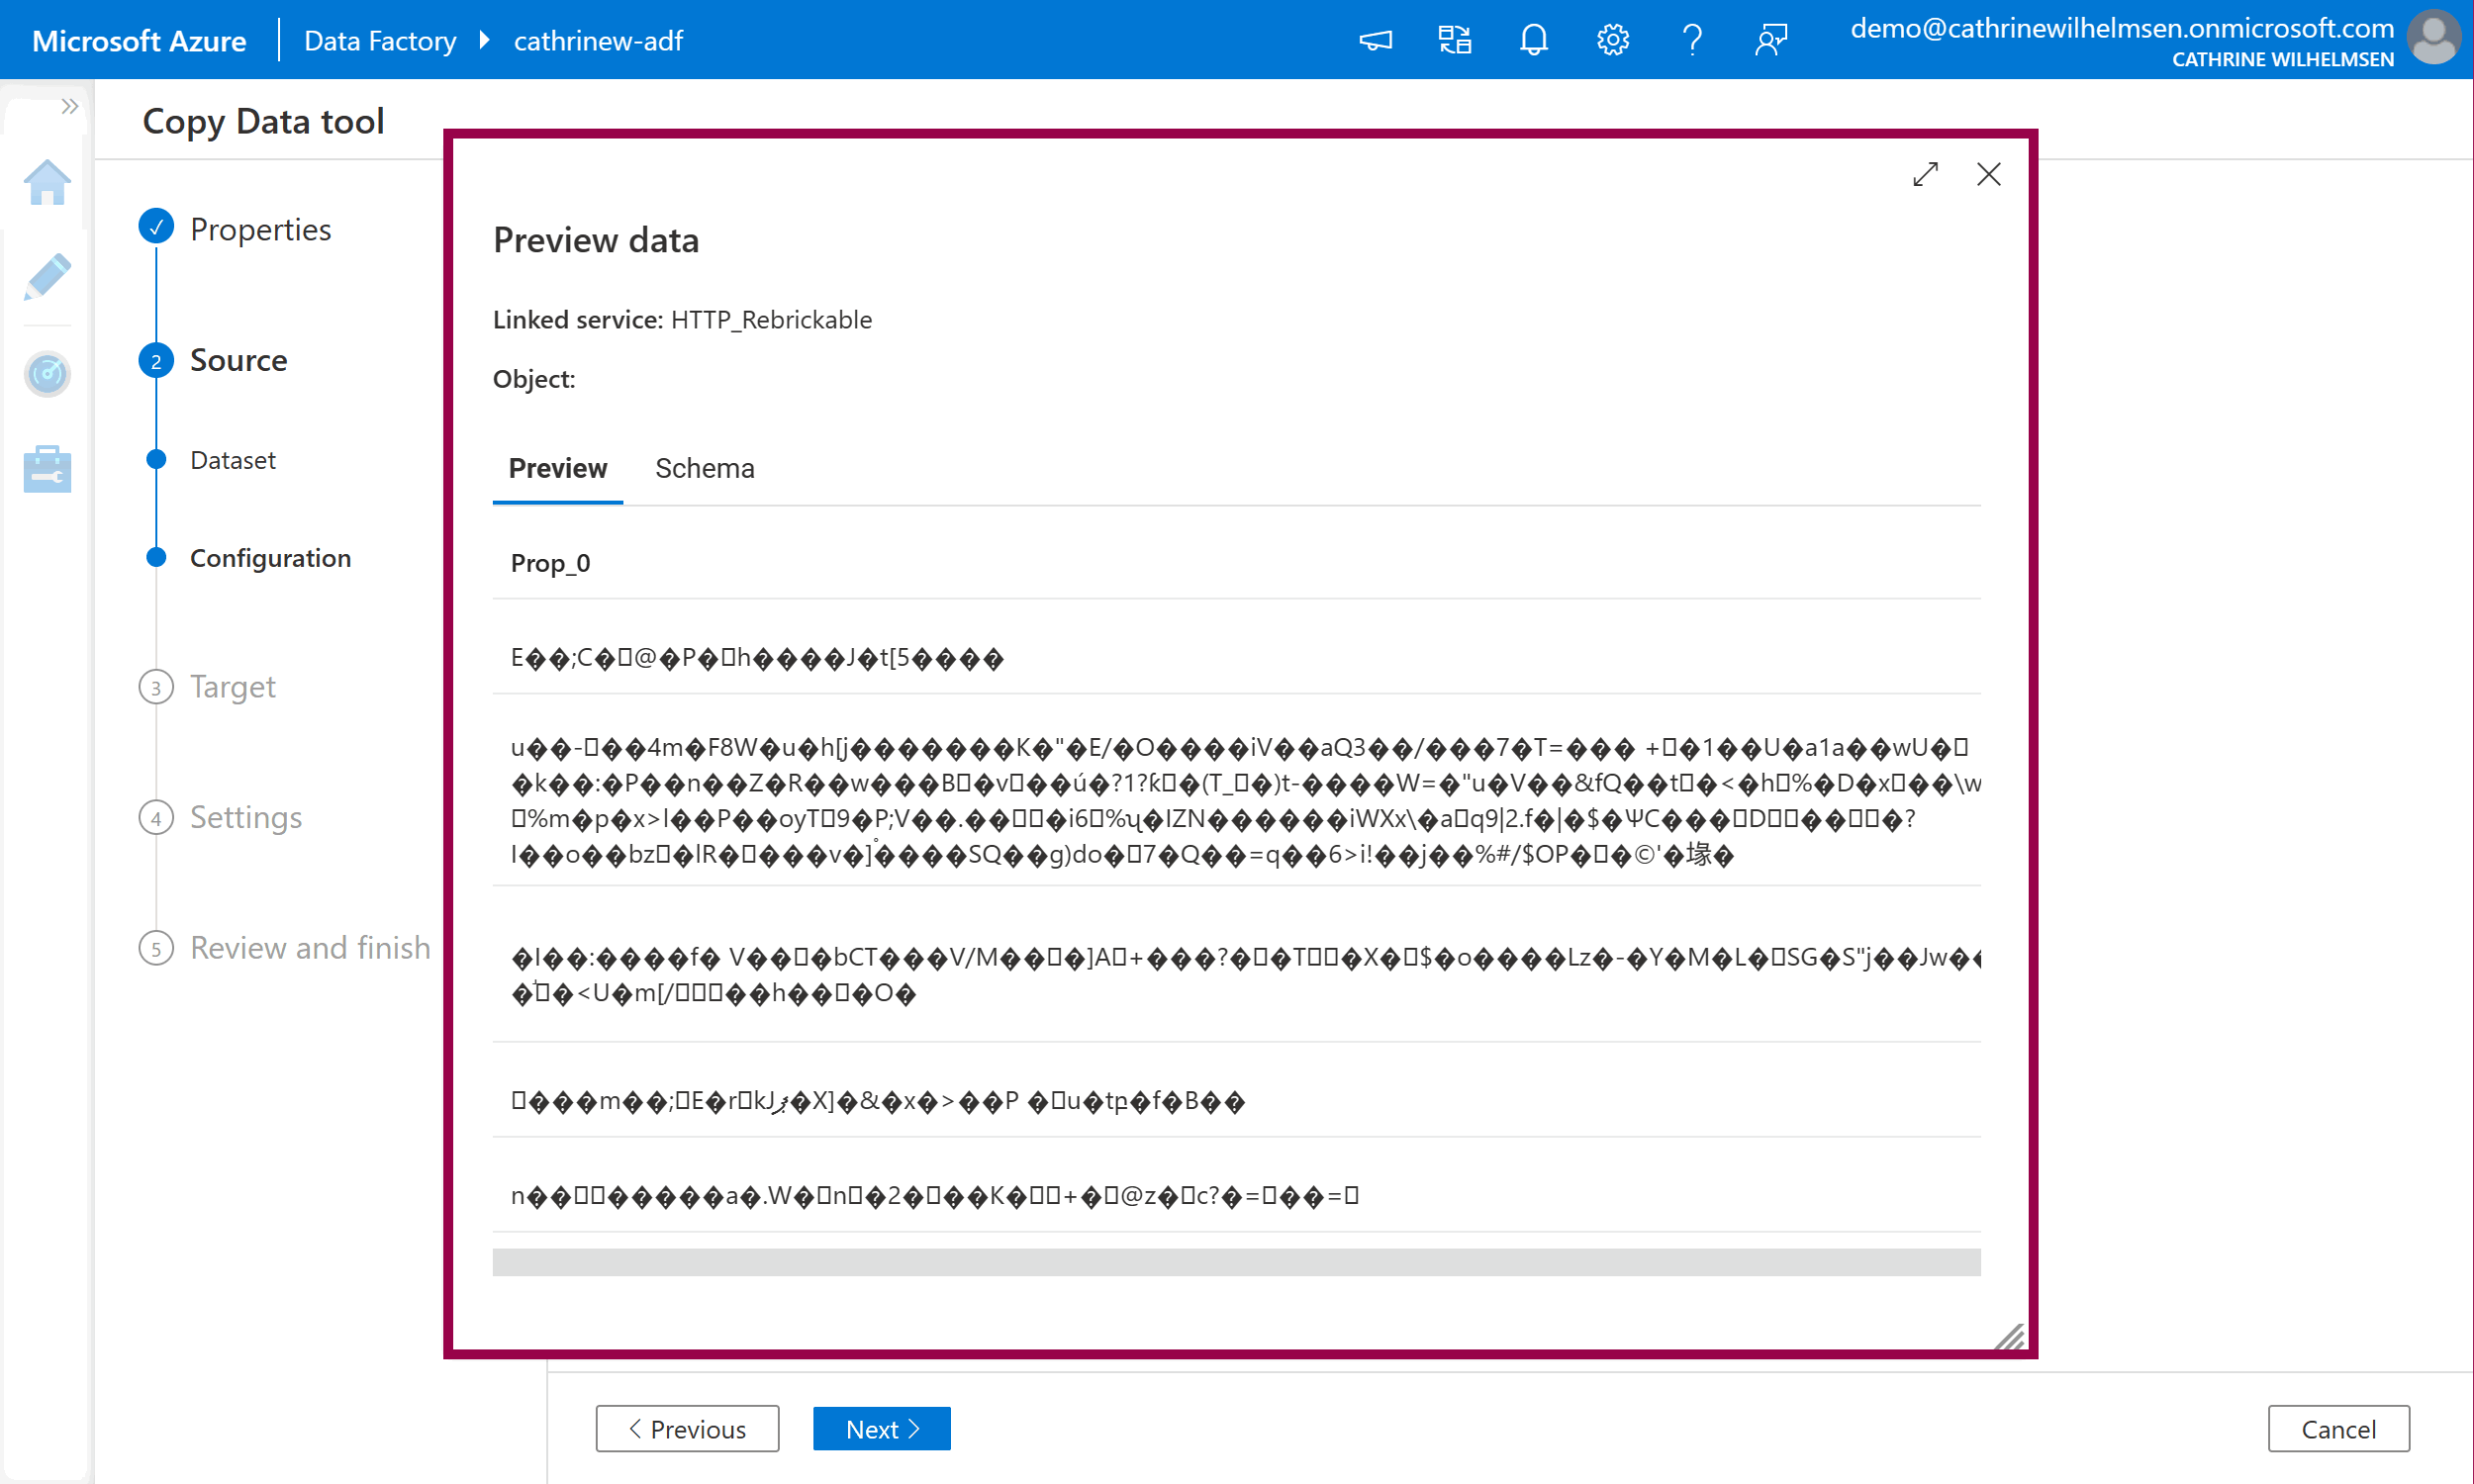
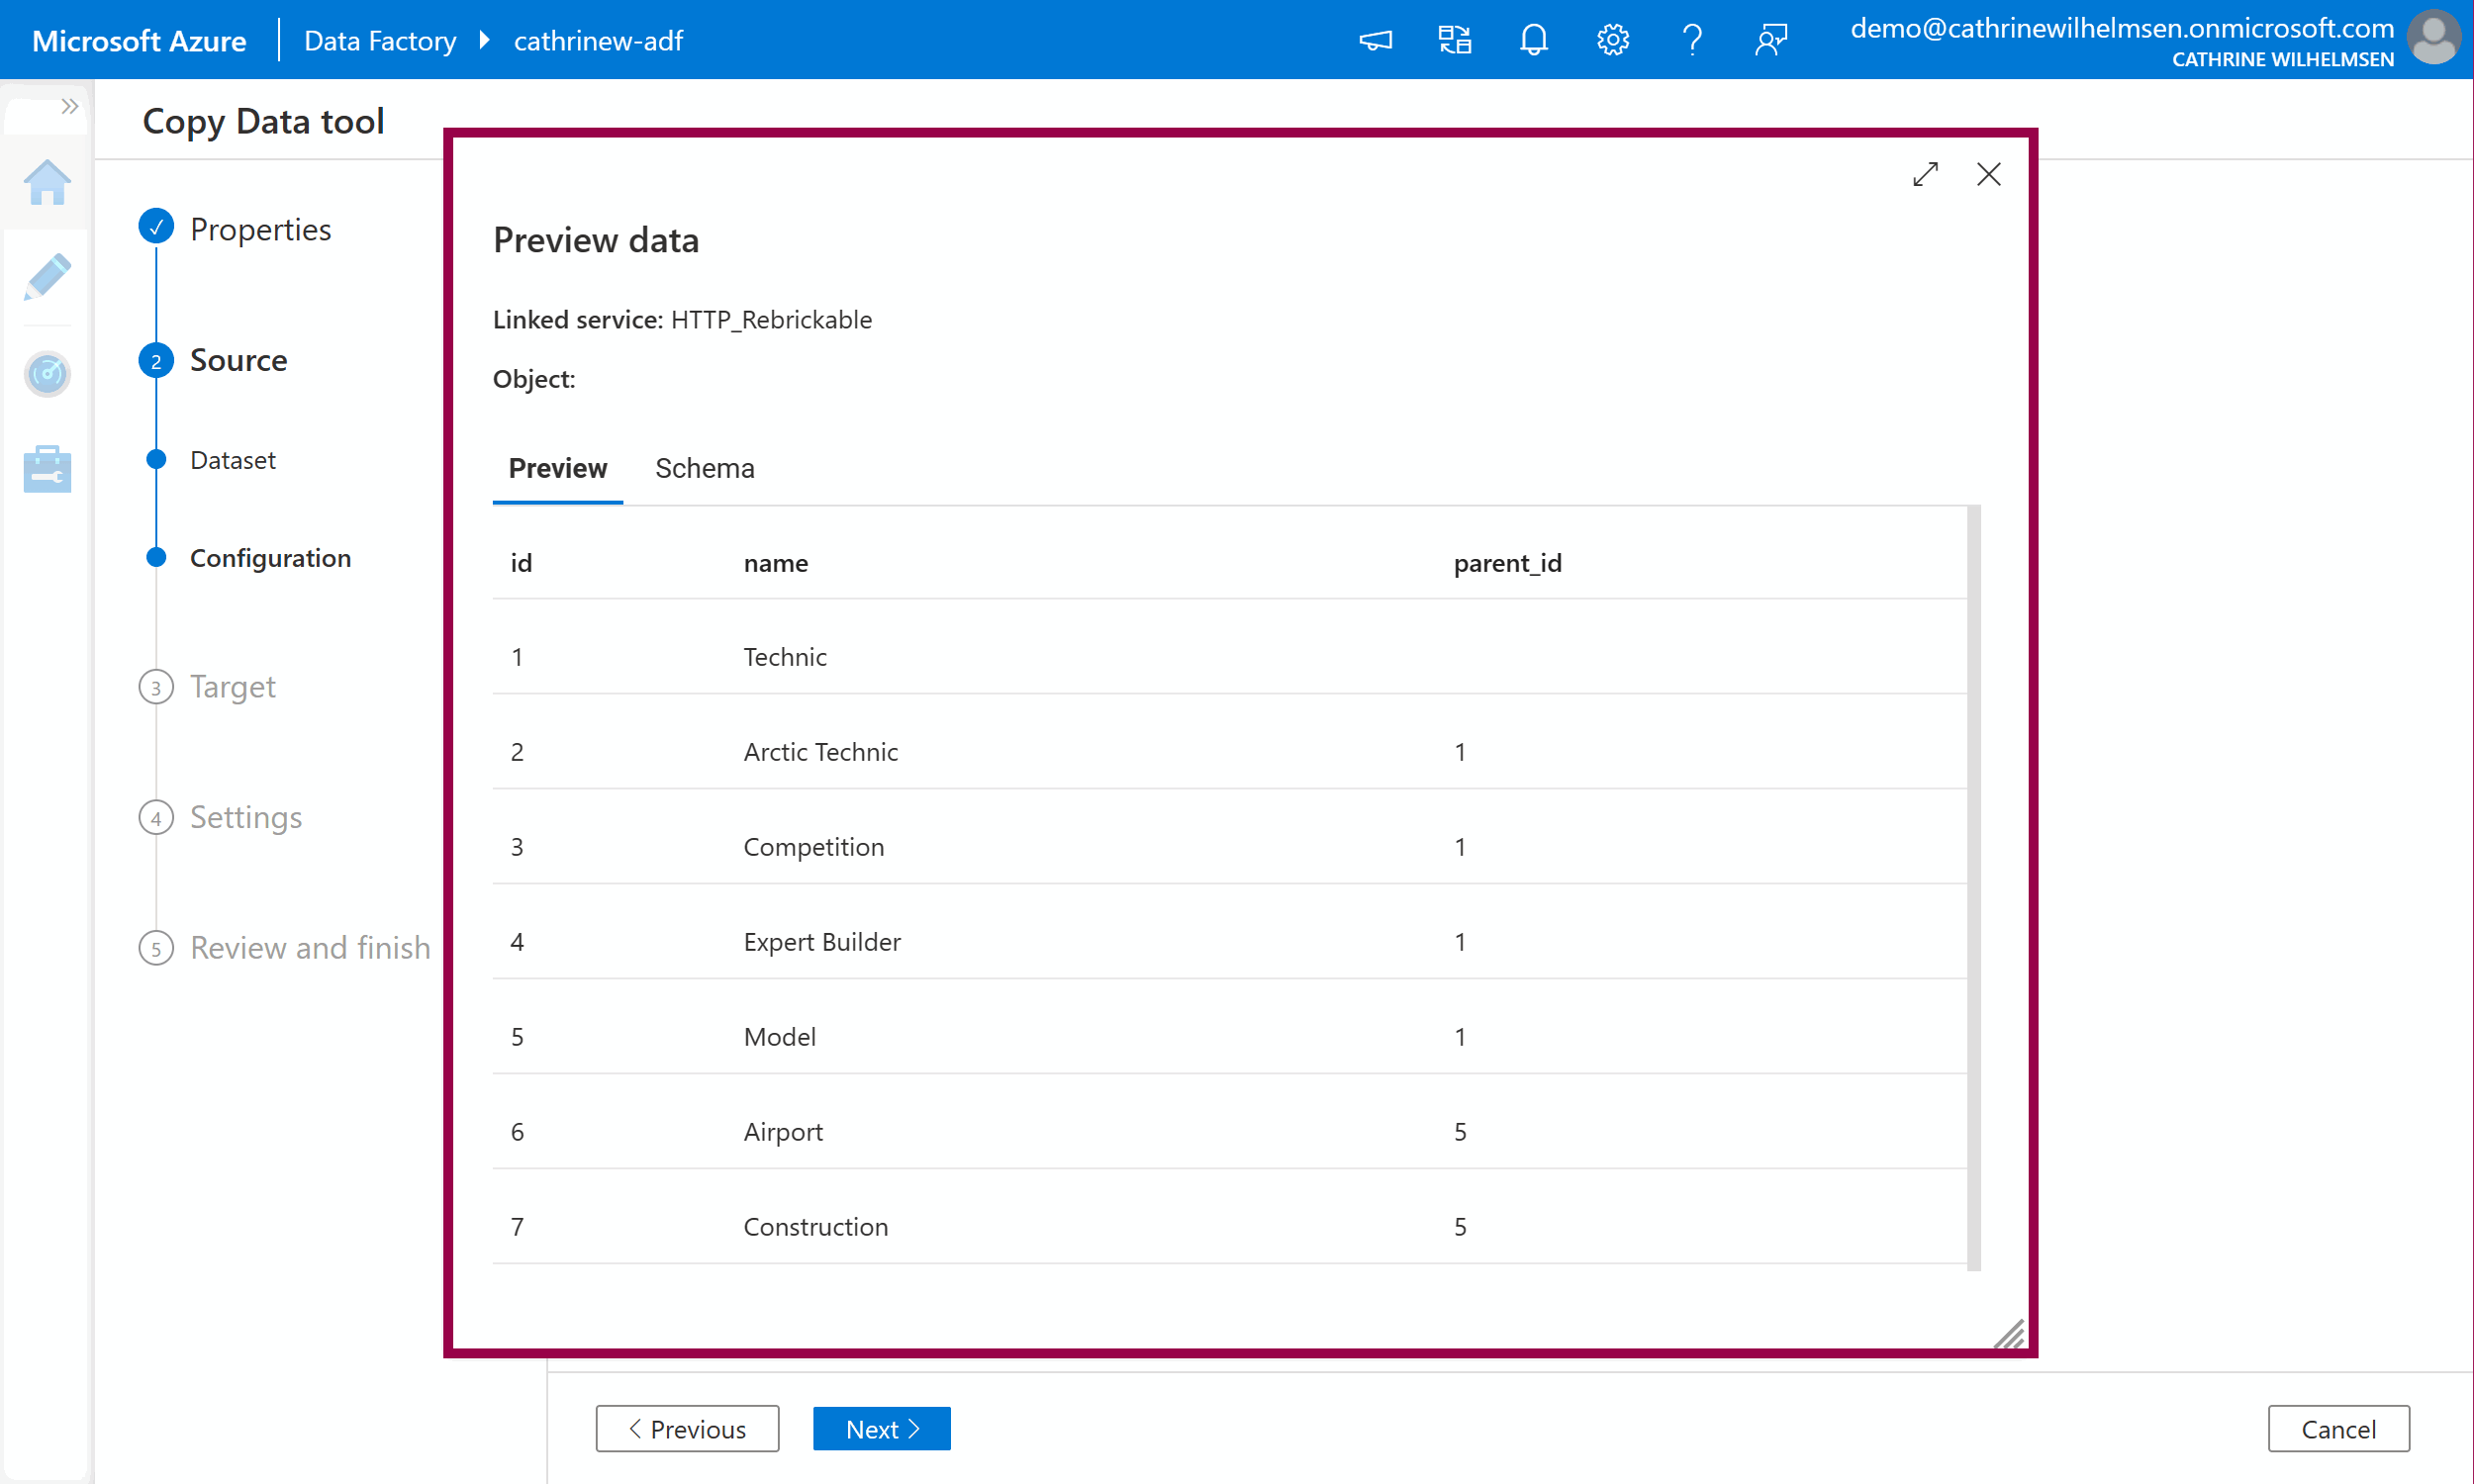
On the source configuration page, we have to specify the file format settings. We can click on detect text format and preview data, but at this point nothing really makes sense…
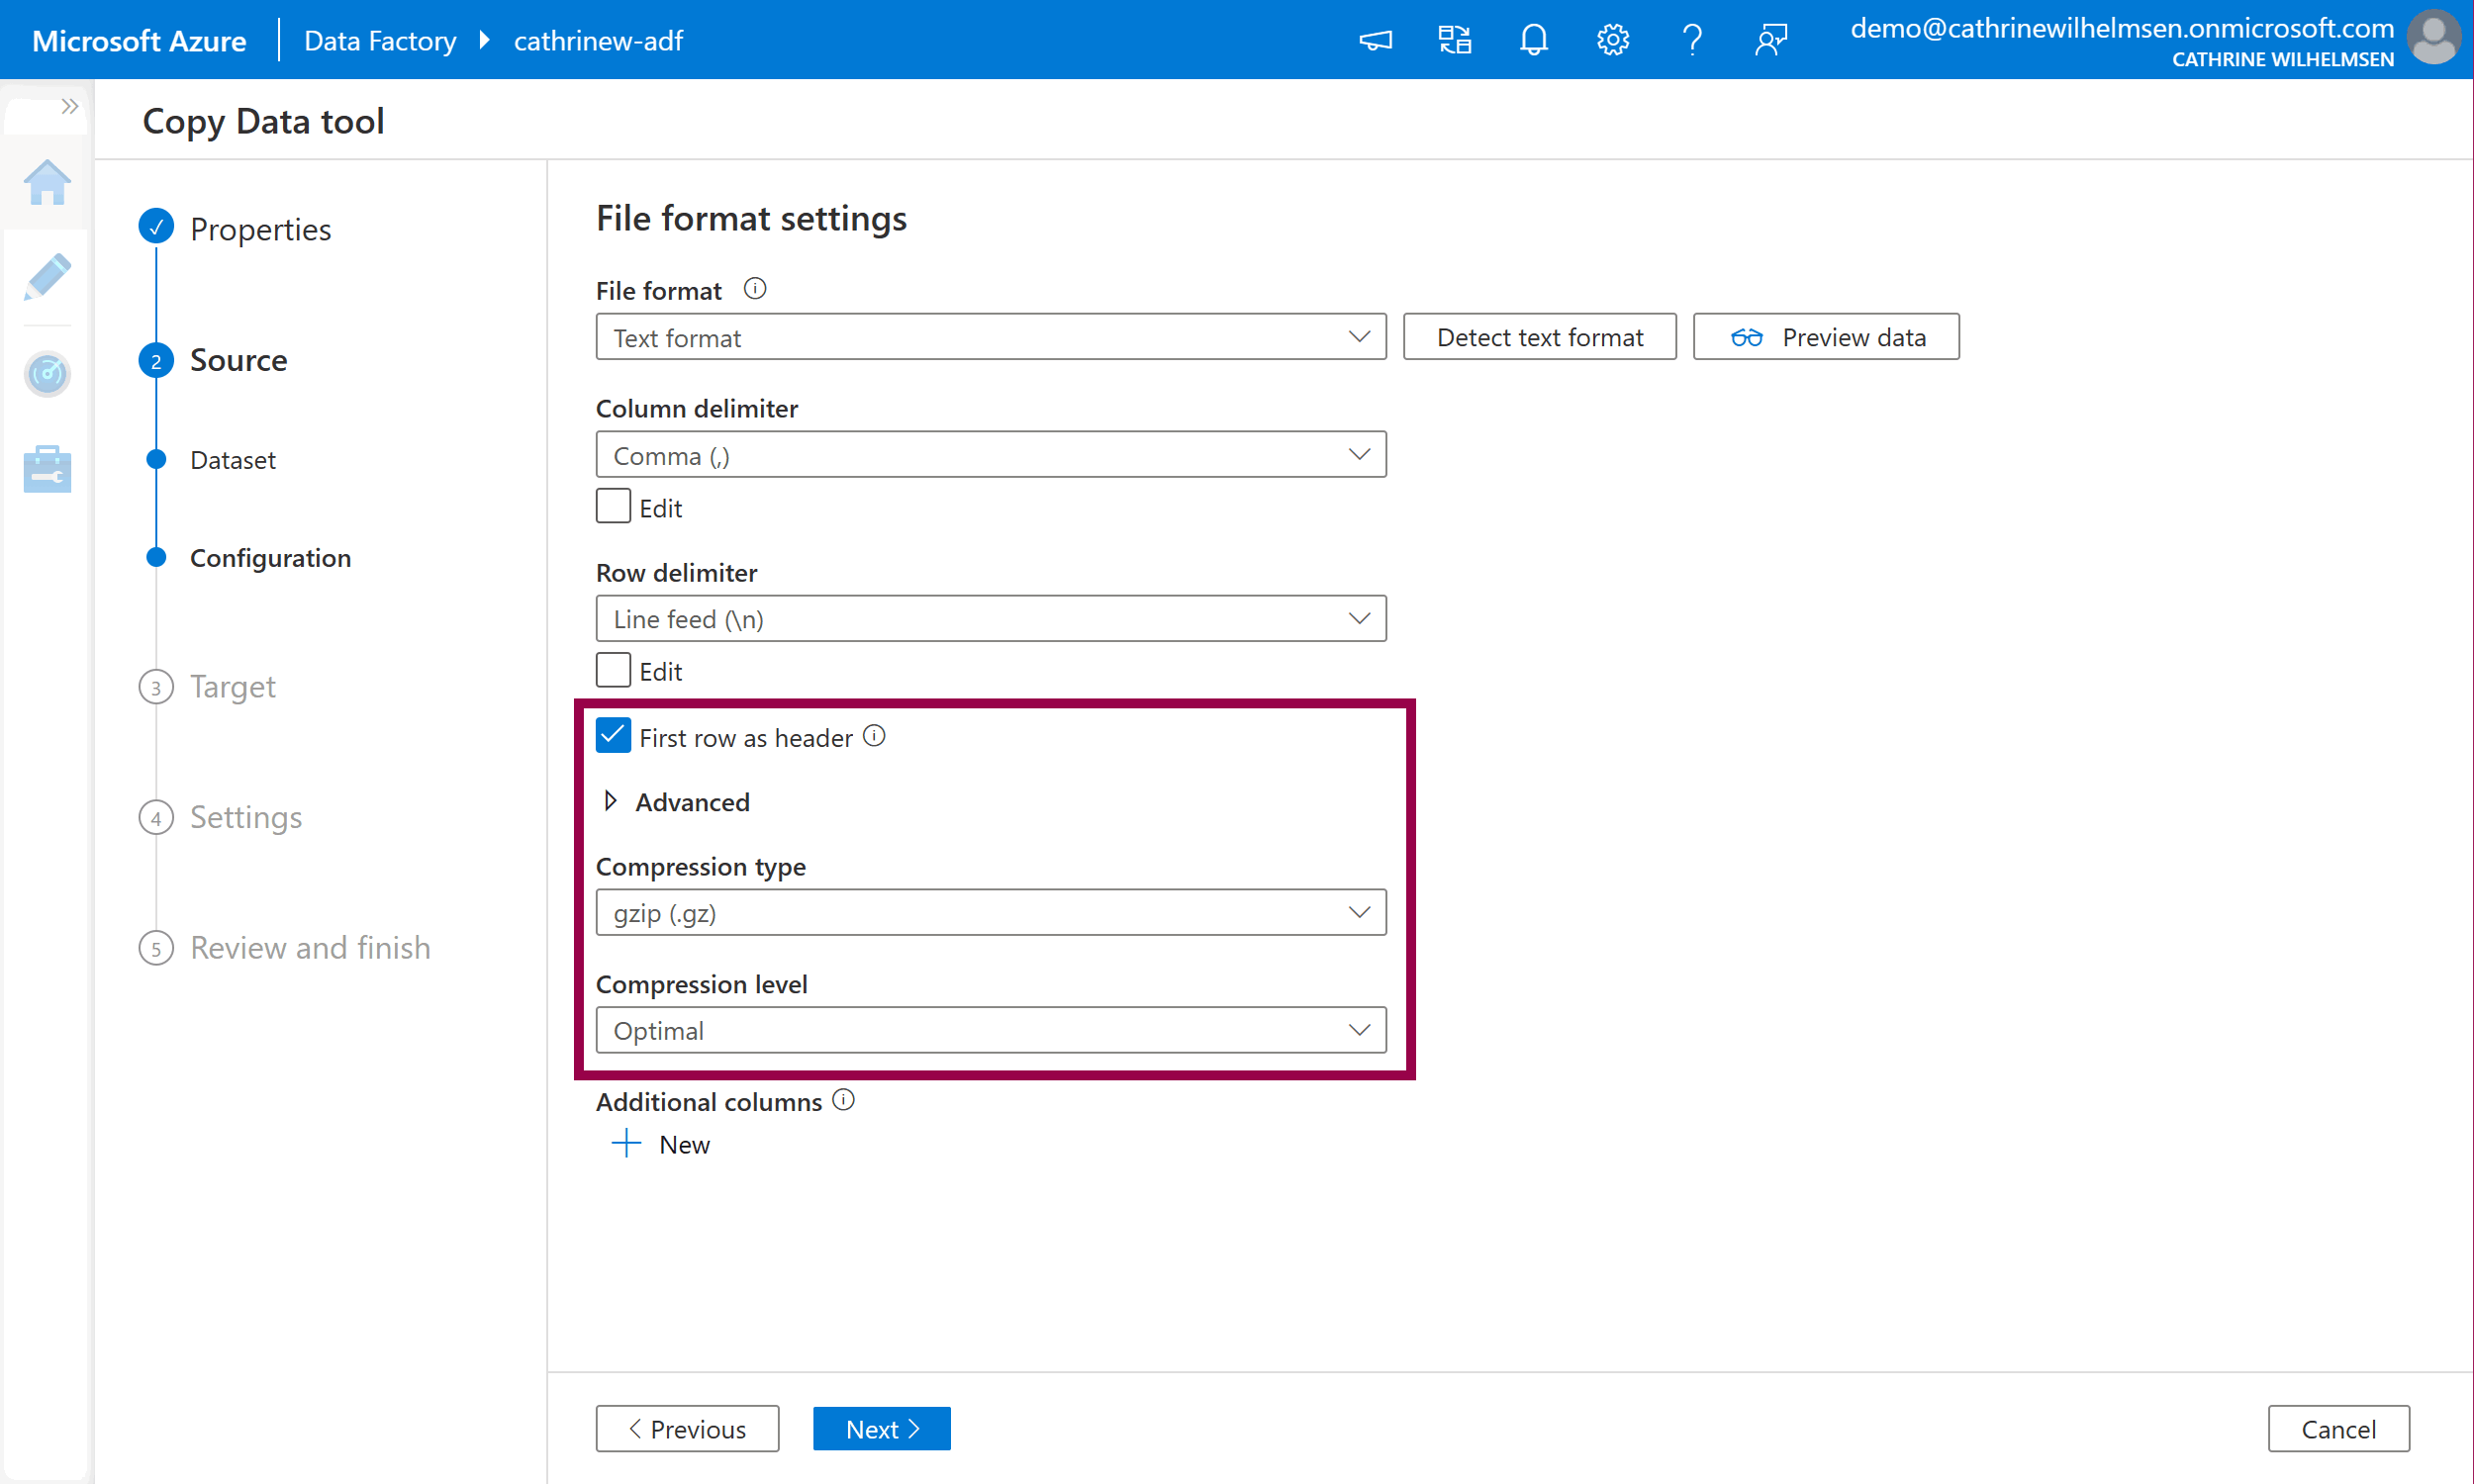
Let’s fix that! Select first row as header, change the compression type to gzip, and set the compression level to optimal. Click preview data again. Tadaaa! Magic! We can now preview the data inside the gzipped file without having to download or unzip it manually! Amazing 🤩
Click next to move on to the Target properties.
3. Target
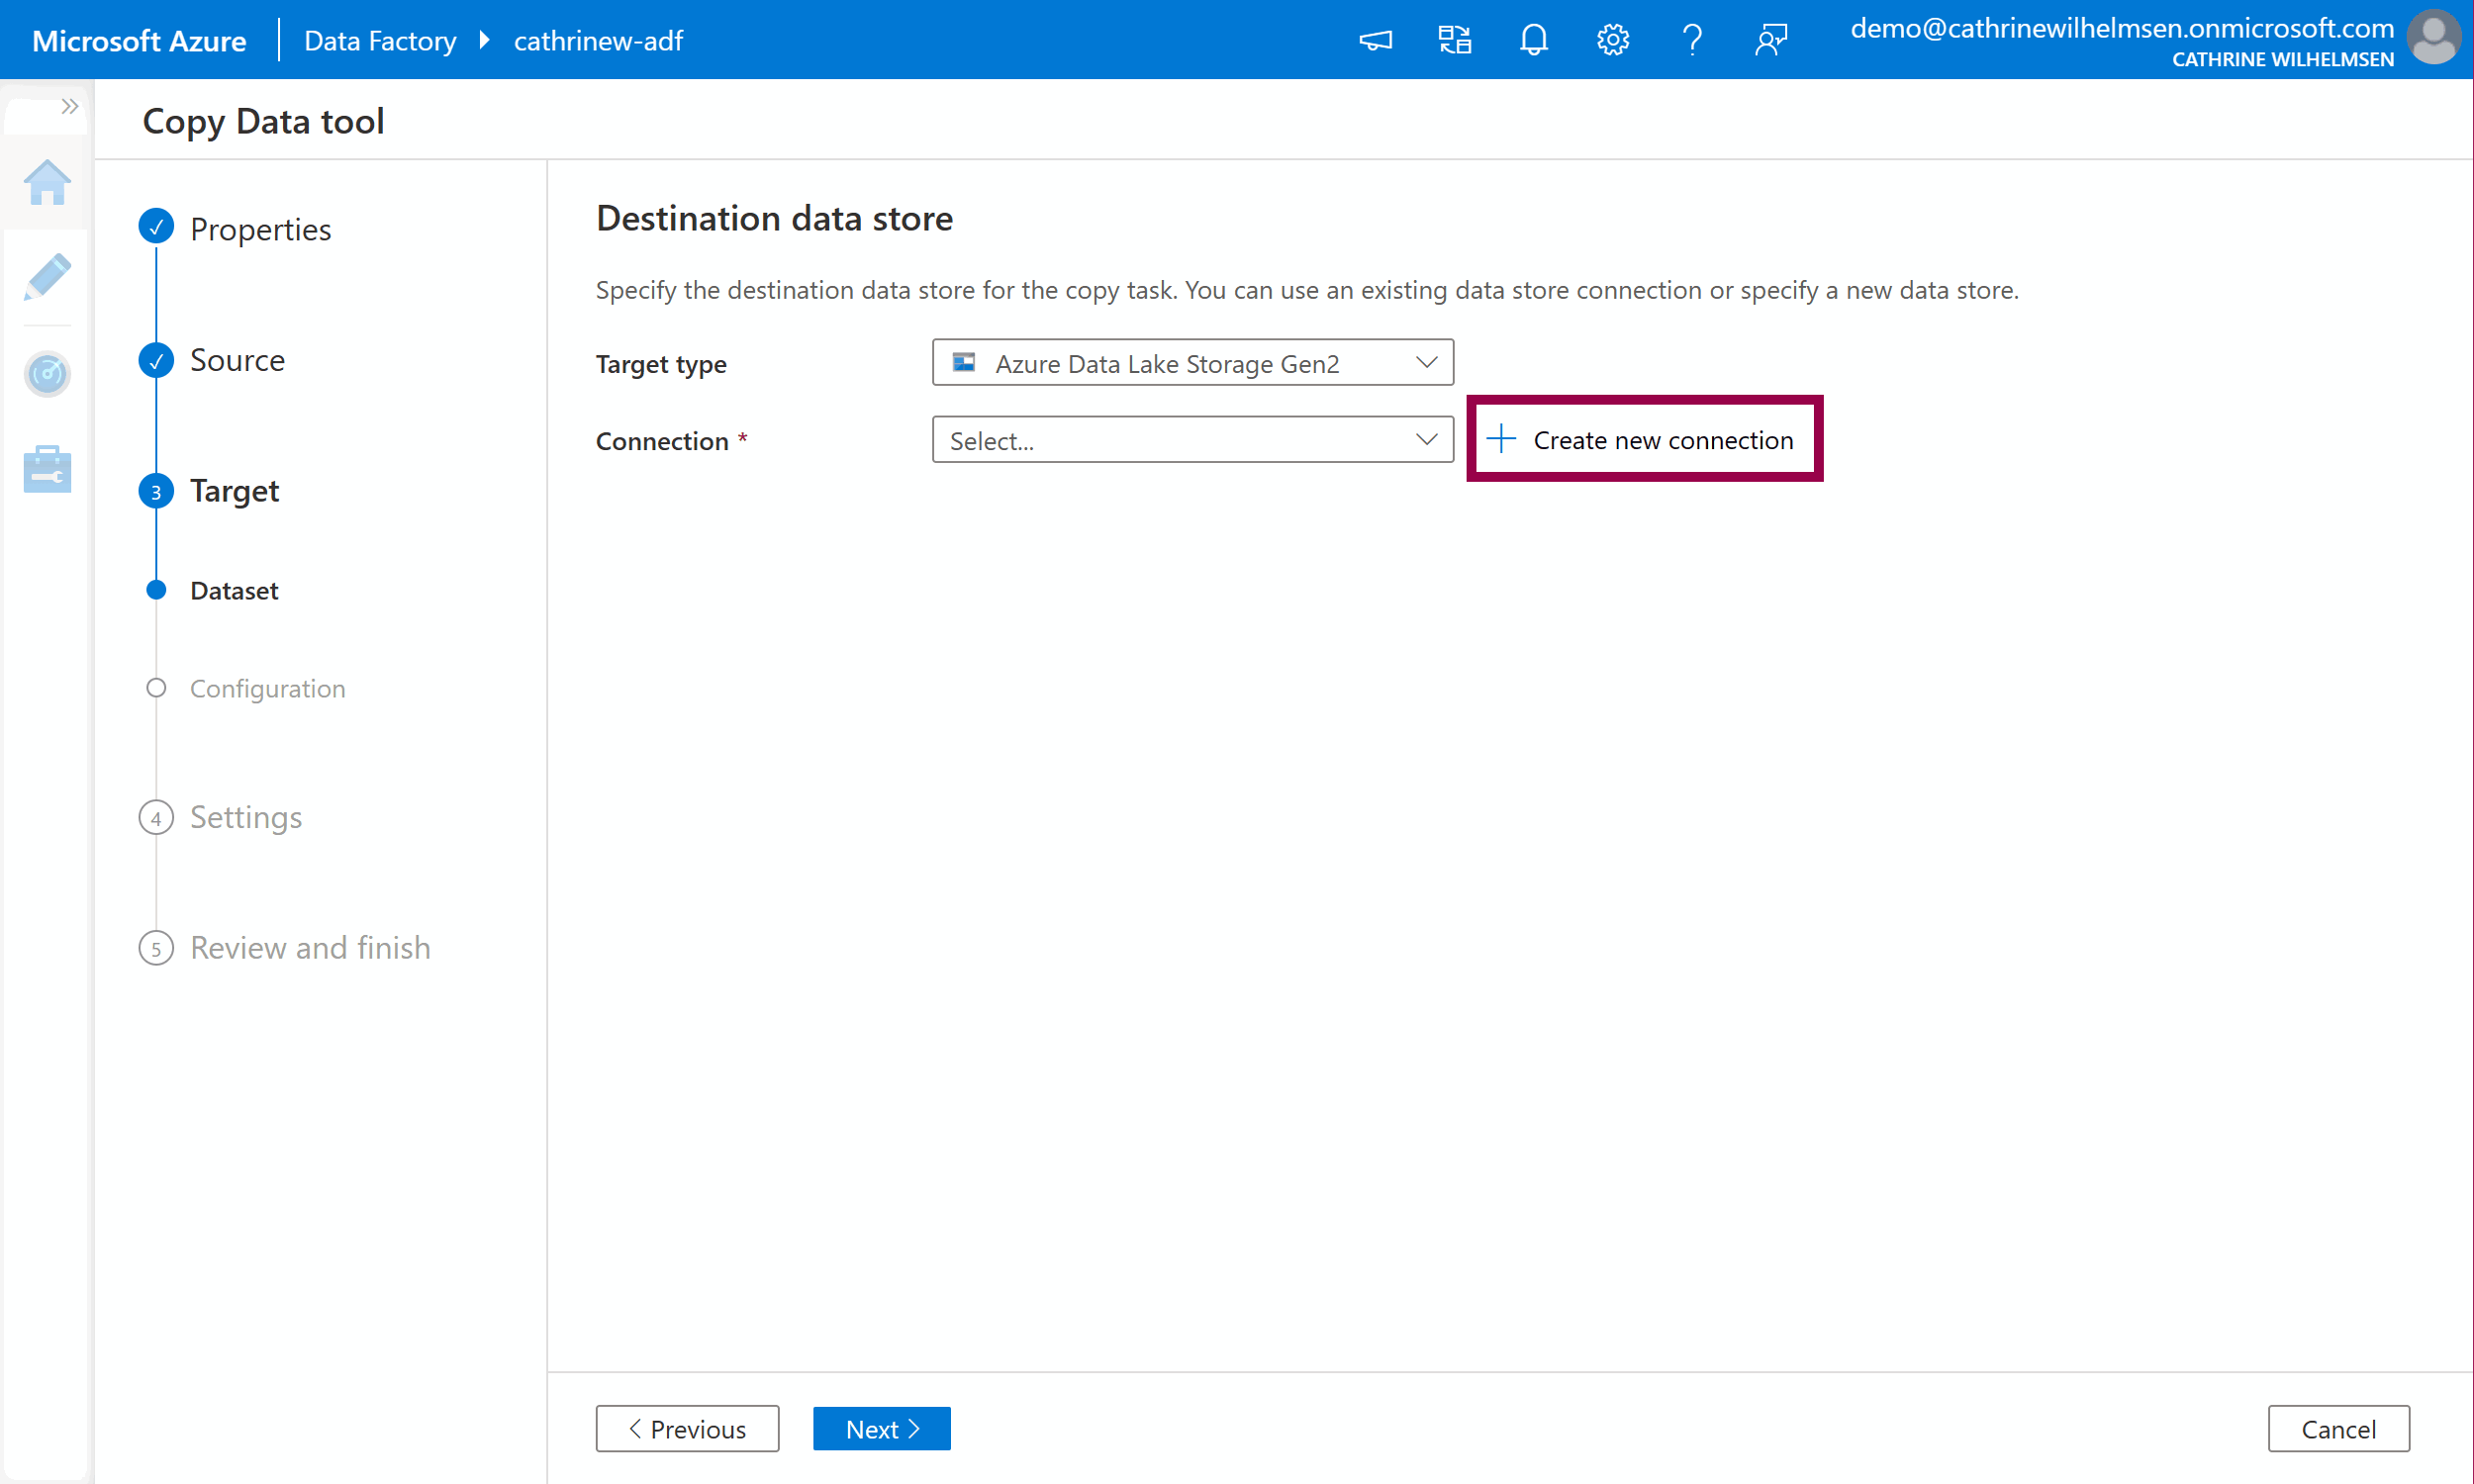
On the target dataset page, choose Azure Data Lake Storage Gen2 from the target type dropdown, then click create new connection:
Give the linked service a name and description. Select your storage account name from the dropdown list. Click create:
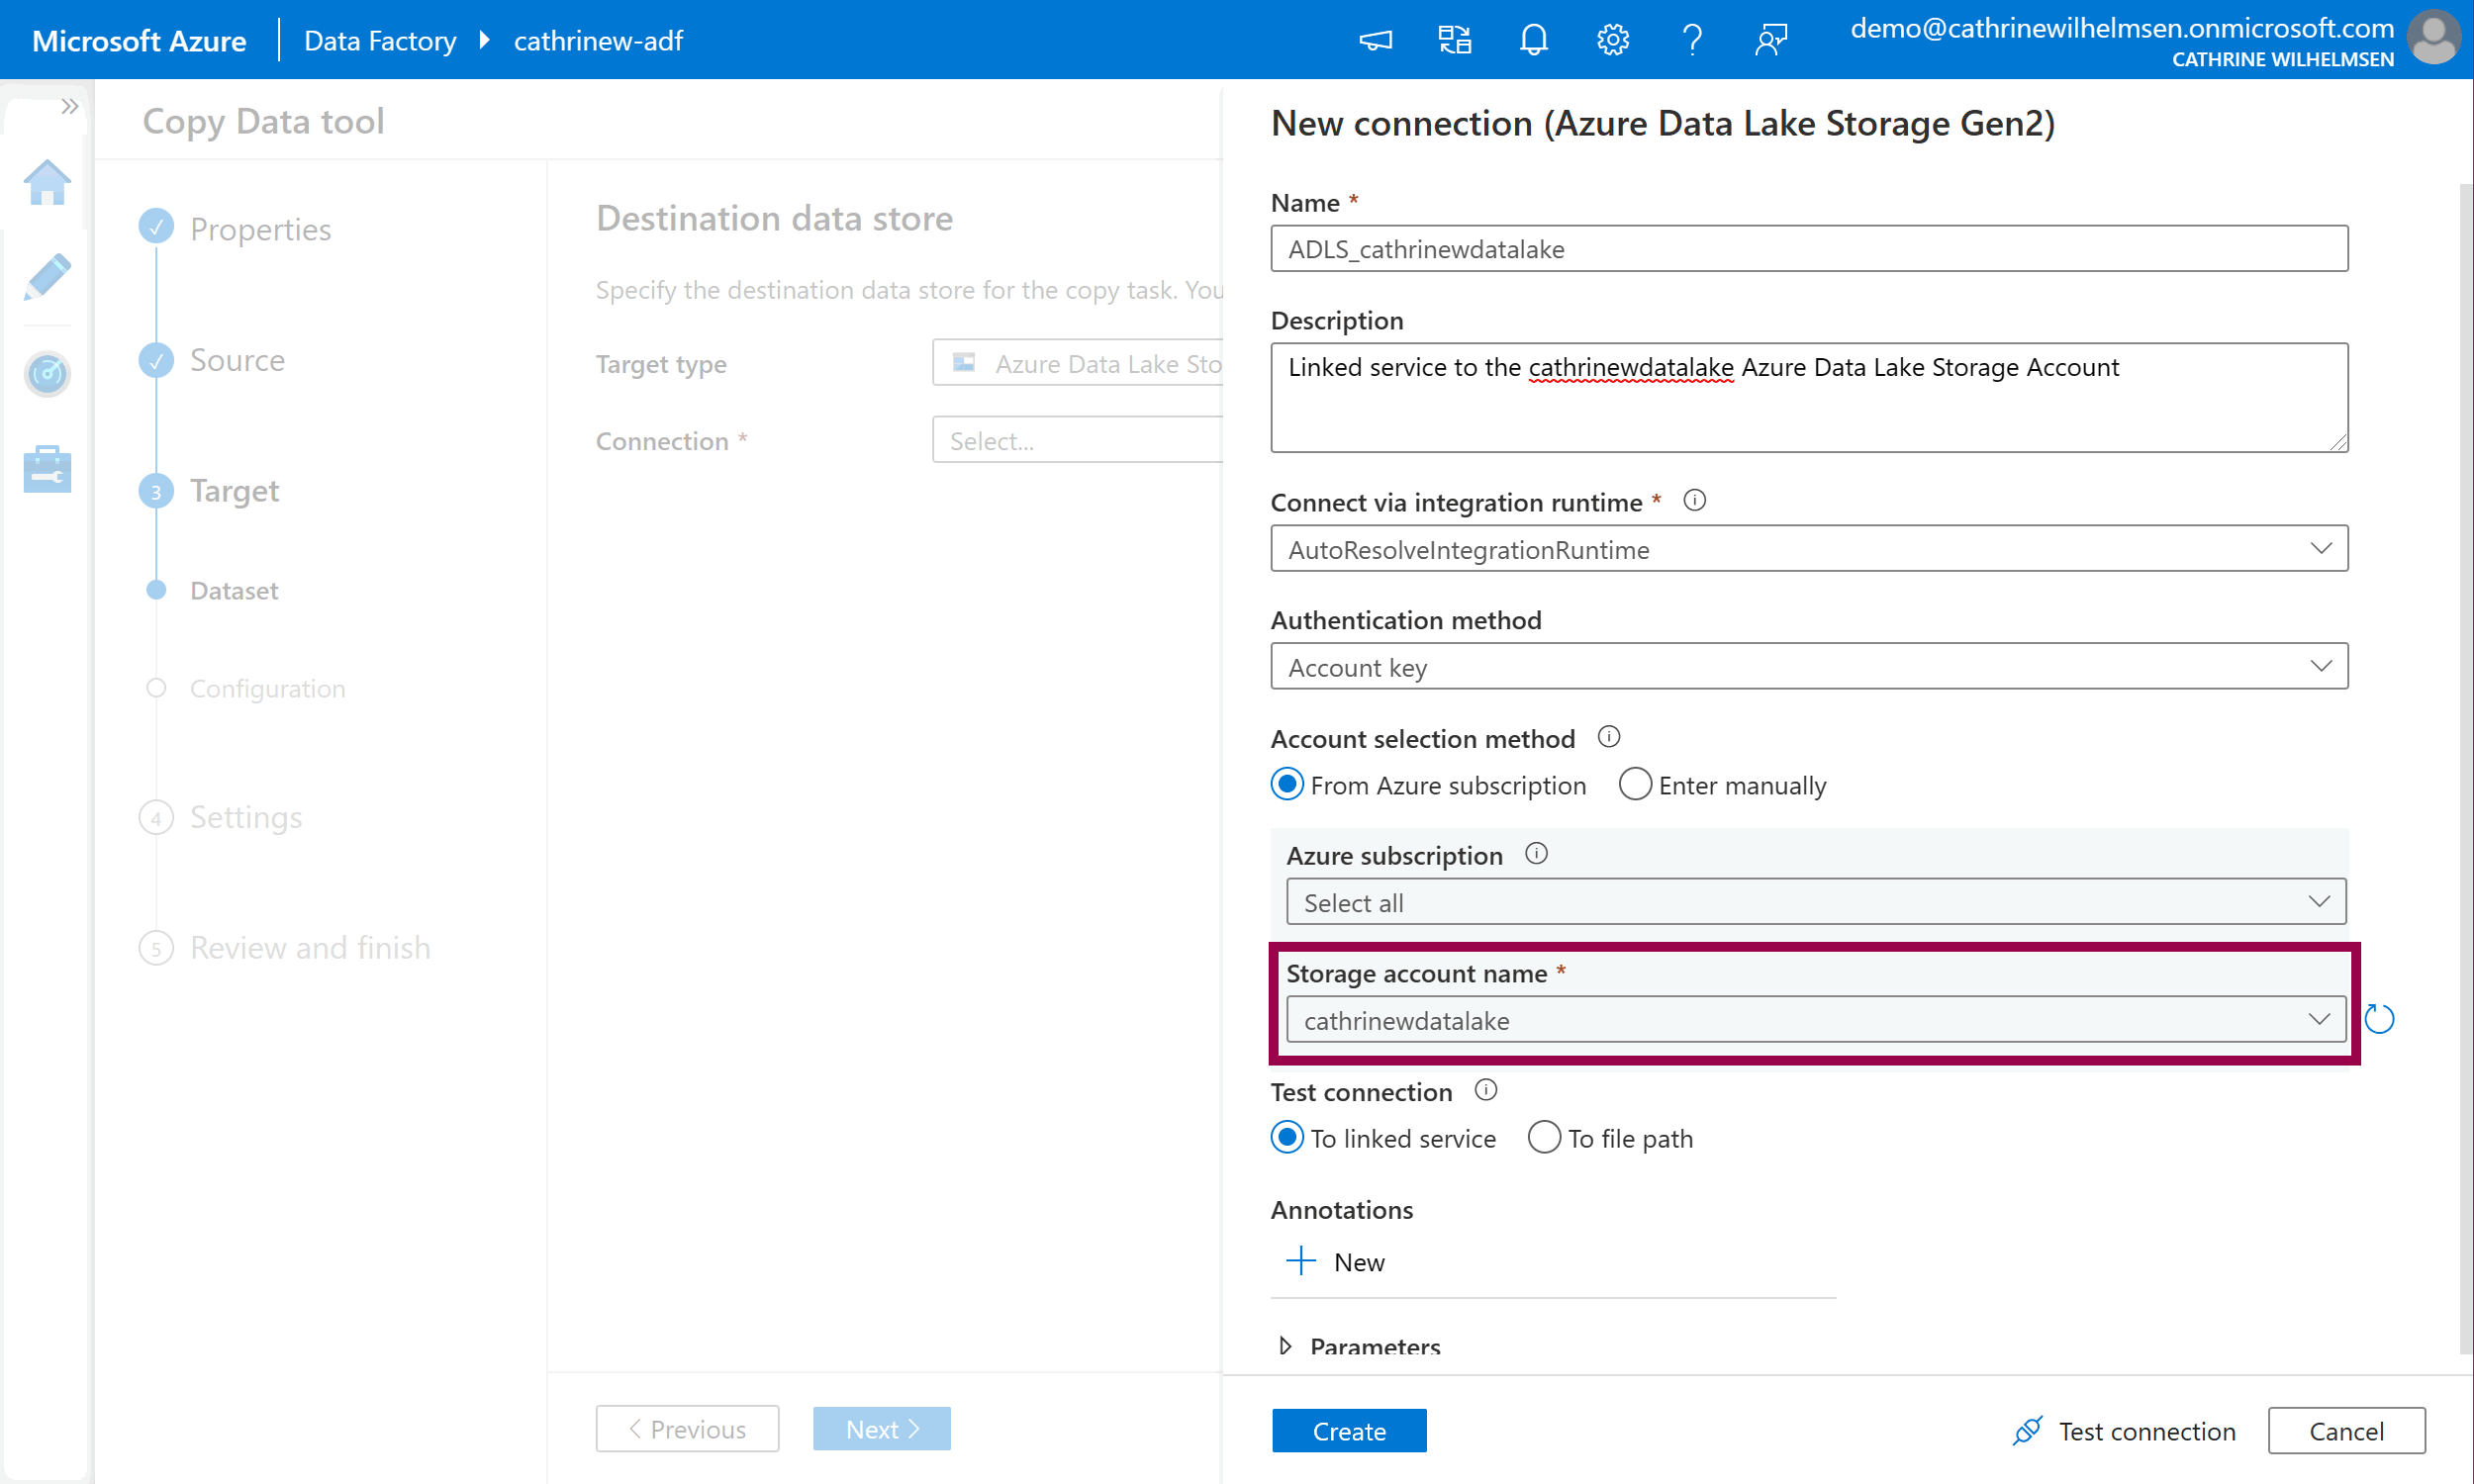
I chose the name ADLS_cathrinewdatalake, because I like to prefix my linked services with the connection type.
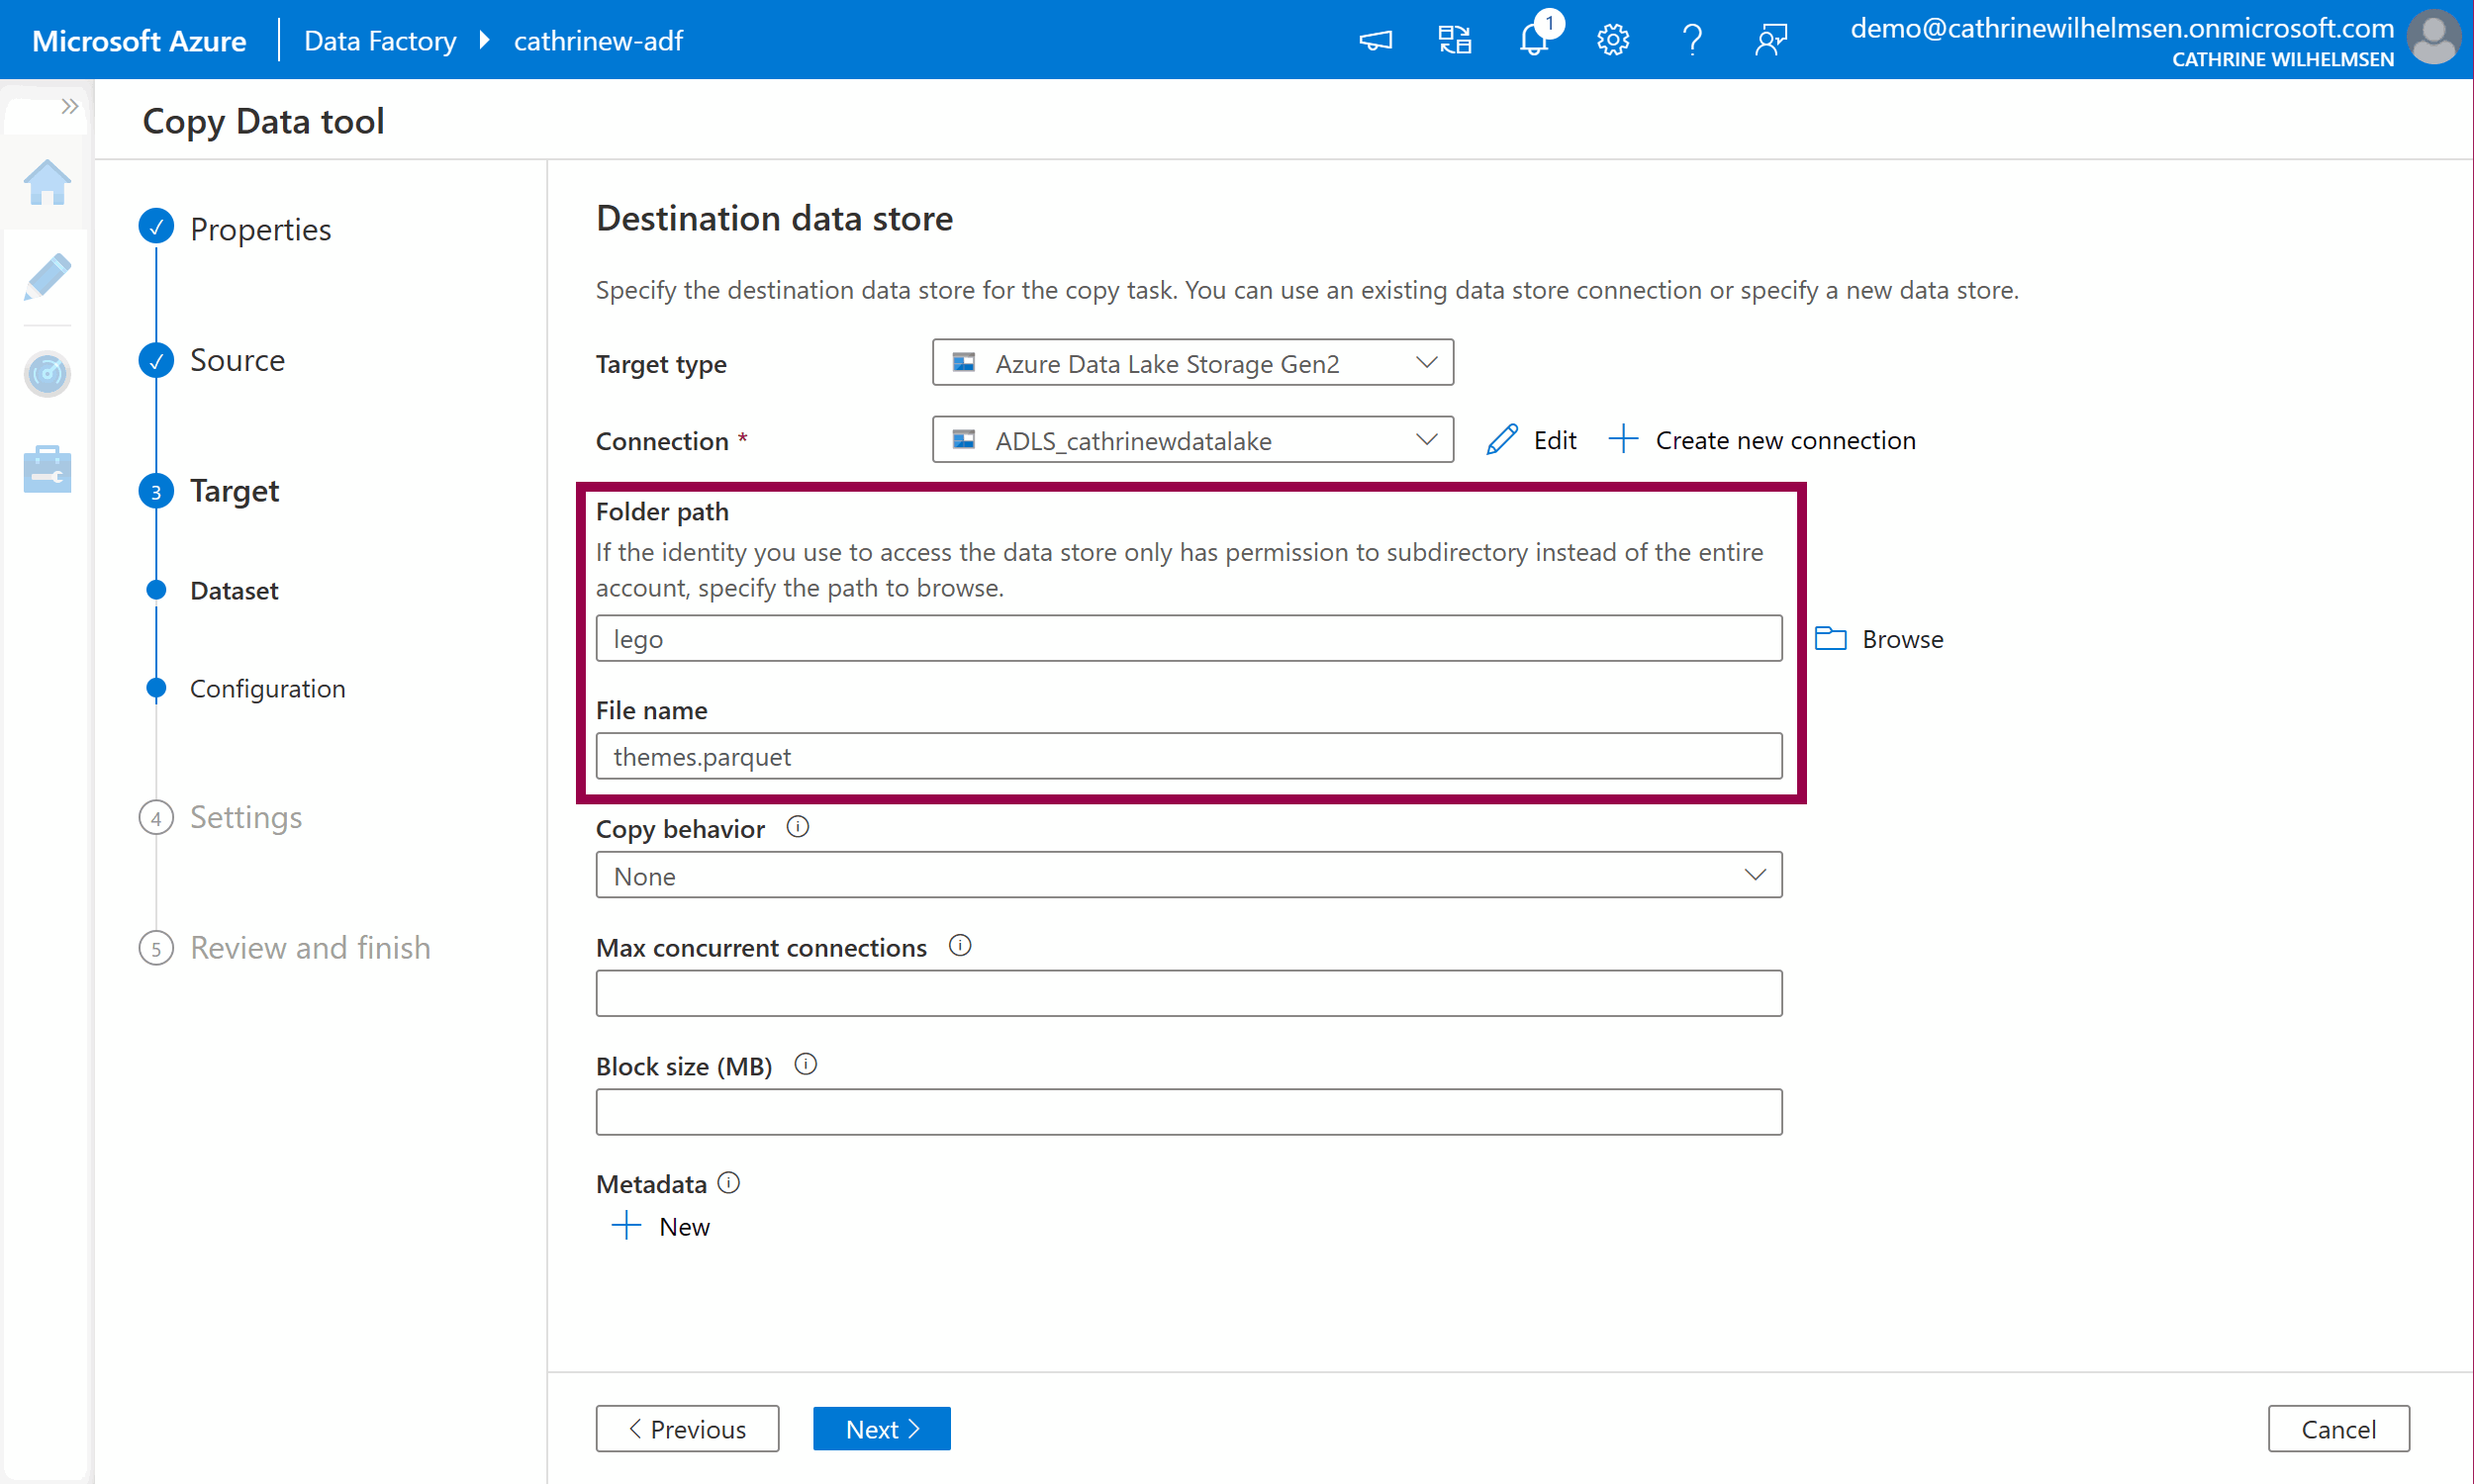
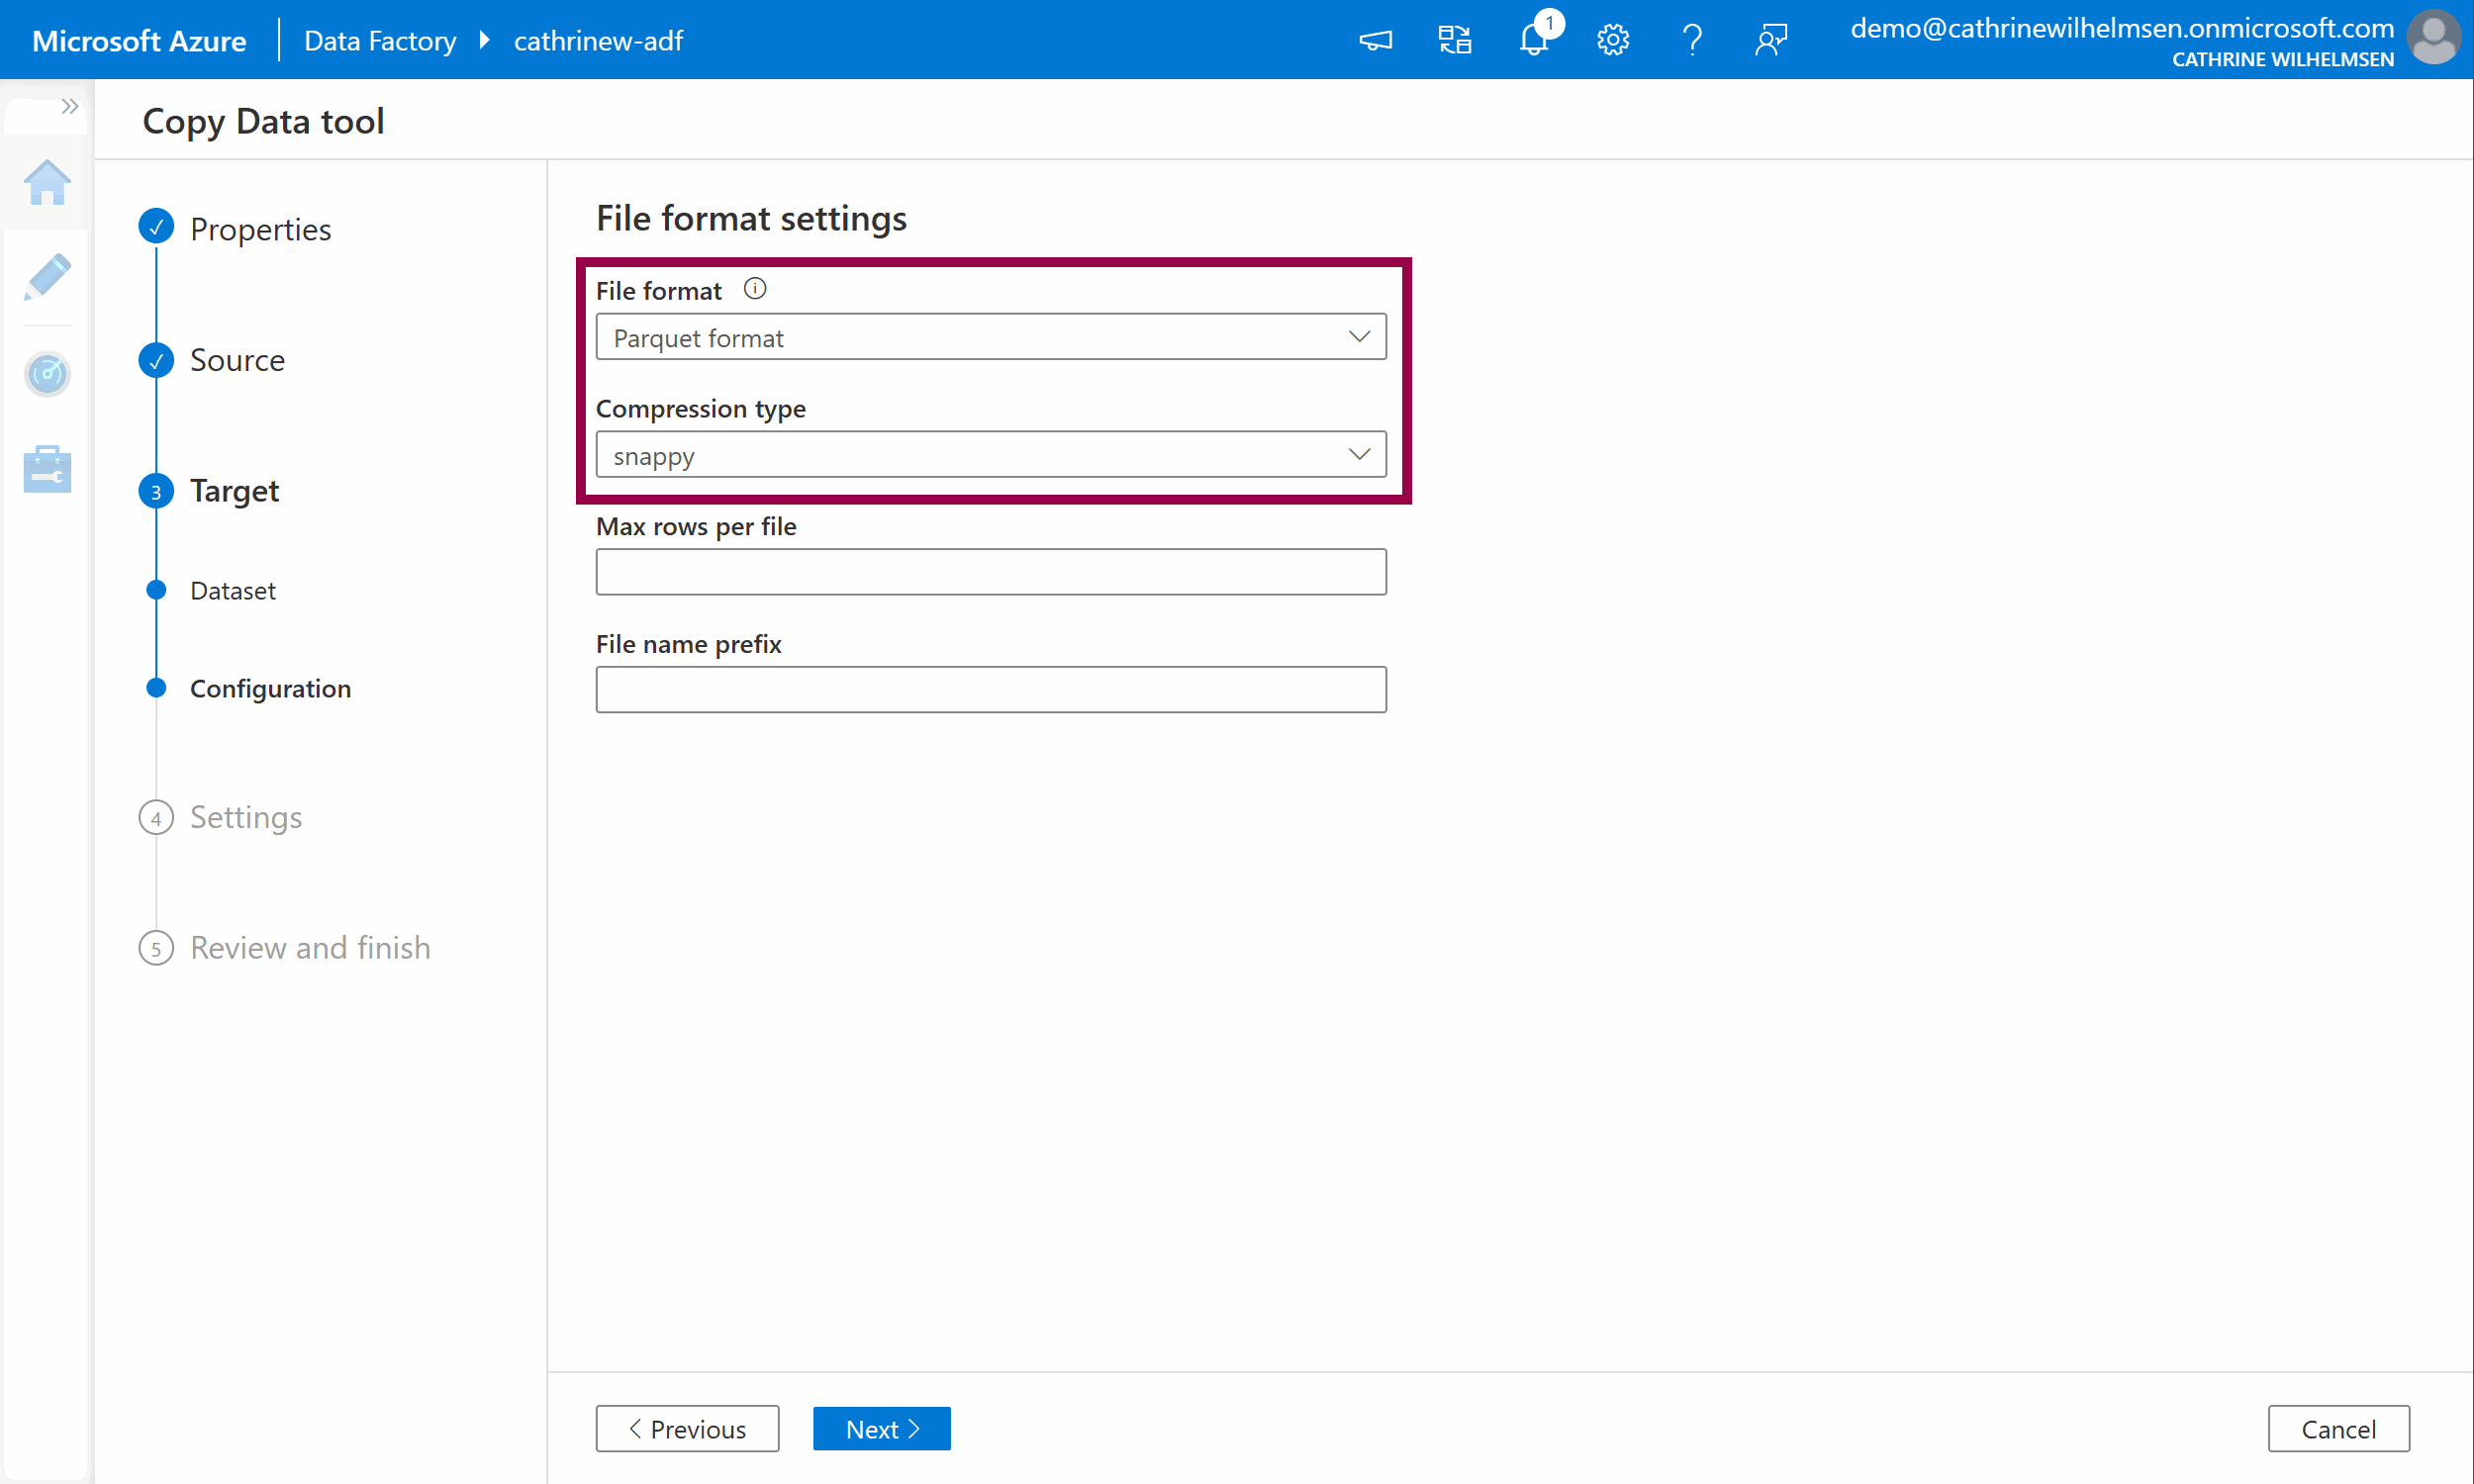
The second linked service has now been created, yay! Specify lego as the folder path, and themes.parquet as the file name. Keep the other default options. Click next:
Verify that the file format is automatically set to Parquet after specifying .parquet as the file name in the previous step:
Click next to move on to the Settings.
4. Settings
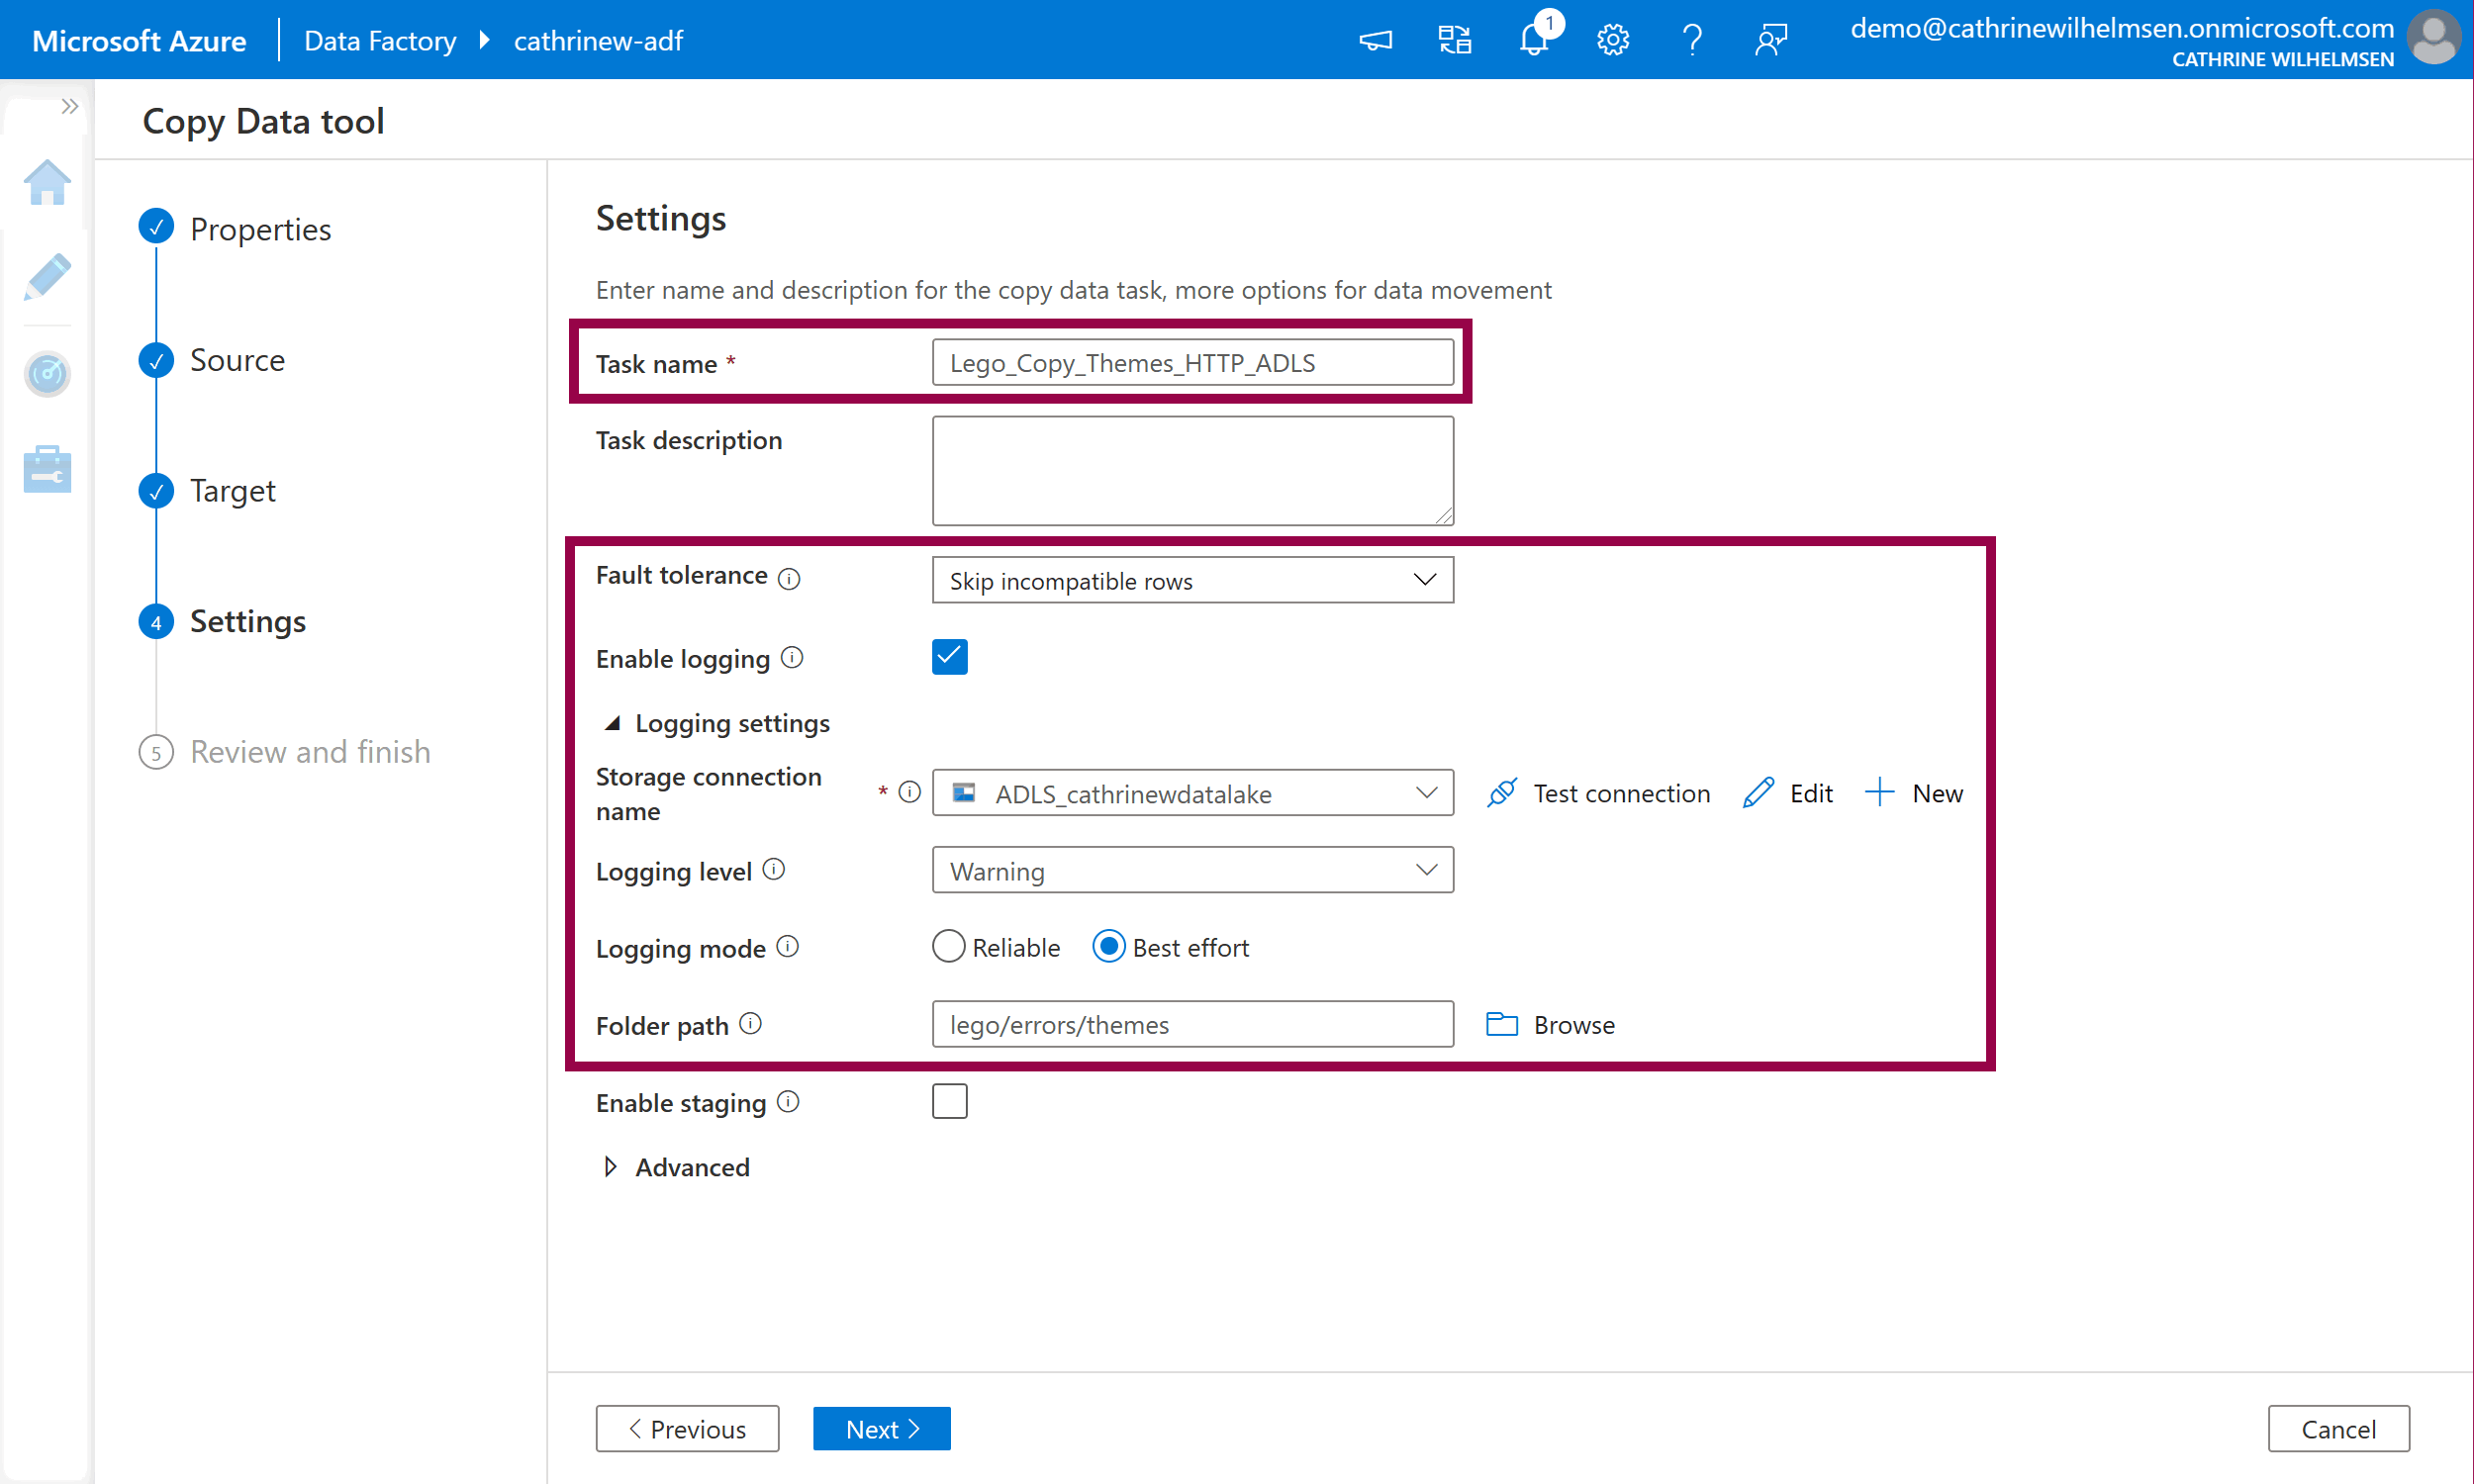
On the Settings page, we will name our pipeline and configure fault tolerance and logging settings. This is another part that feels like magic. By changing a setting, we can enable automatic handling and logging of rows with errors. Whaaat! 😁 In SQL Server Integration Services (SSIS), this had to be handled manually. In Azure Data Factory, you literally just enable it and specify the settings. MAGIC! 🥳
Give the pipeline a name. Change the fault tolerance to skip incompatible rows and enable logging. Specify lego/errors/themes as the folder path:
Click next to move on to Review and Finish.
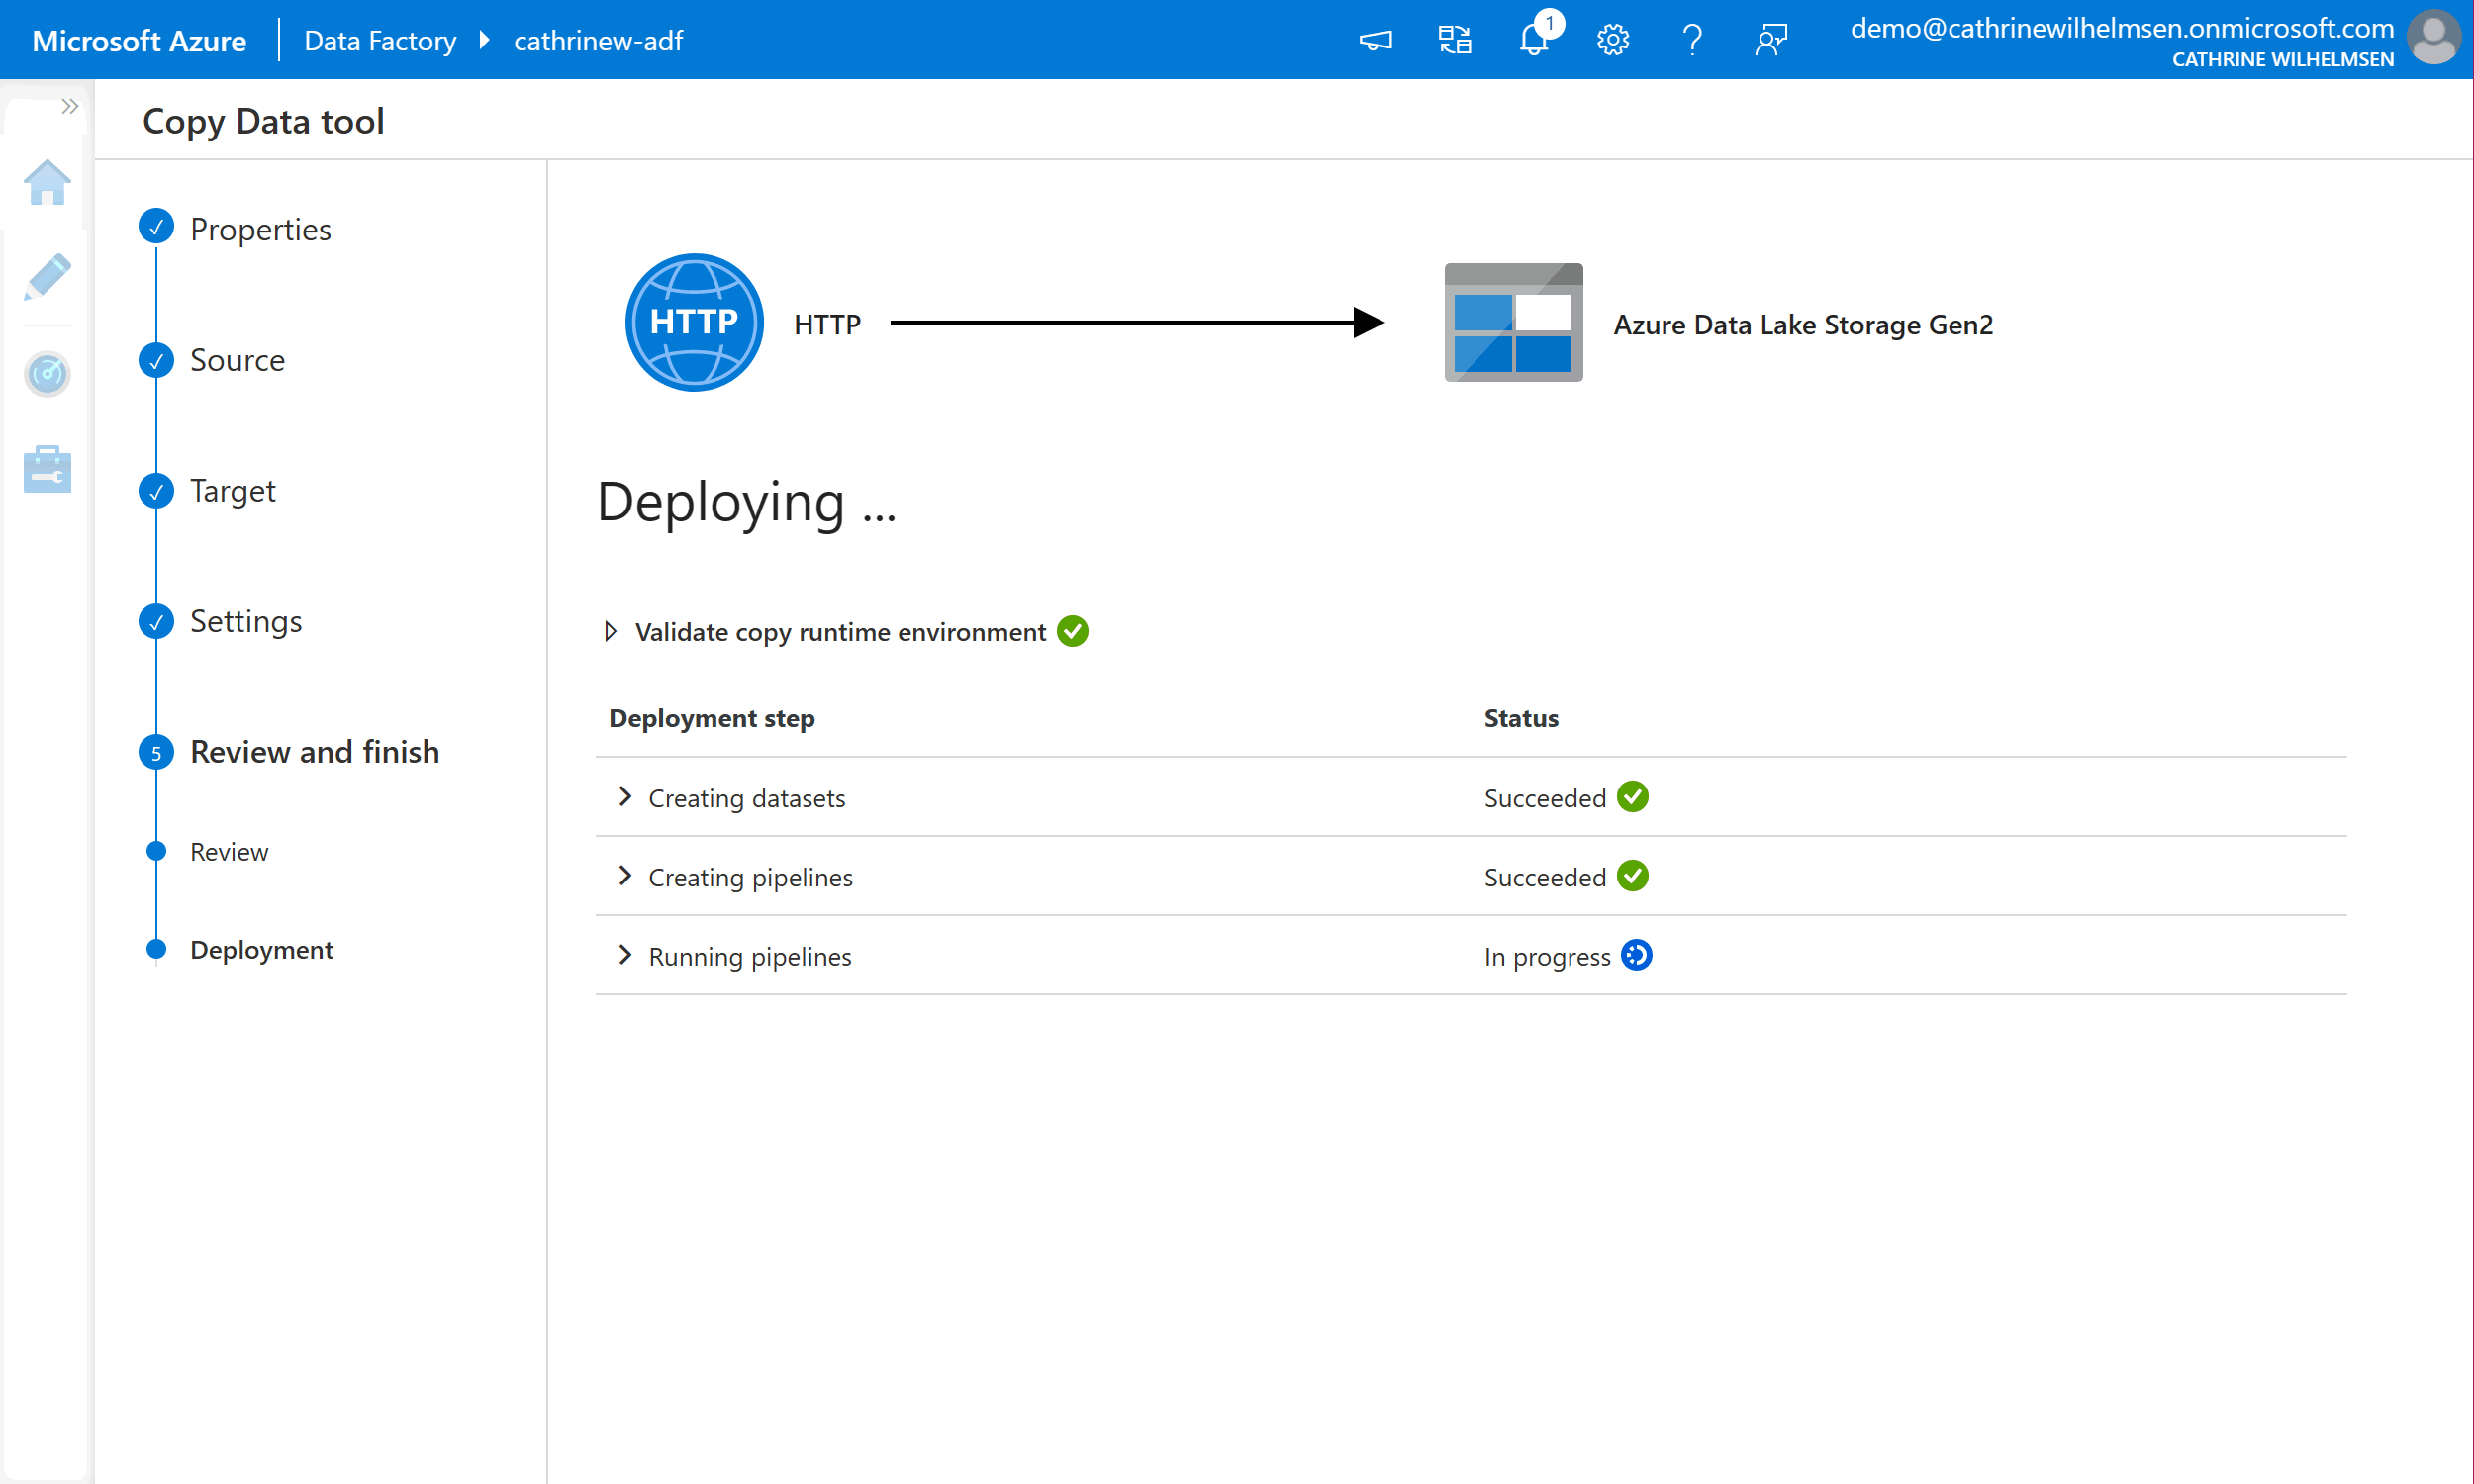
5. Review and Finish
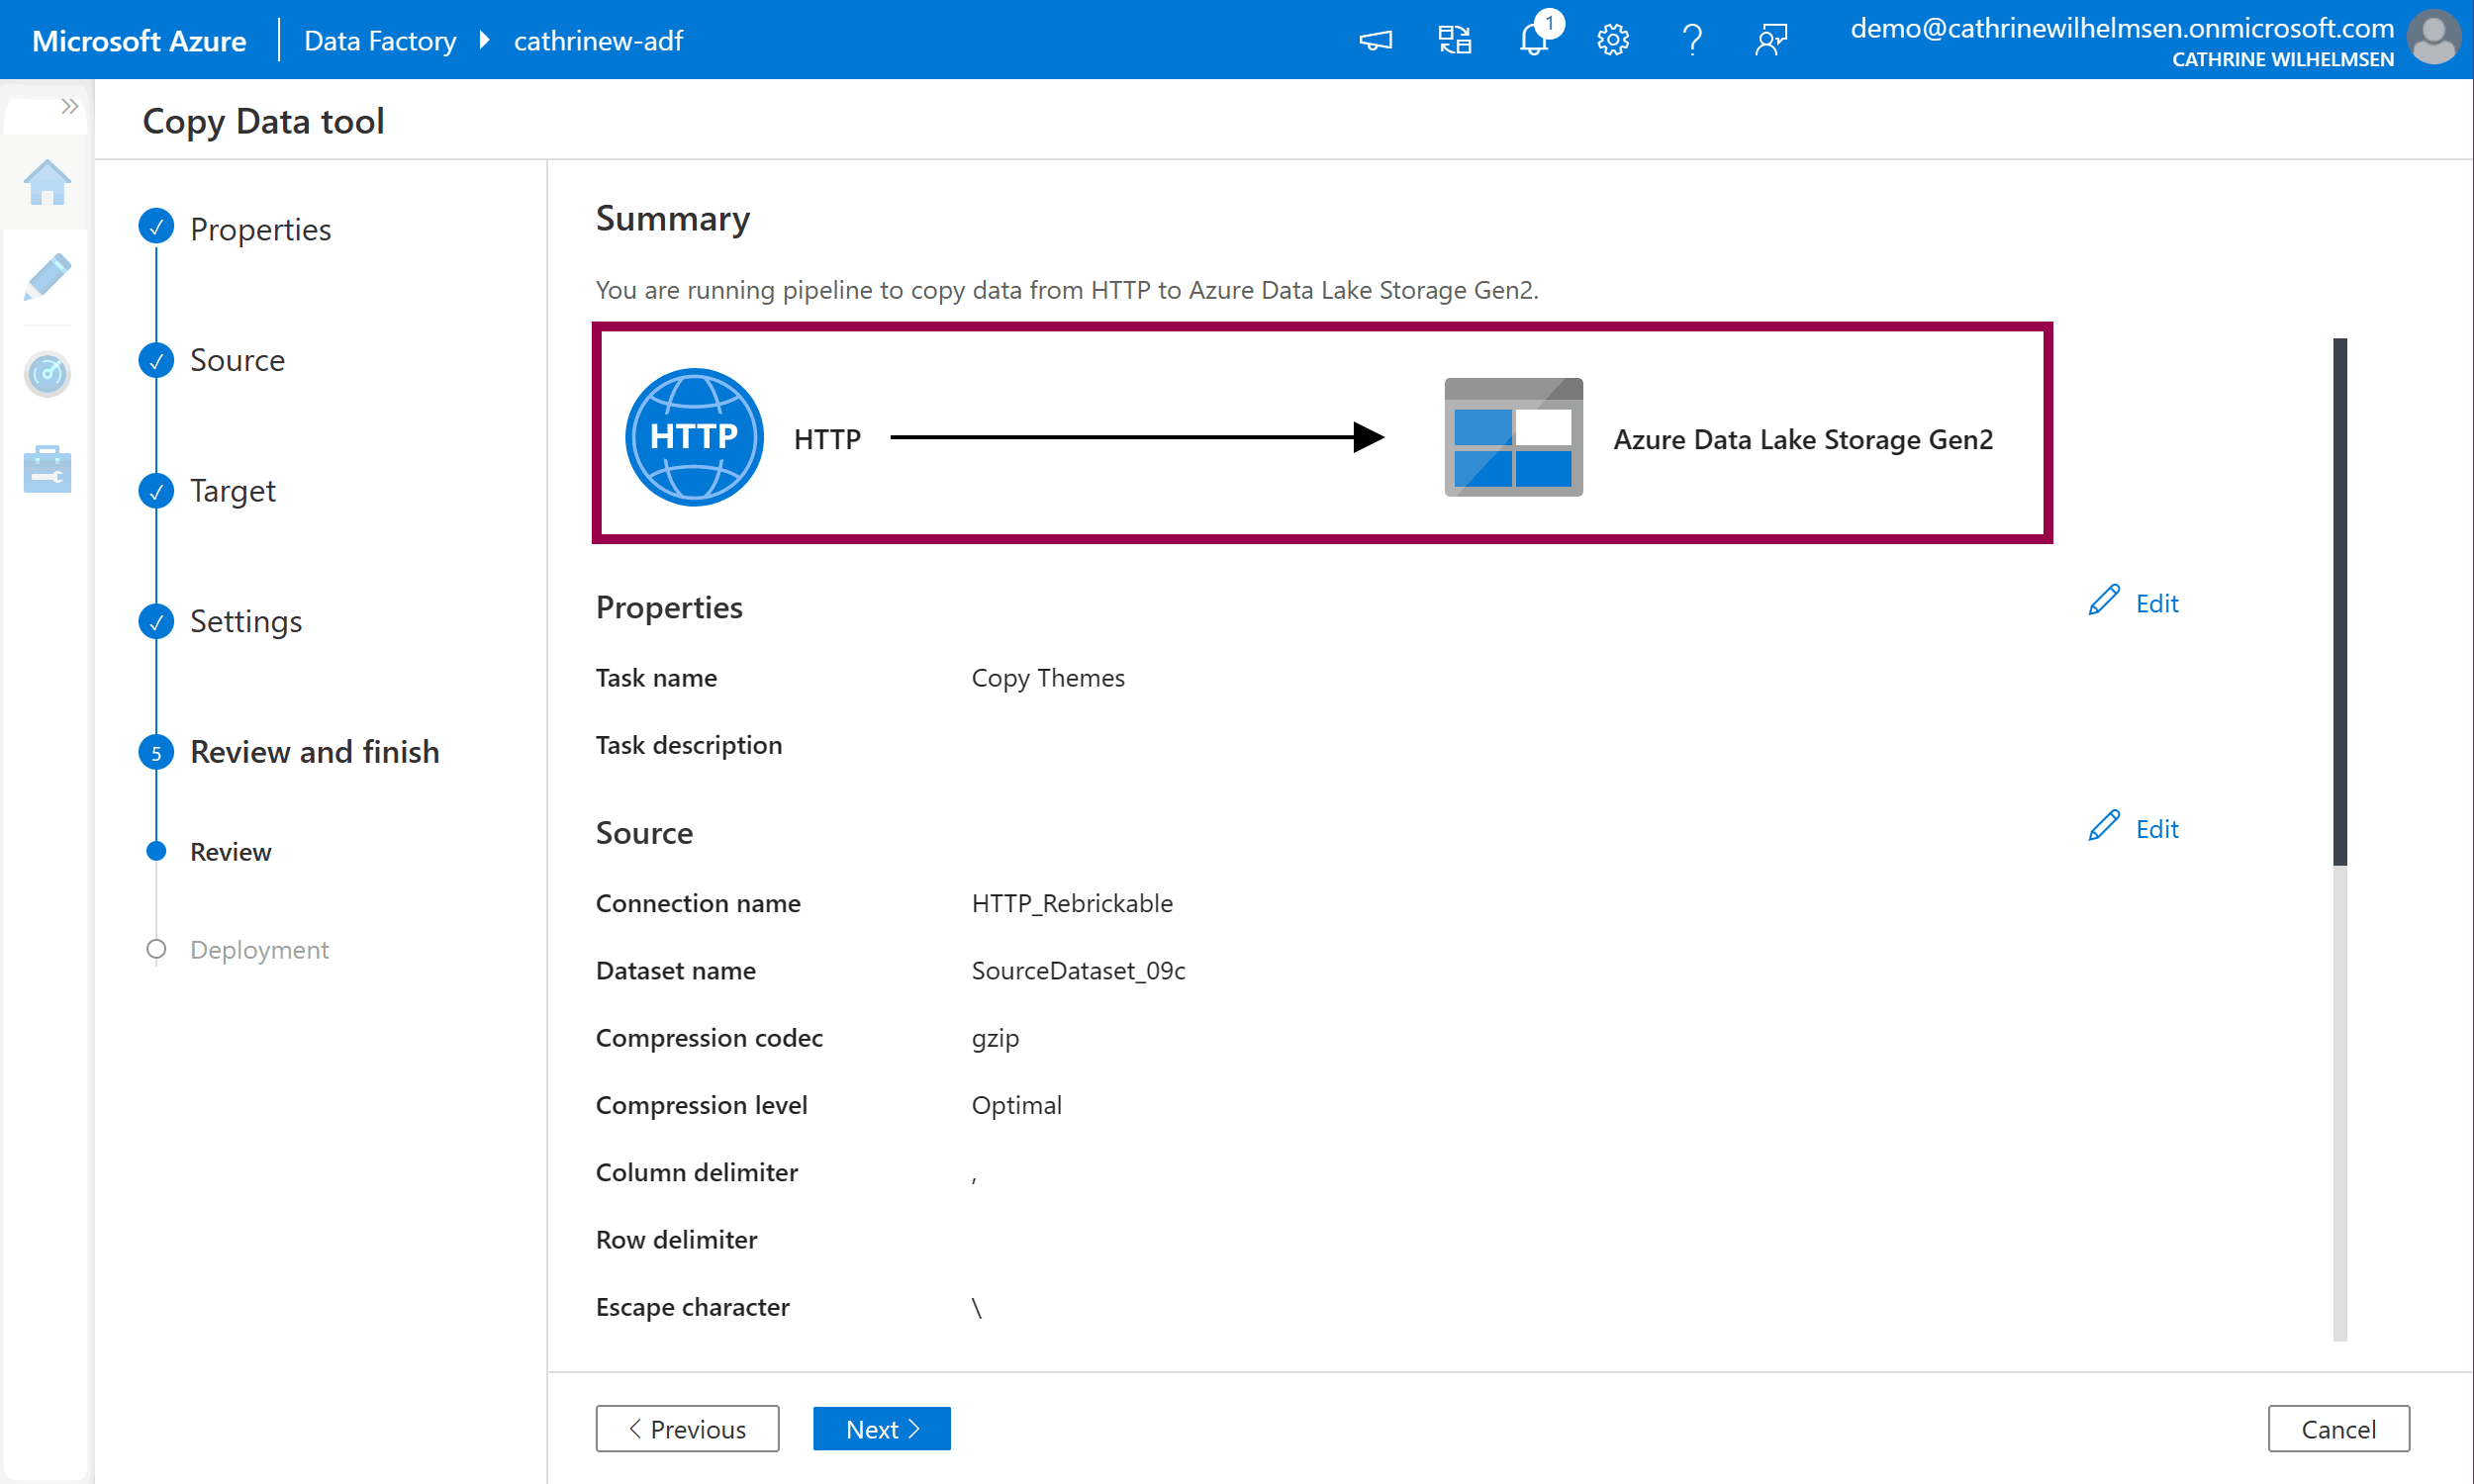
On the Review page, you will see a pretty graphic illustrating that you are copying data from an HTTP source to an Azure Data Lake Storage Gen2 target:
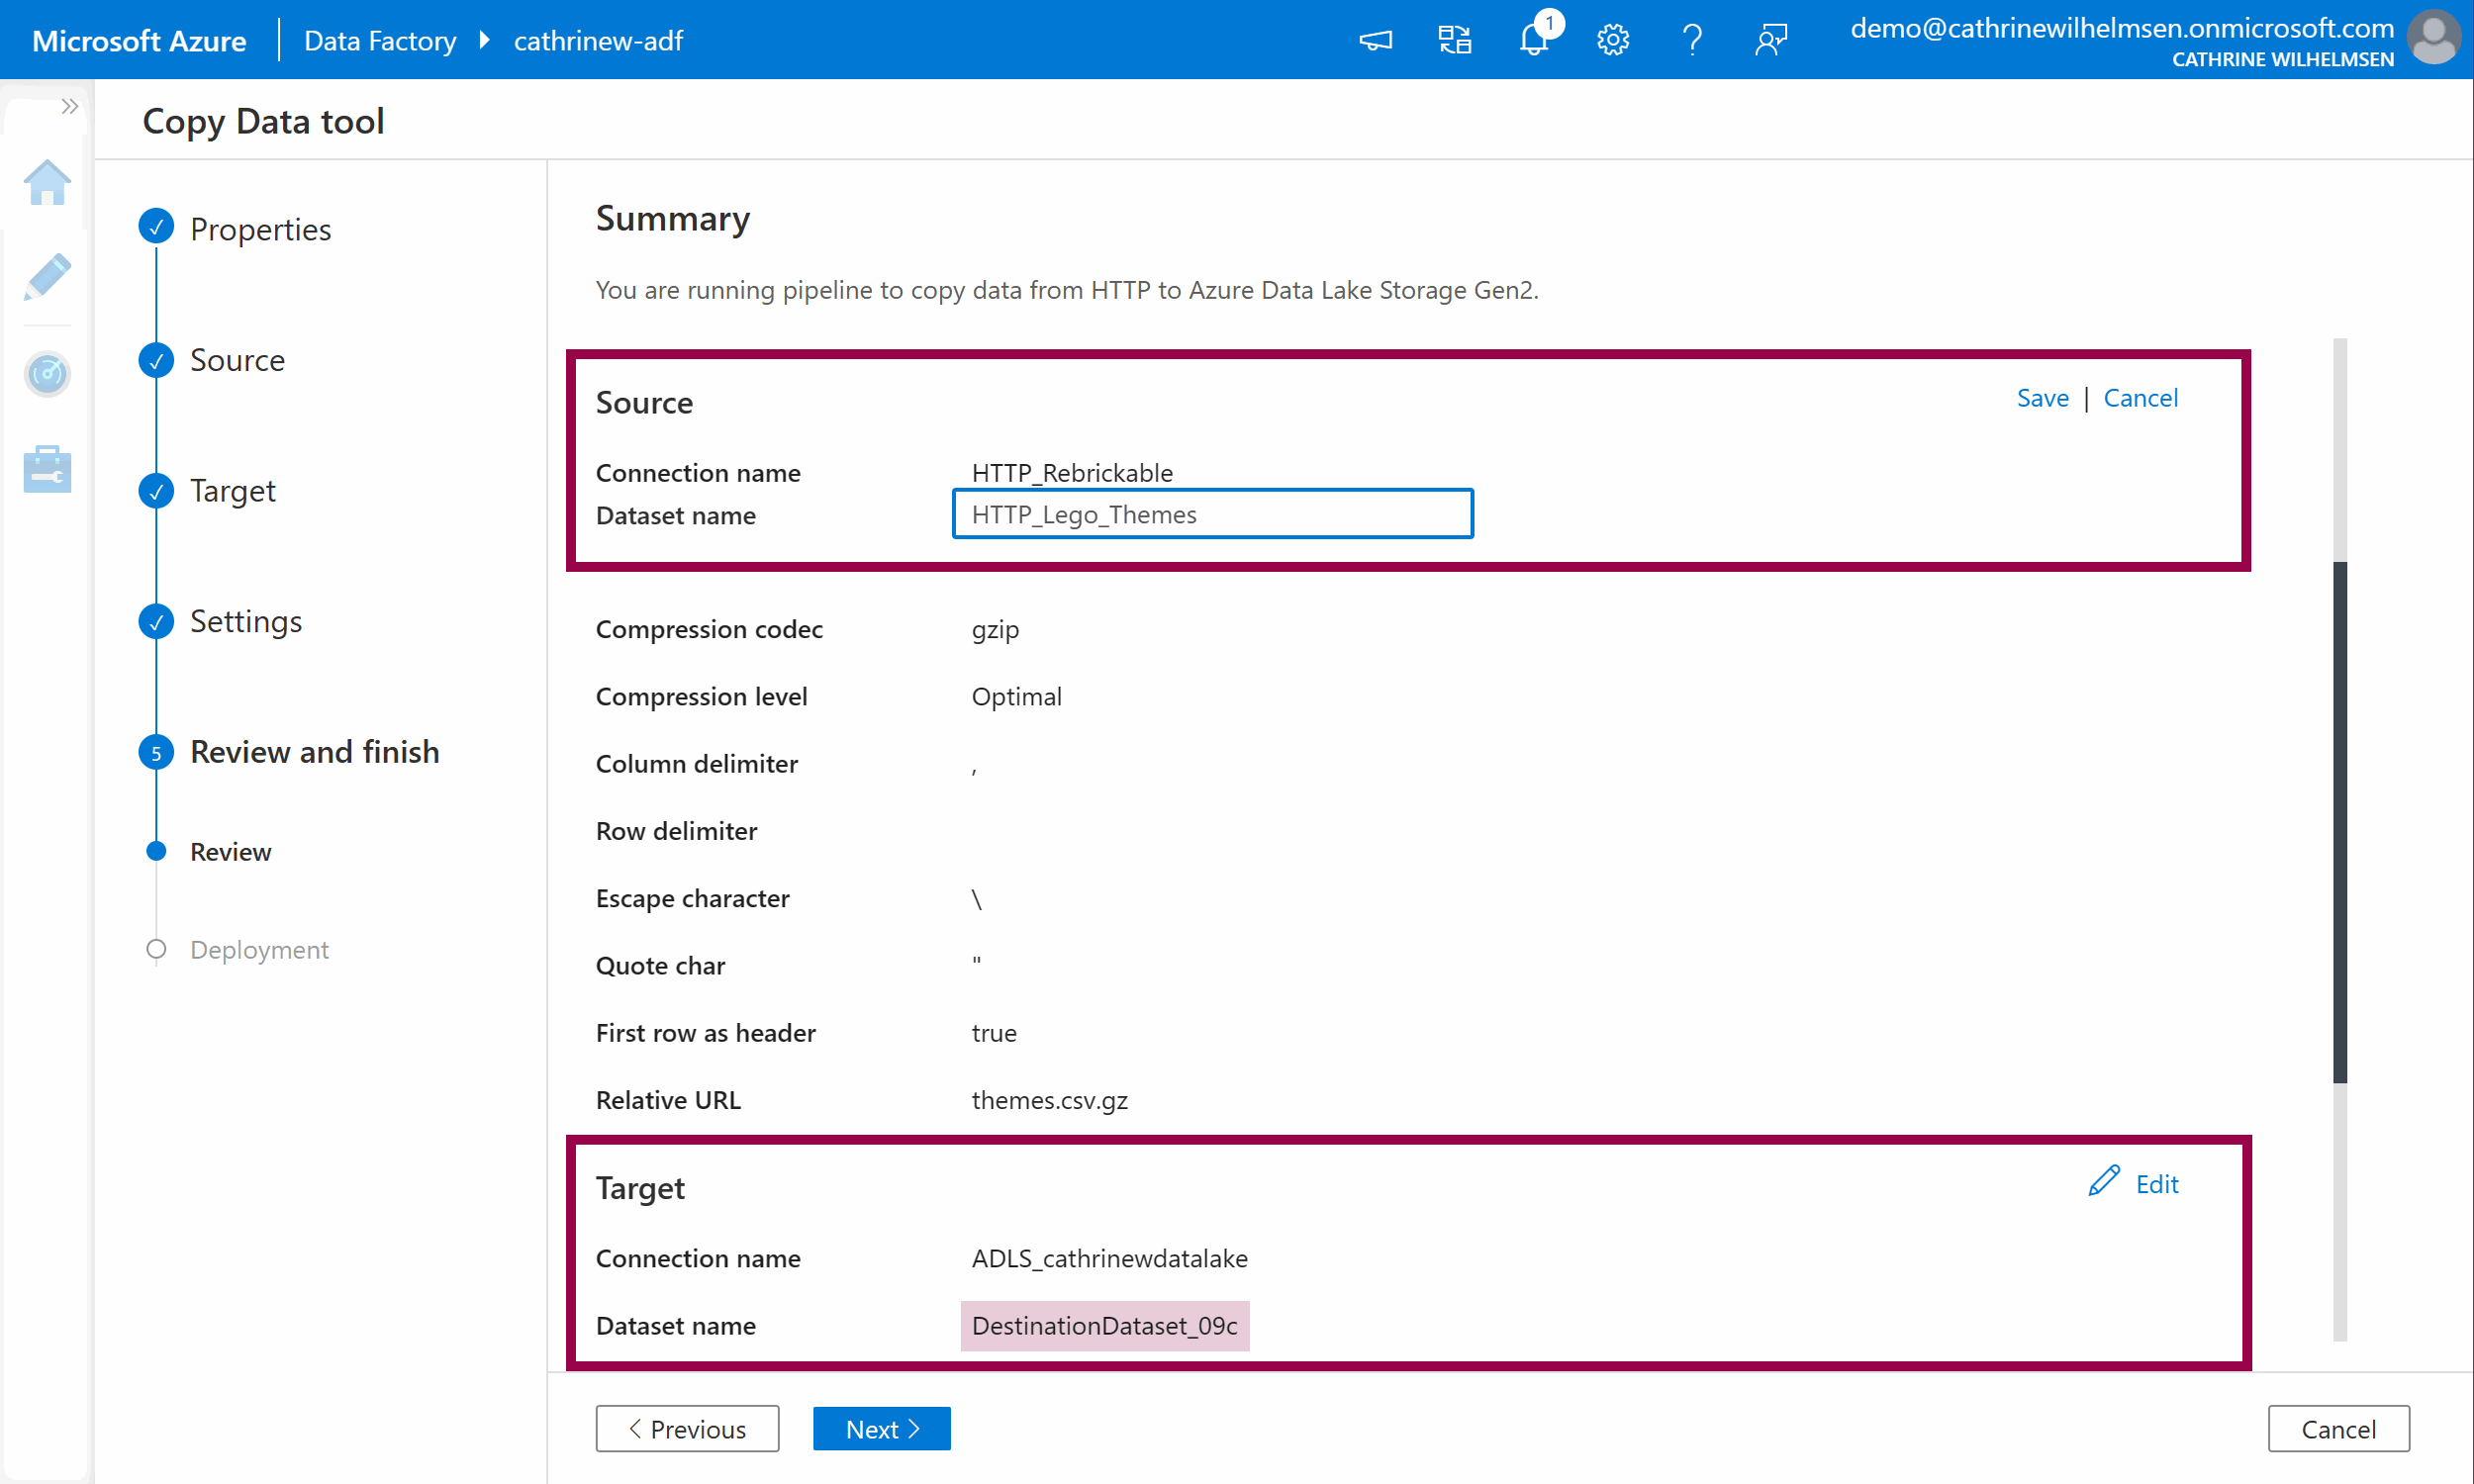
The dataset names have been given a generic name with a random suffix. Click on Edit next to each of them and give them more appropriate names. Remember to click Save:
Click next to move on to Deployment.
The final step, Deployment, will create the datasets and pipeline. Since we chose the “run once now” setting in the Properties step, the pipeline will be executed immediately after deployment:
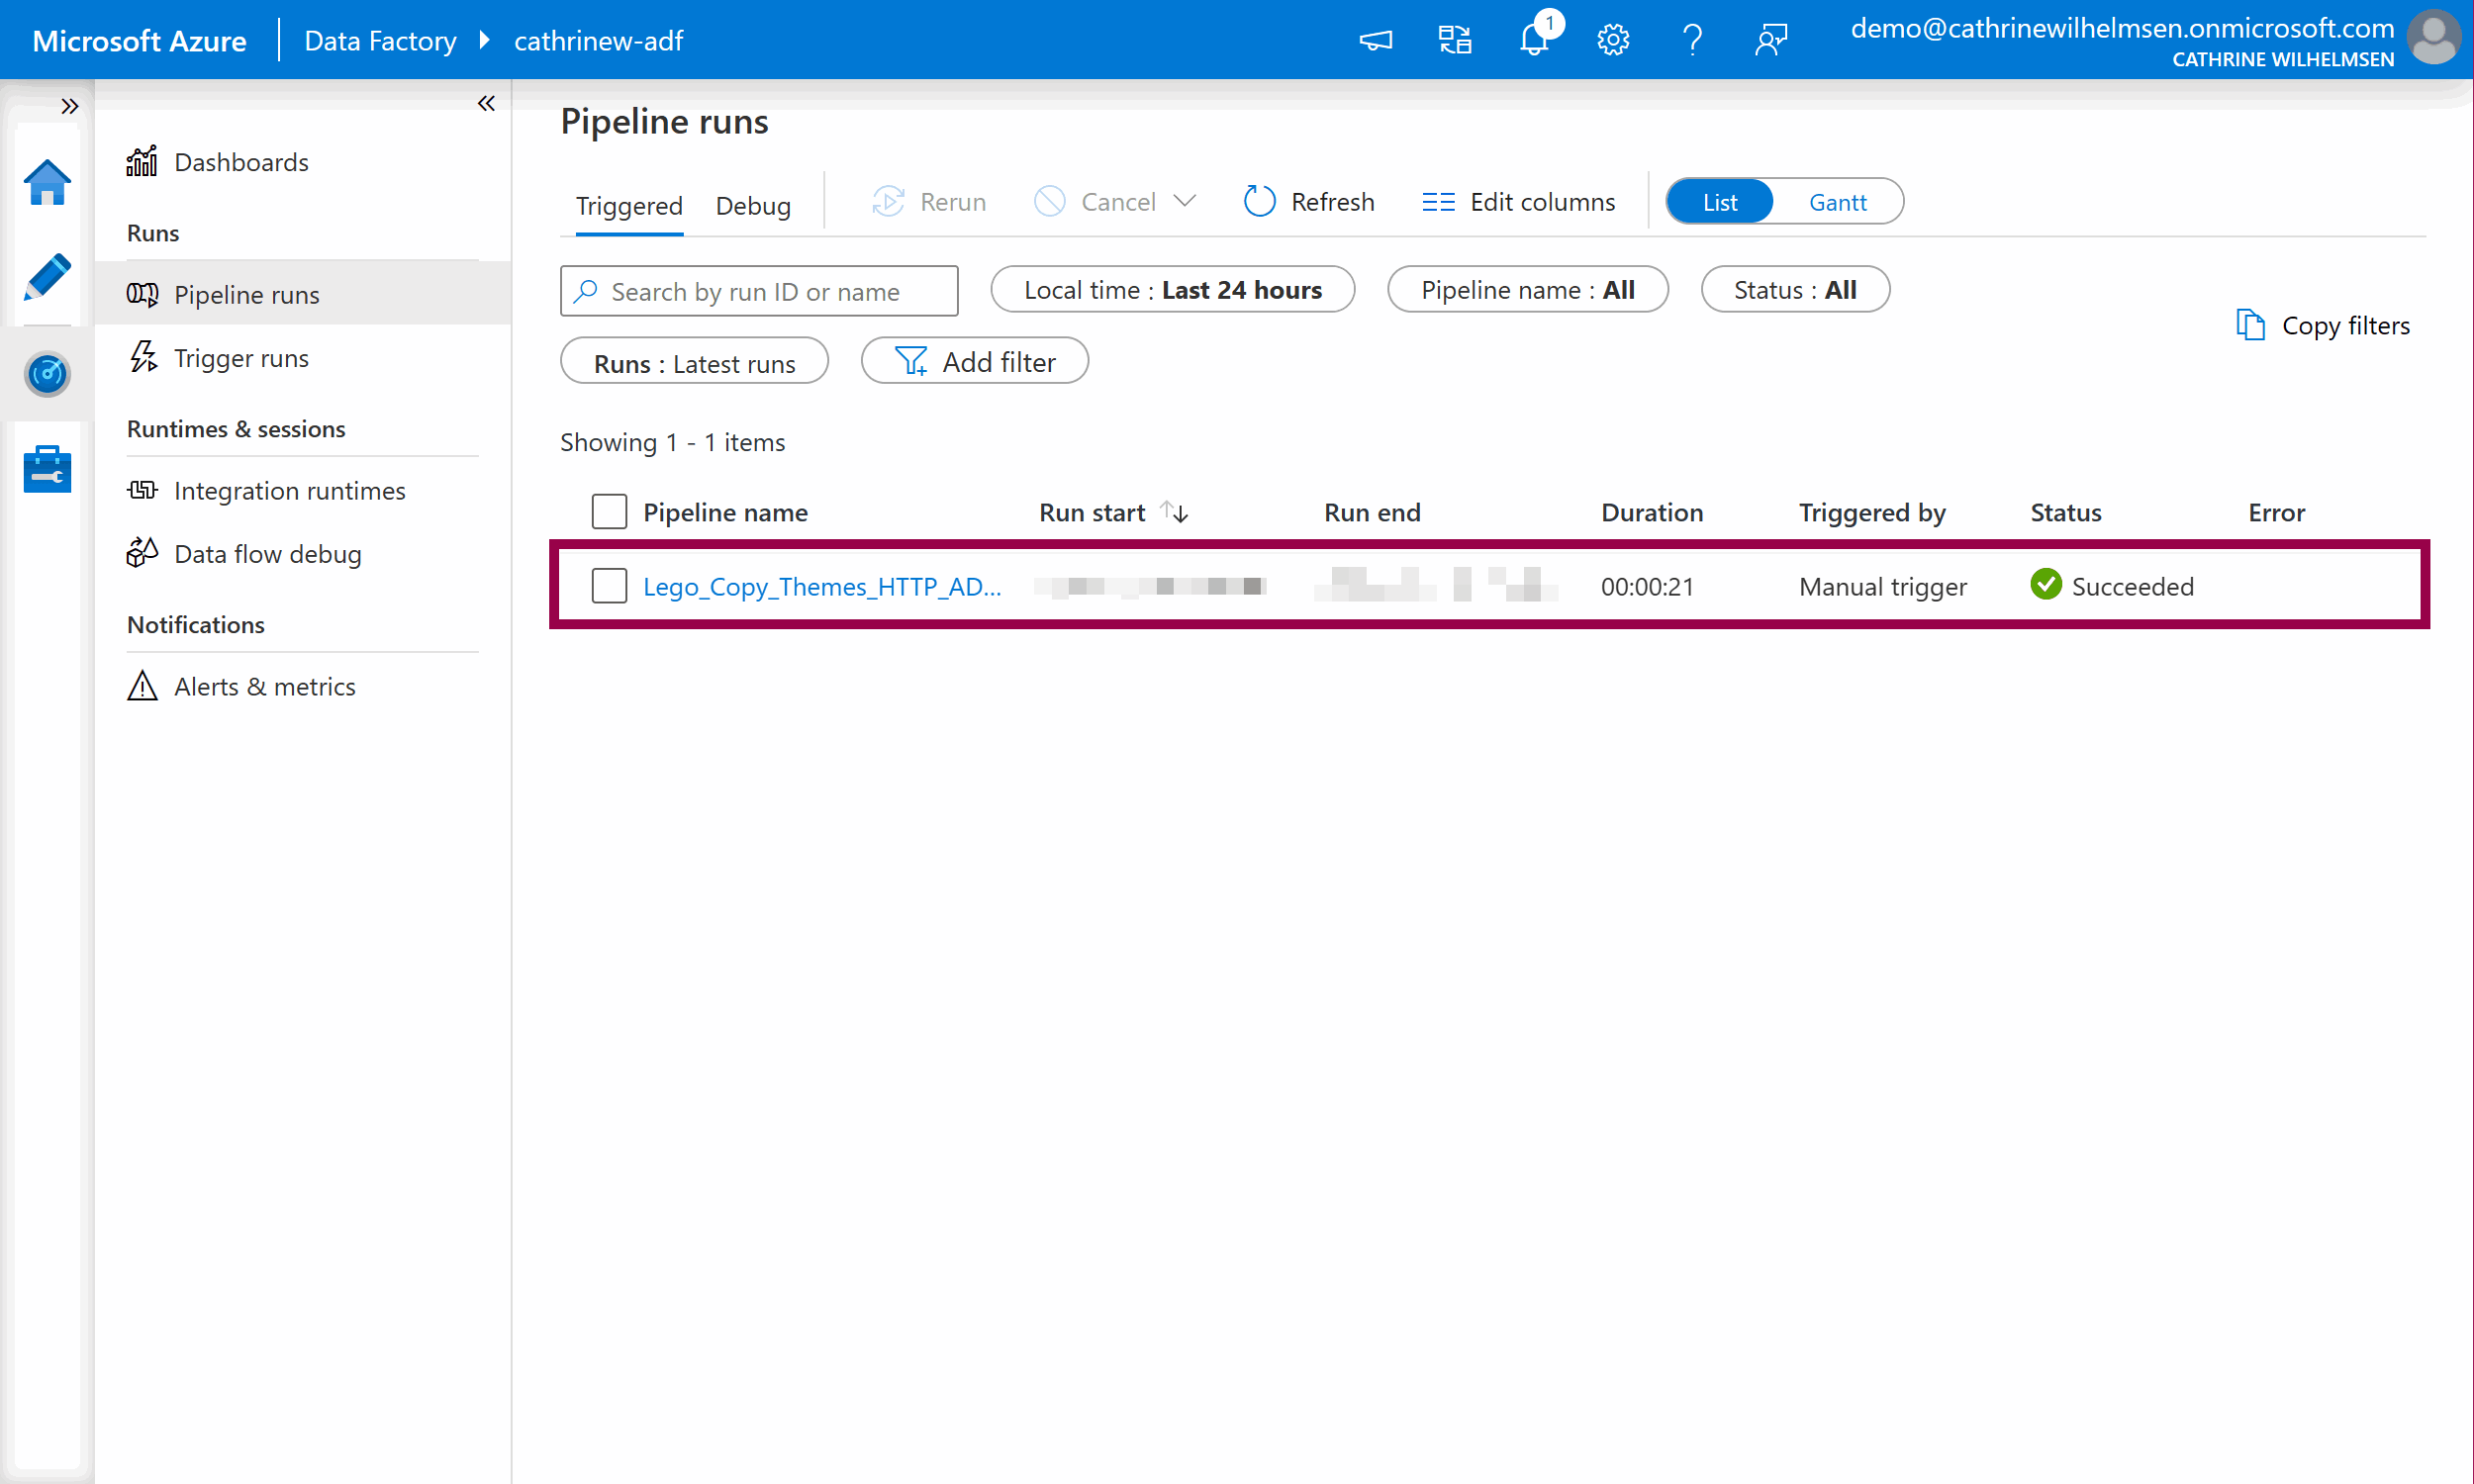
Once the deployment is complete, we can open the pipeline on the Author page, or view the execution on the Monitor page. Click monitor:

Success! ✅🥳 Our pipeline executed successfully.
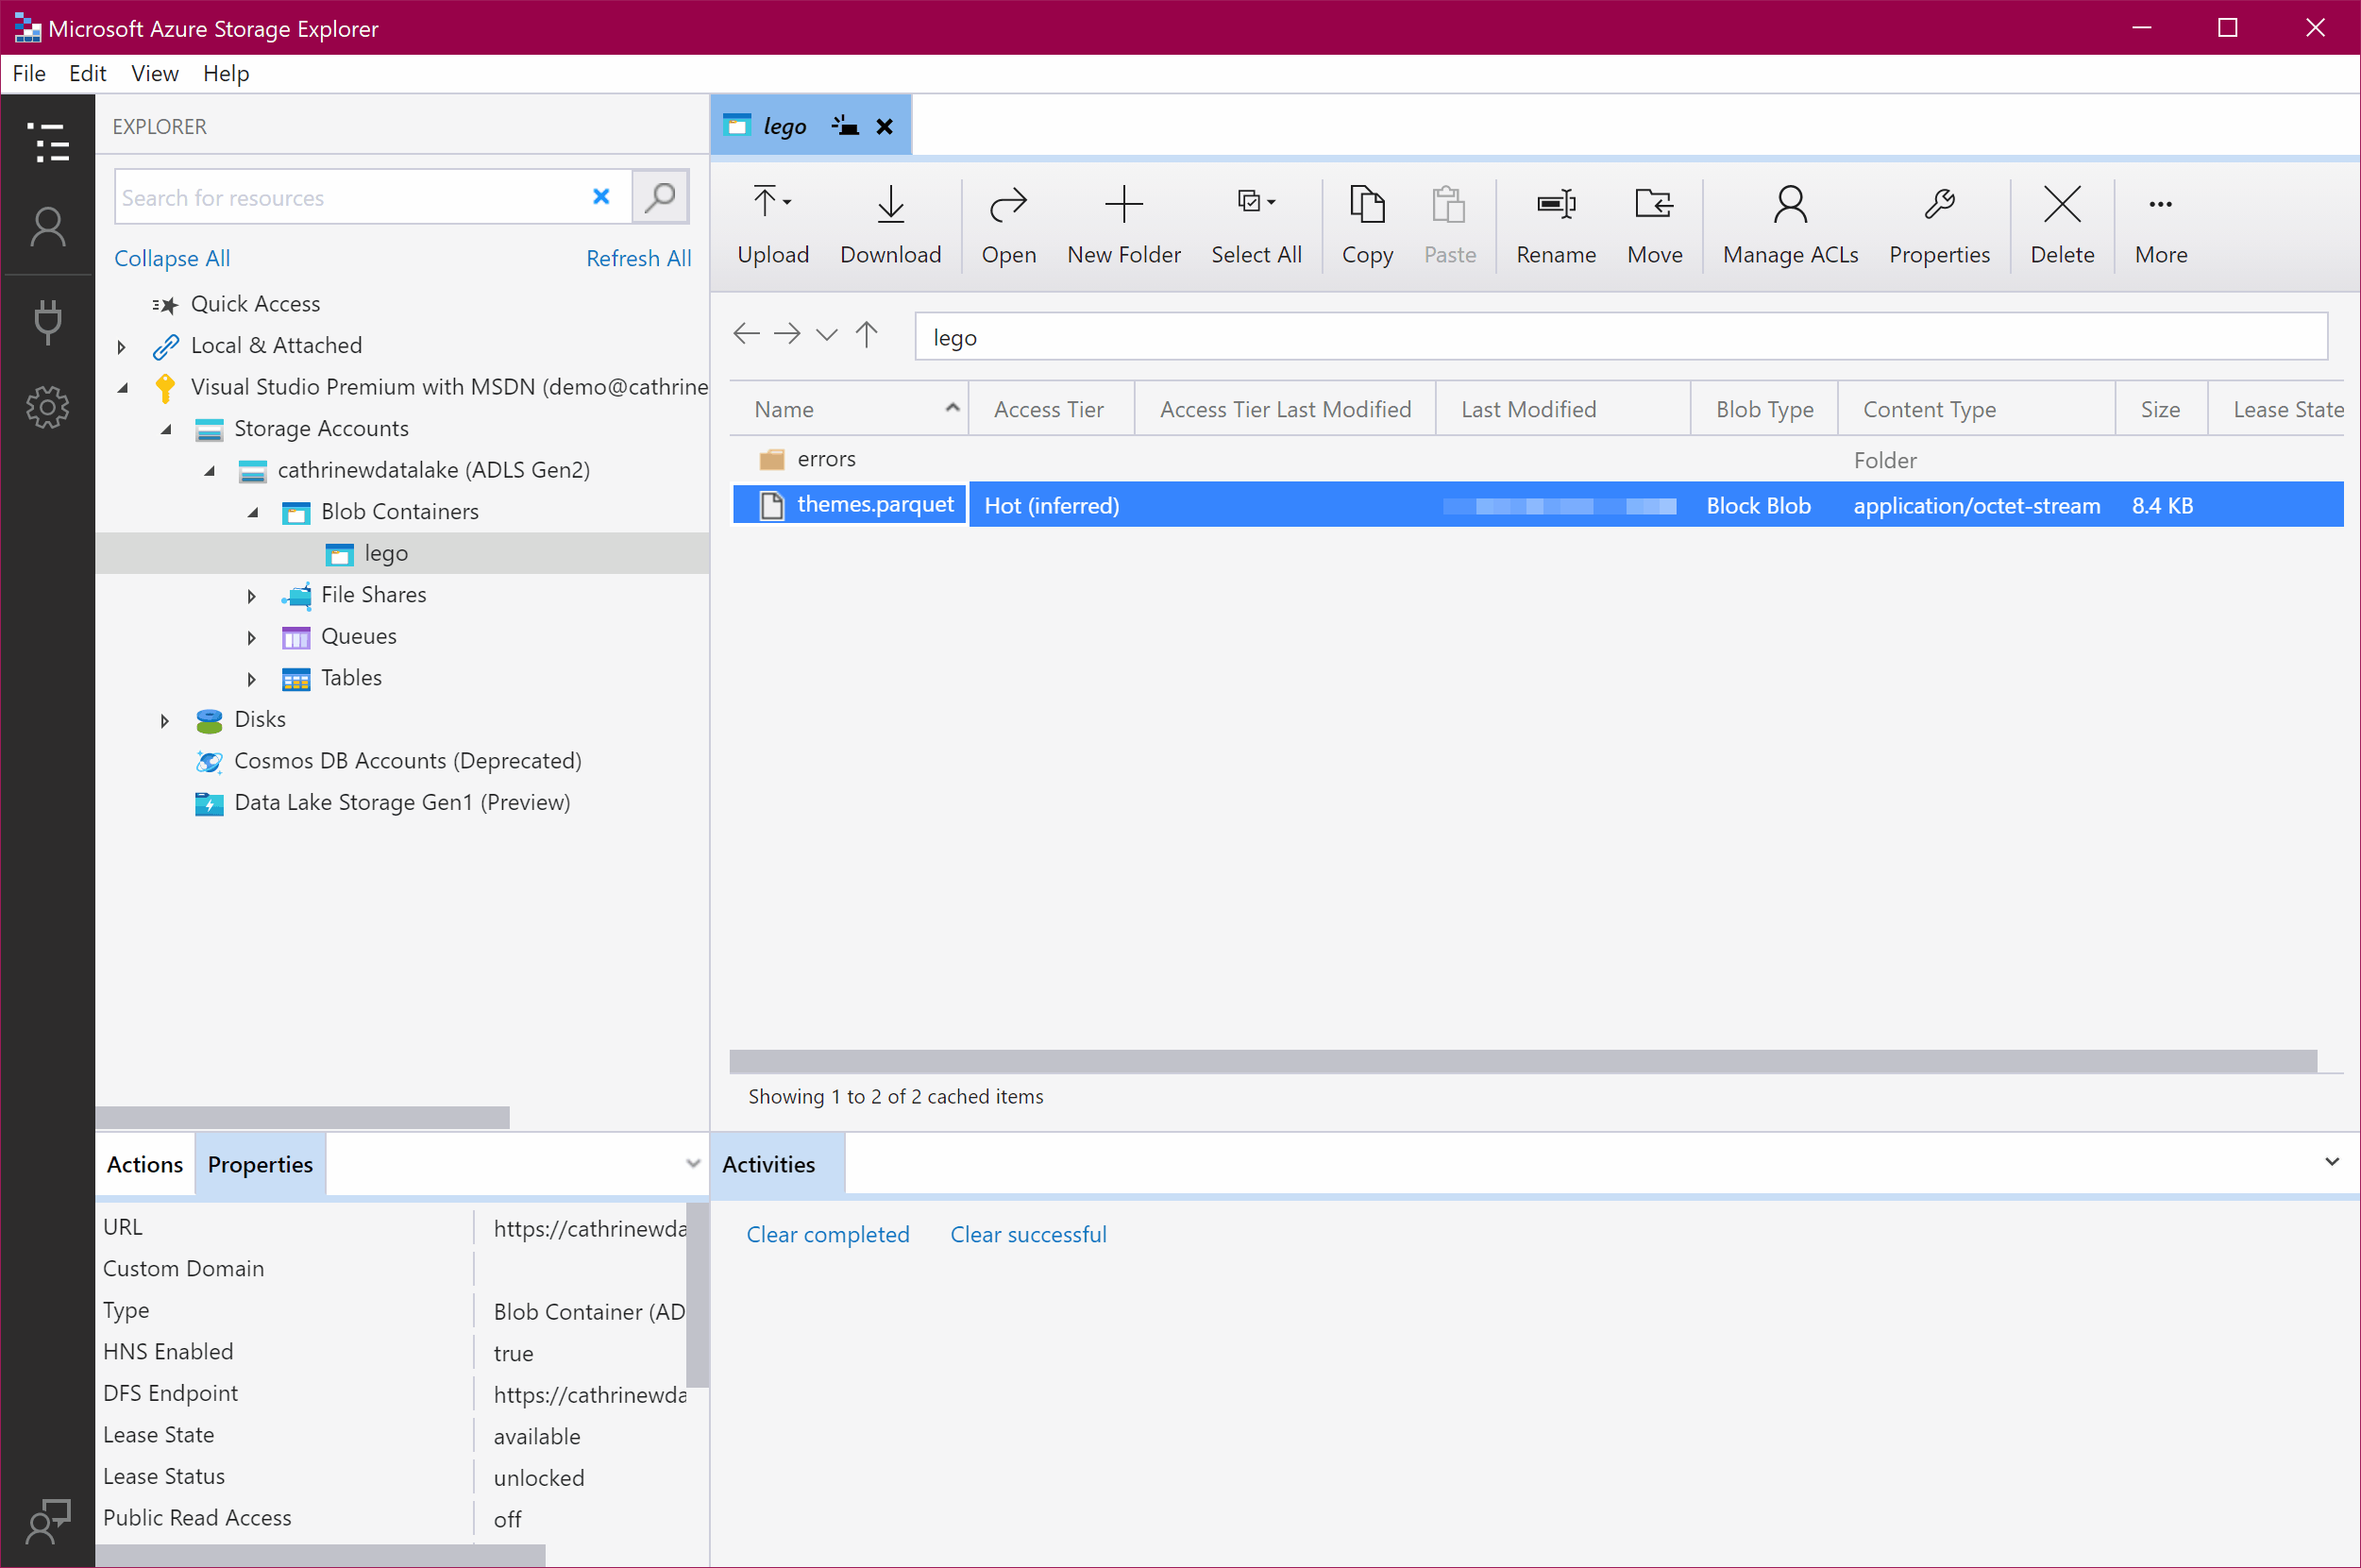
We can now open Azure Storage Explorer and verify that the gzipped CSV file from Rebrickable has been copied and converted to a parquet file in our data lake:
Summary
In this post, we first explored the demo datasets that we used as our source. Then, we created our Azure Data Lake Storage Accounts for storing data. Finally, we used the Copy Data Tool to download a gzipped CSV file from our demo datasets, unzip it, convert it to parquet. and load it into our data lake.
The Copy Data Tool created all the factory resources for us: one pipeline with a copy data activity, two datasets, and two linked services. This guided experience is a great way to get started with Azure Data Factory.
Next, we will go through each of these factory resources in more detail, and look at how to create them from the Author page instead of through the Copy Data Tool. First, let’s look at pipelines!
About the Author
 Cathrine Wilhelmsen is a Microsoft Data Platform MVP, international speaker, author, blogger, organizer, and chronic volunteer. She loves data and coding, as well as teaching and sharing knowledge - oh, and sci-fi, gaming, coffee and chocolate 🤓