Renaming the default branch in Azure Data Factory Git repositories from "master" to "main"

In Azure Data Factory, you can connect to a Git repository using either GitHub or Azure DevOps. When connecting, you have to specify which collaboration branch to use. In most cases, the default branch is used. Historically, the default branch name in git repositories has been “master”. This is problematic because it is not inclusive and is very offensive to many people.
The Git project, GitHub, and Azure DevOps are making changes to allow users to specify a different default branch name. GitHub and Azure DevOps will be changing their default branch names to “main” in 2020. I fully support this change and will be doing the same in my projects.
In this post, we will go through how to rename the default branch from “master” to “main” in Azure Data Factory Git repositories hosted in GitHub and Azure DevOps. Then we will reconnect Azure Data Factory and configure it to use the new “main” branch as the collaboration branch.
For these examples, I’m using my personal demo projects. I’m not taking into consideration any branch policies, other users, third-party tools, or external dependencies. As always, keep in mind that this is most likely a larger change, both technically and organizationally, in production and enterprise projects. 😊
The Short Version
- Create a new “main” branch in your Git repository
- Set the new “main” branch as the default branch in your Git repository
- Delete the old “master” branch in your Git repository
- Disconnect from your Git repository in Azure Data Factory
- Reconnect to your Git repository in Azure Data Factory using the new “main” branch as the collaboration branch
For The Longer Version with Screenshots, scroll down to GitHub or Azure DevOps 👇🏻
GitHub

(If you are using Azure DevOps instead, scroll down 👇🏻🤓)
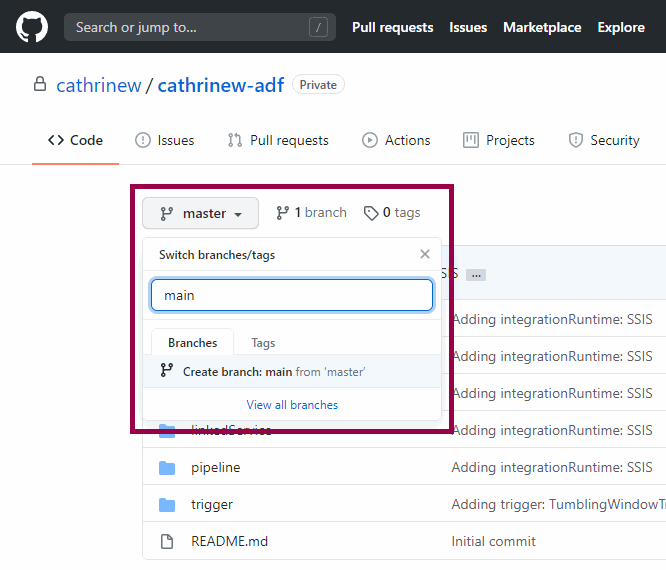
Open your Azure Data Factory Git repository in GitHub. On the Code page, click on the branch dropdown where it says “master”. Type “main” as the new branch name, then click on Create branch: main from master:
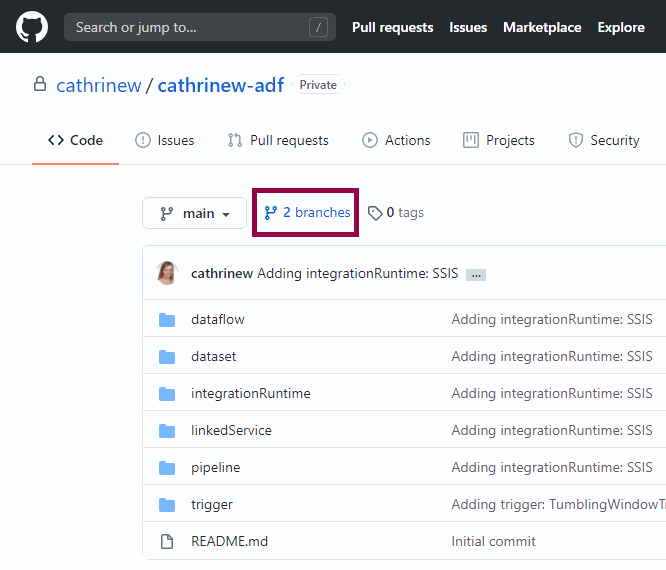
The new “main” branch is now selected. Click on branches to view all branches:
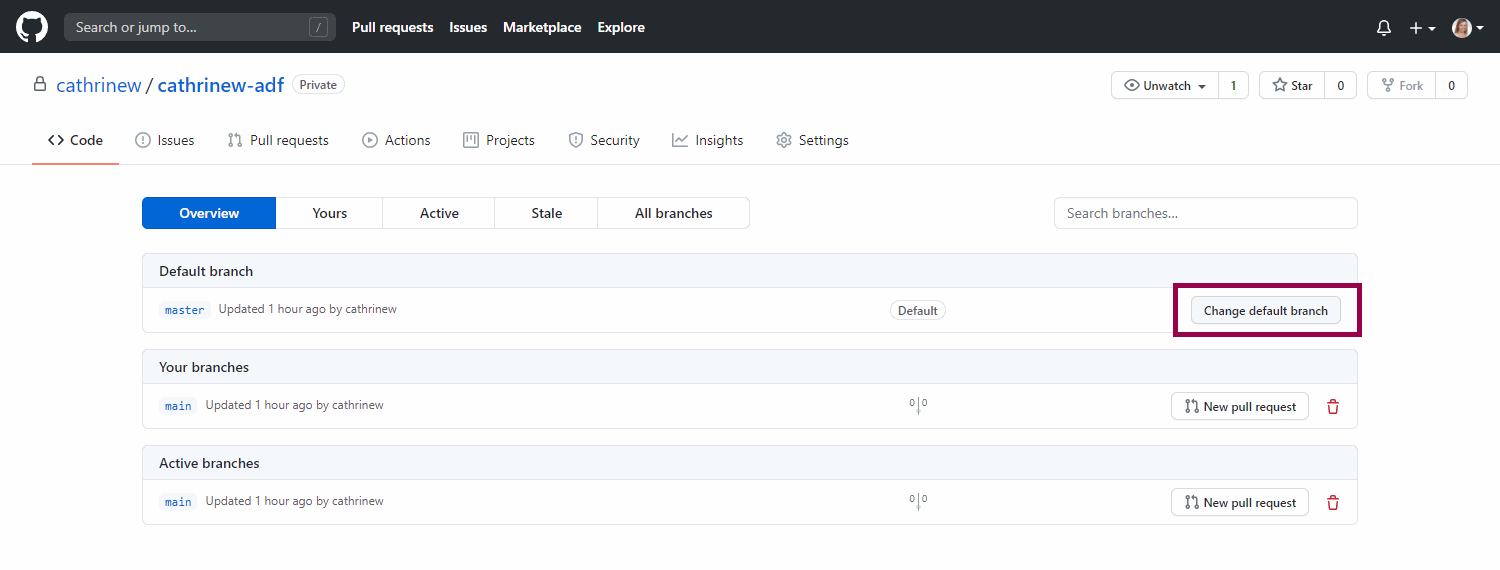
In the branches overview, click on Change default branch:
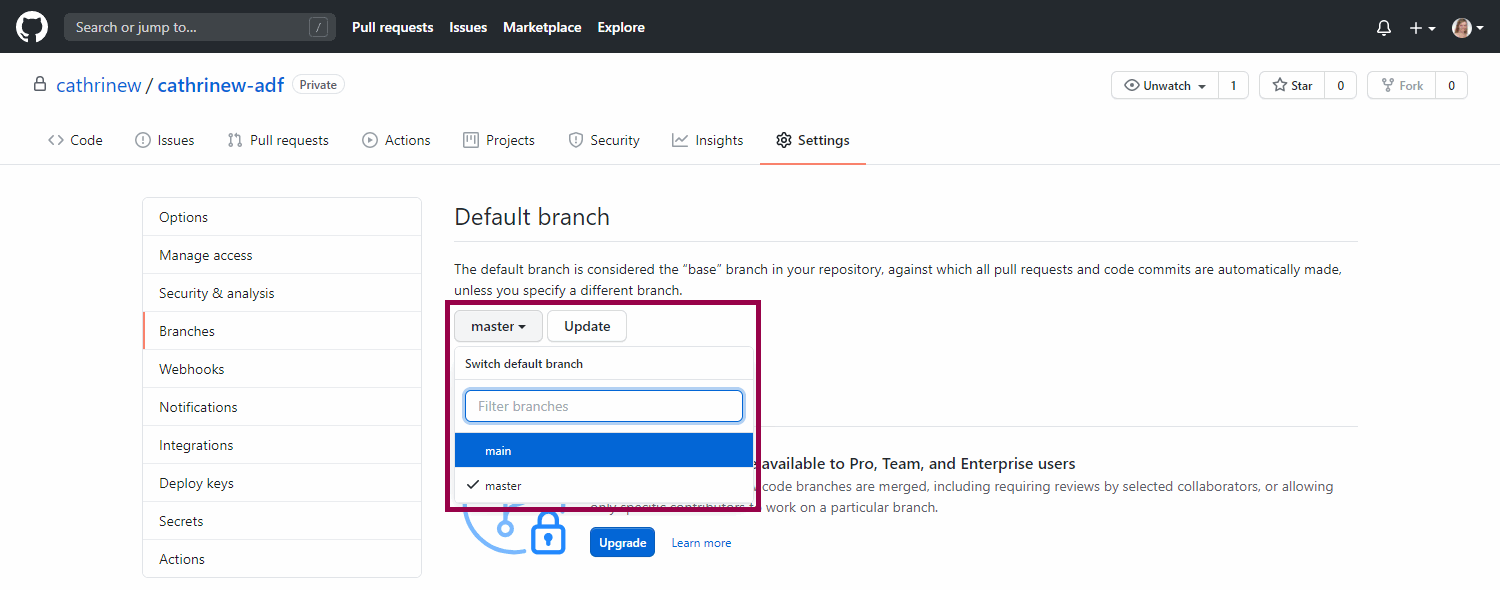
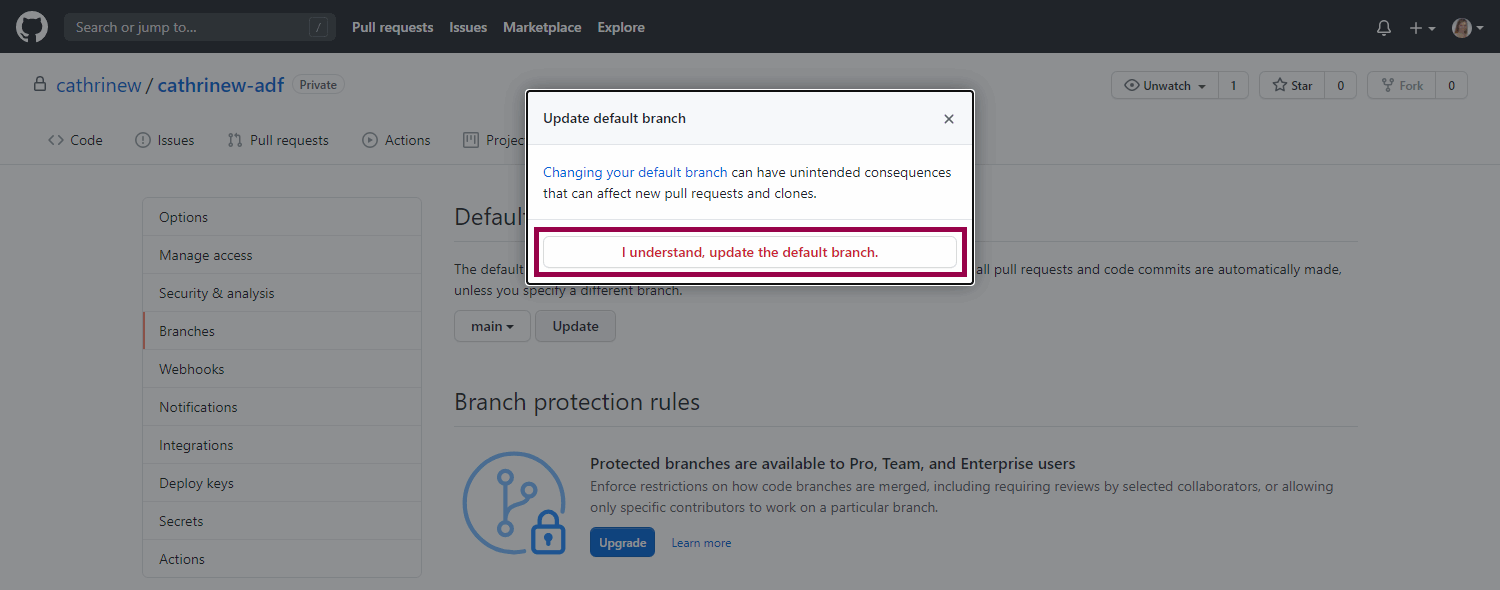
On the default branch page, click on the branch dropdown where it says “master”. Select “main”, then click on Update:
The warning says that changing your default branch can have unintended consequences that can affect new pull requests and clones. Click on I understand:
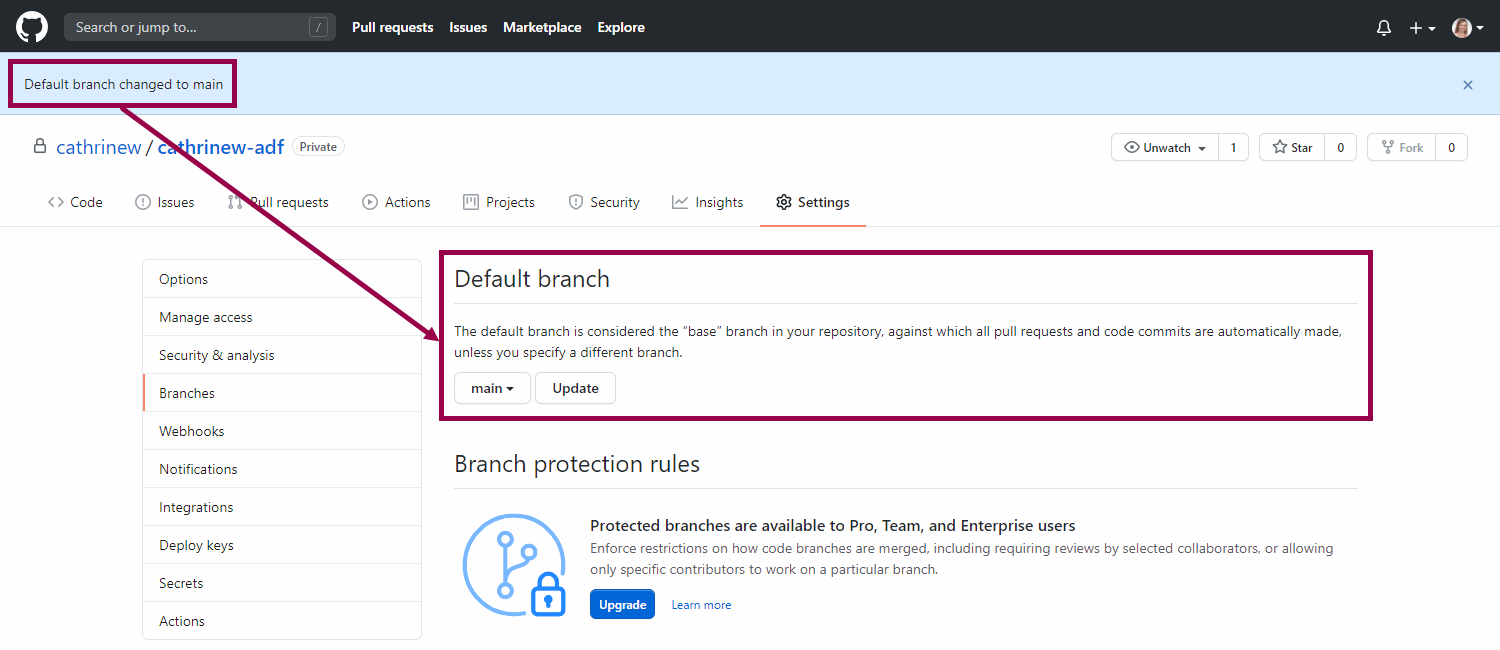
Yay! The default branch has now been changed to “main”:
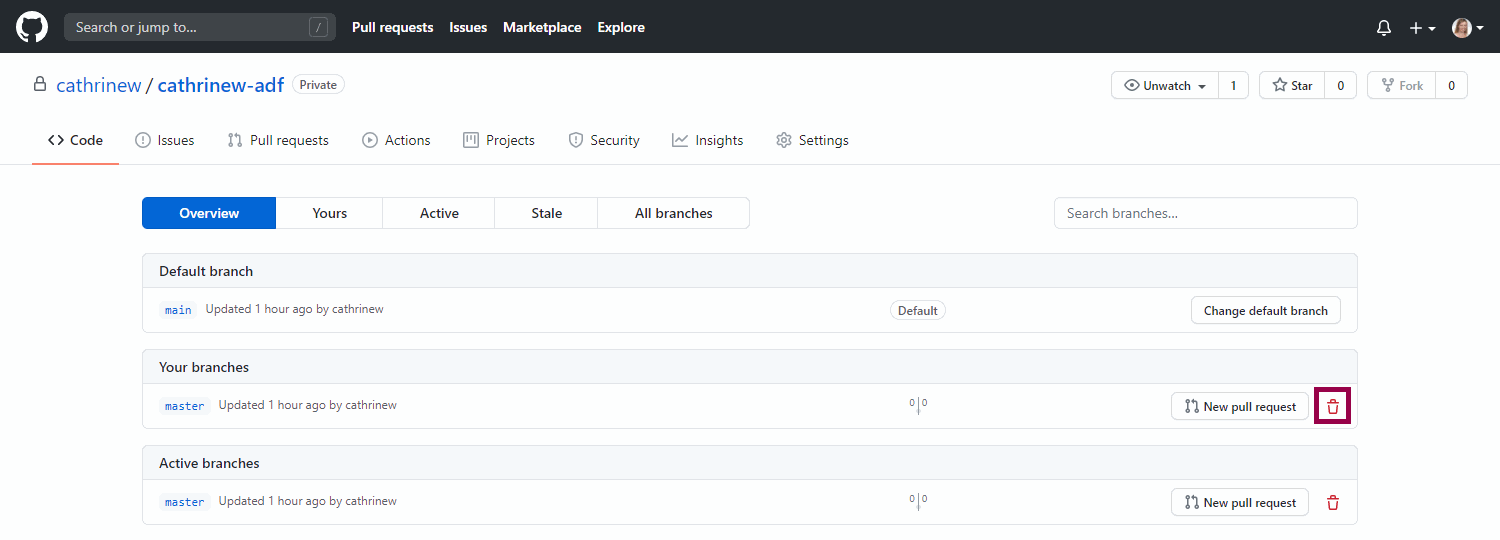
Back in the branches overview, click on the delete icon next to the “master” branch to delete it:
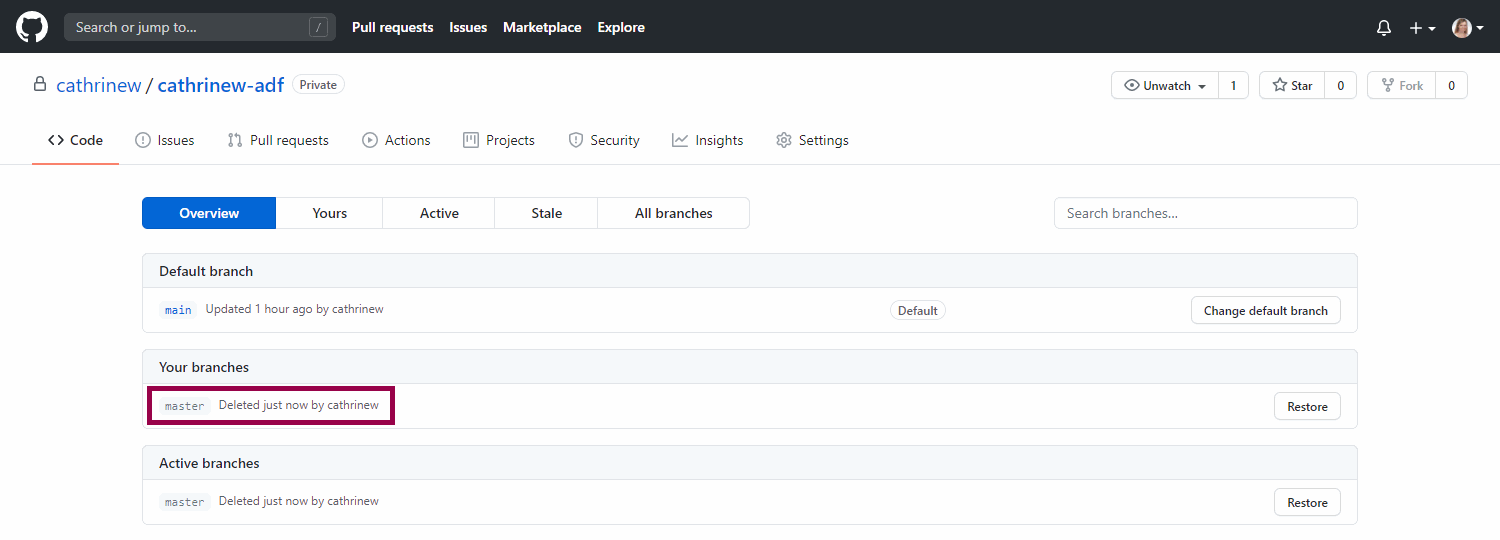
The “master” branch is now deleted:
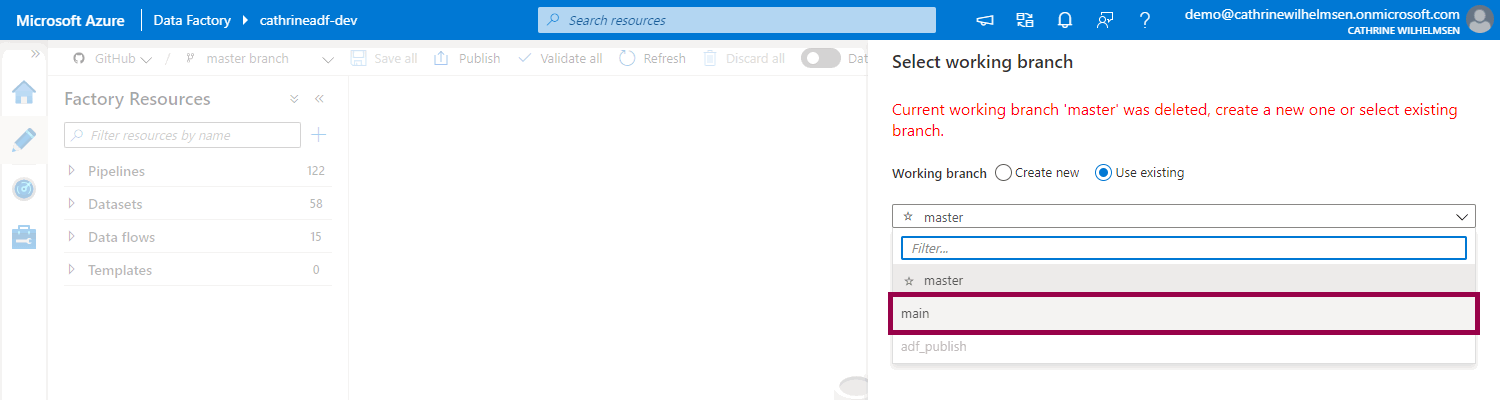
Open or switch back to your Azure Data Factory. If you get a notification that the current working branch was deleted, use the new “main” branch instead:
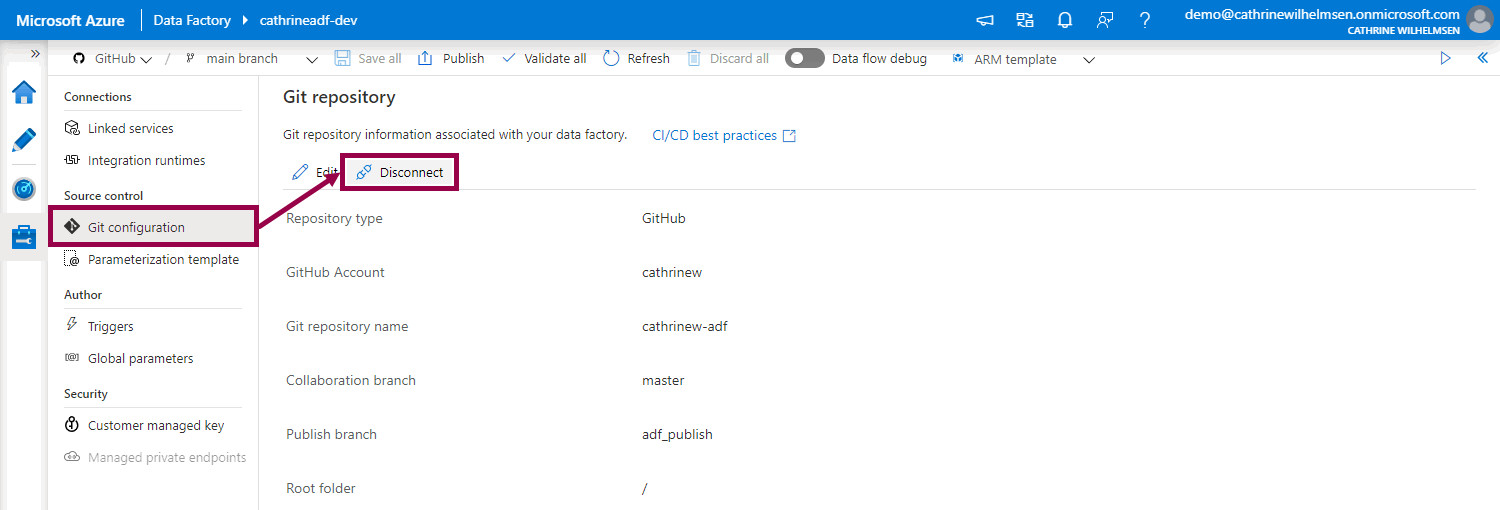
Go to the Manage page and click on Git Configuration. Then click on Disconnect:
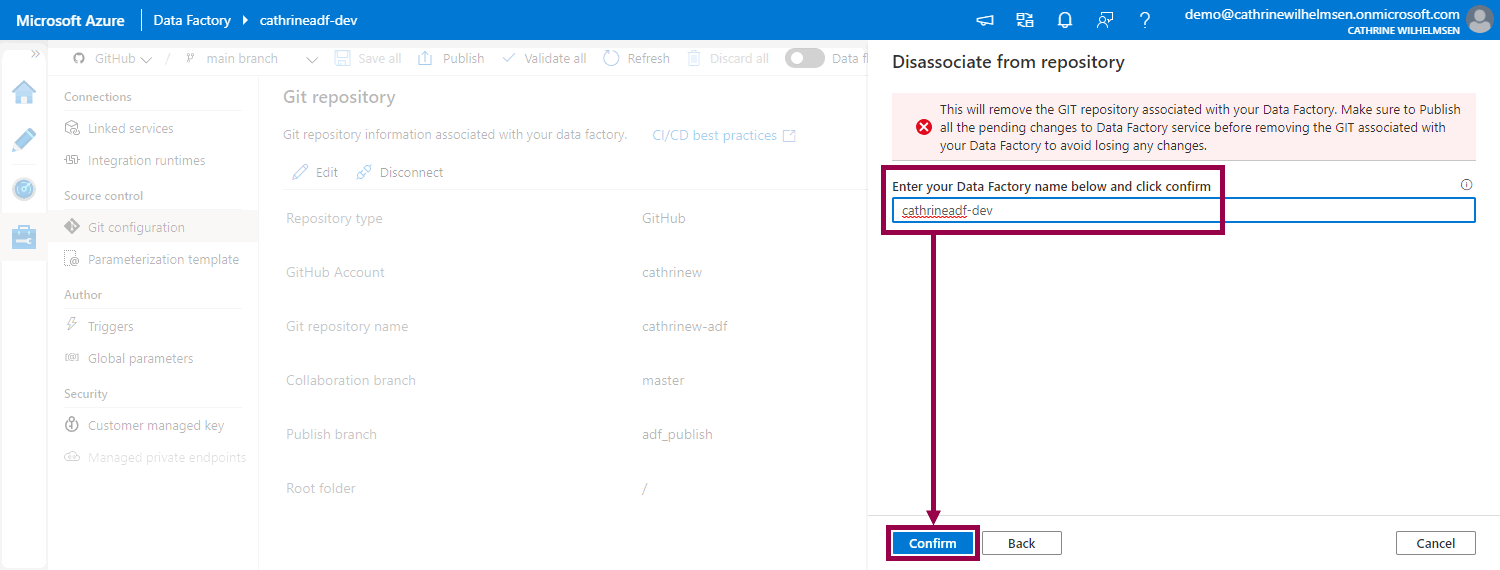
You will see a warning that you should publish all pending changes before disconnecting to avoid losing any changes. I always recommend that you do this just in case, but since we will immediately reconnect to our Git repository, you don’t have to do it in this case. Type the name of your data factory and click on Confirm:
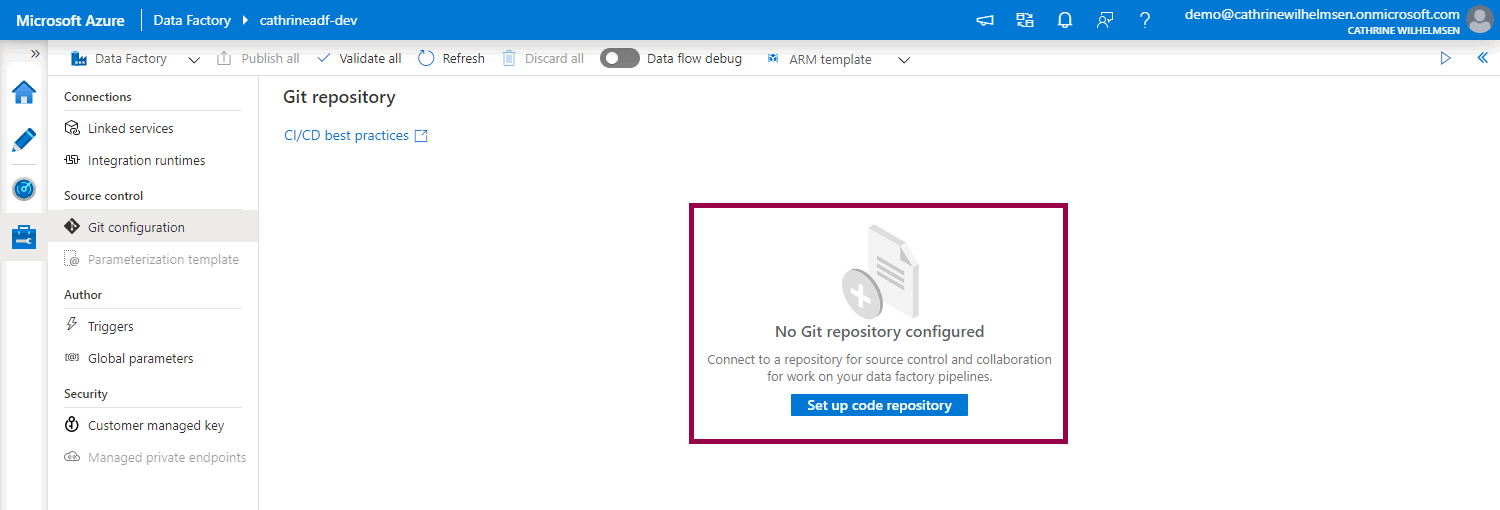
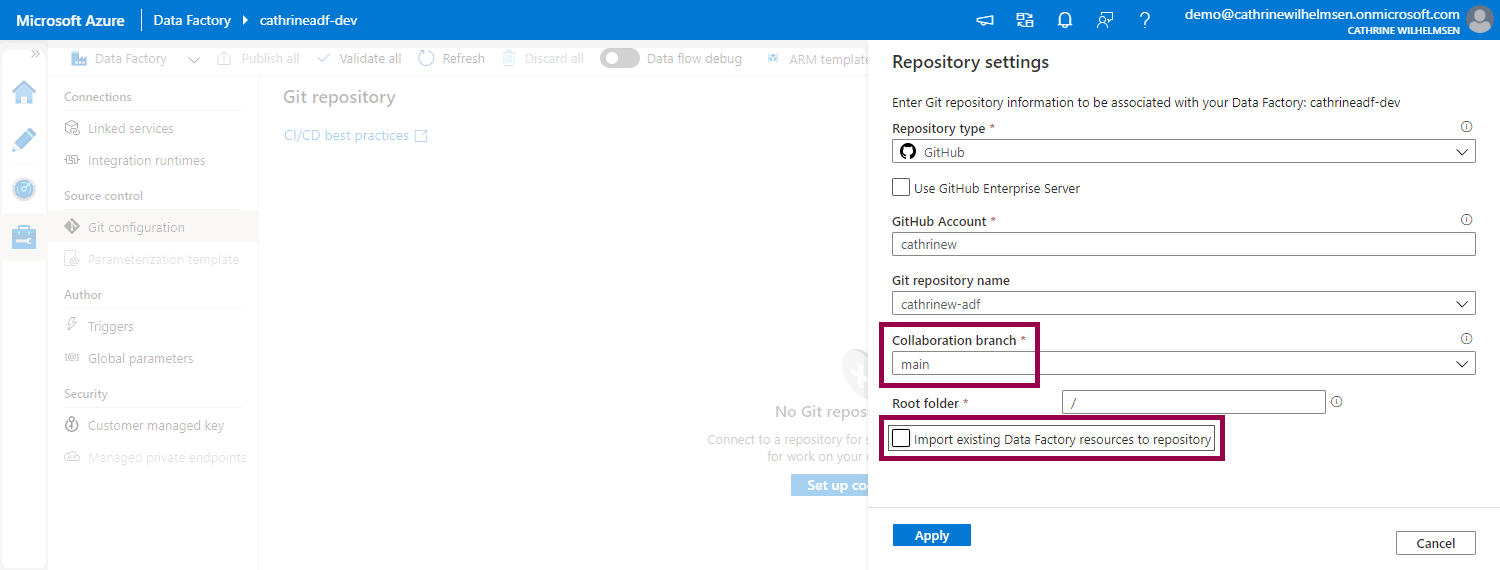
Now we can reconnect. Click on Set up code repository:
Select the new "main" branch as the collaboration branch and make sure you uncheck Import existing Data Factory resources to repository. This ensures that you keep what is in the “main” branch as-is. Then click on Apply:
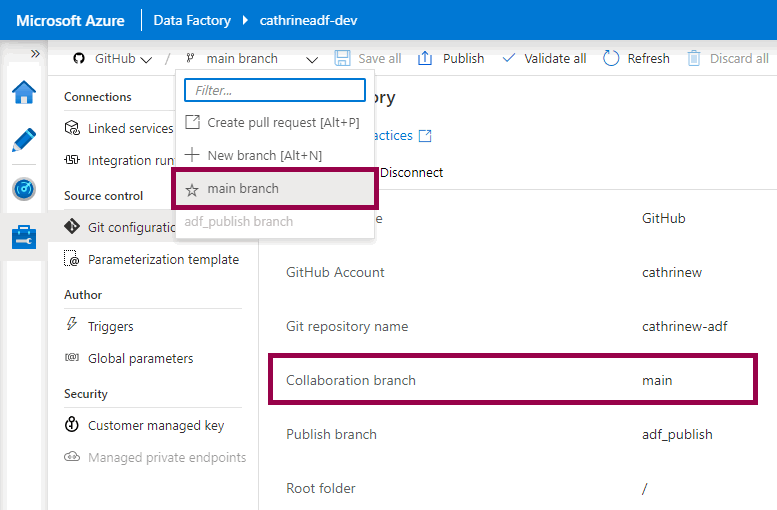
That’s it! The new “main” branch is now the collaboration branch and has a star icon next to it in the branch dropdown:
Azure DevOps

(If you are using GitHub instead, scroll up ☝🏻🤓)
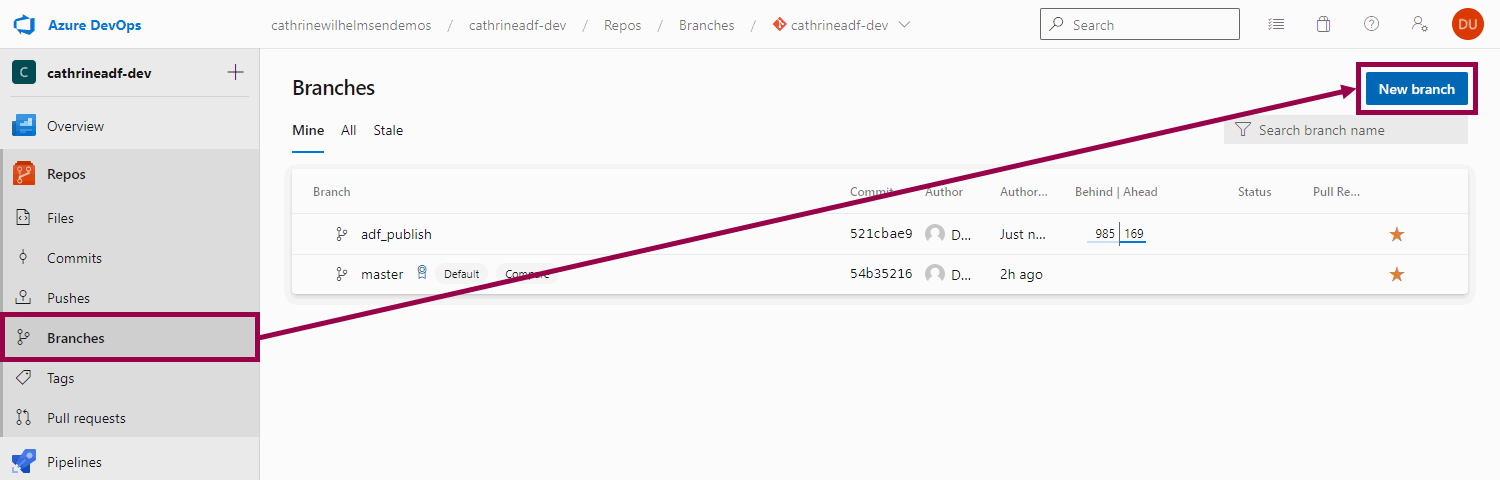
Open your Azure Data Factory Git repository in Azure DevOps. On the Branches page, click on New branch:
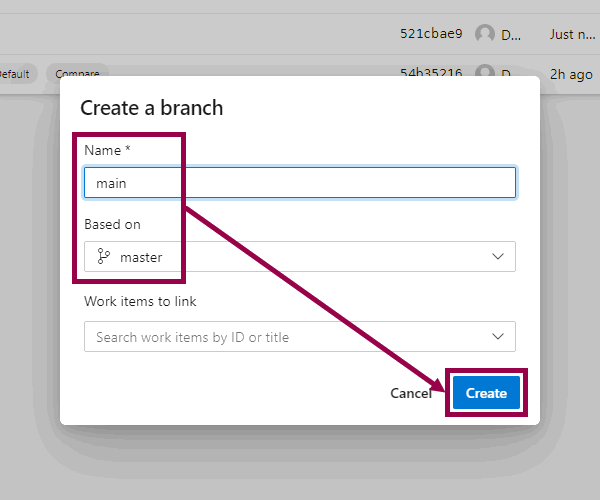
Type “main” as the new branch name, base it on “master”, then click on Create:
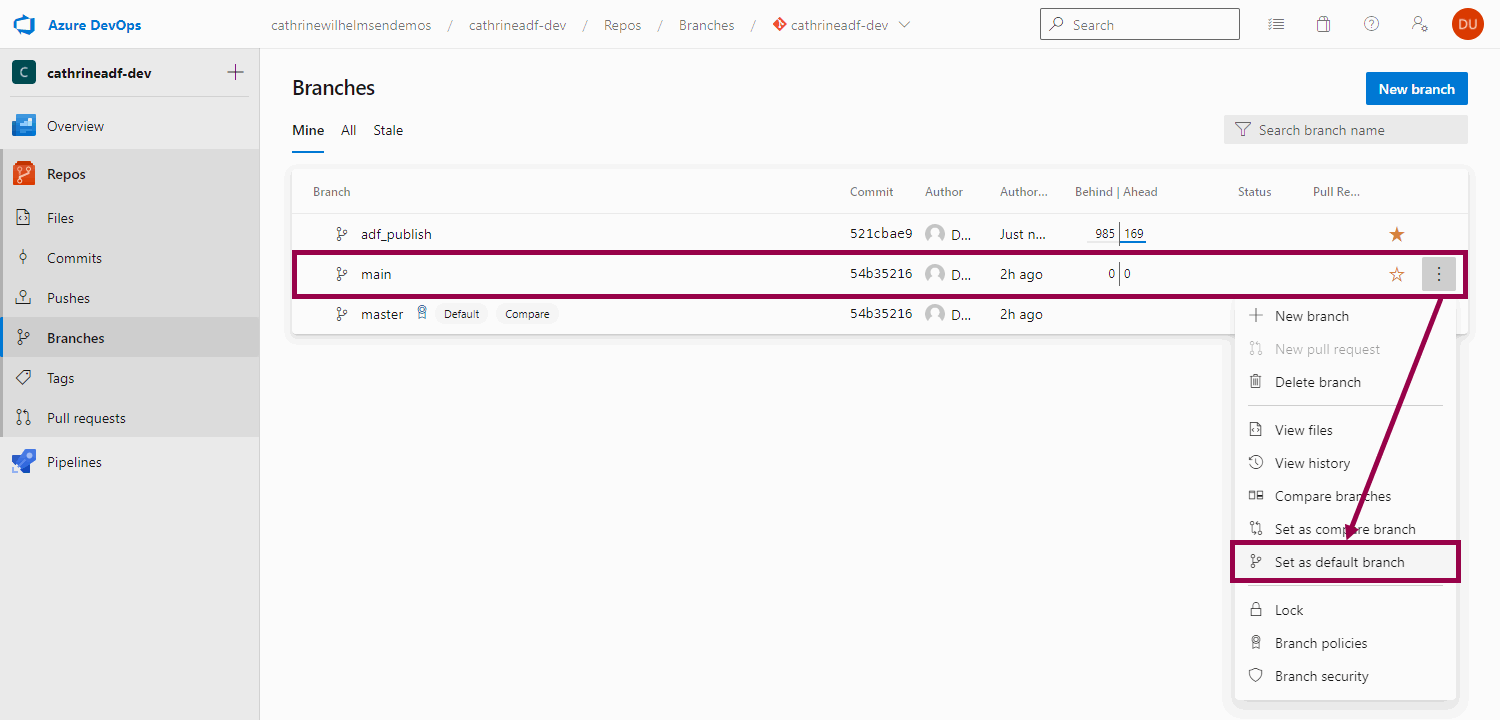
Click on the vertical ellipsis button next to the new “main” branch to open the “More…” menu, then click on Set as default branch:
Yay! The “main” branch is now showing as the new default branch:
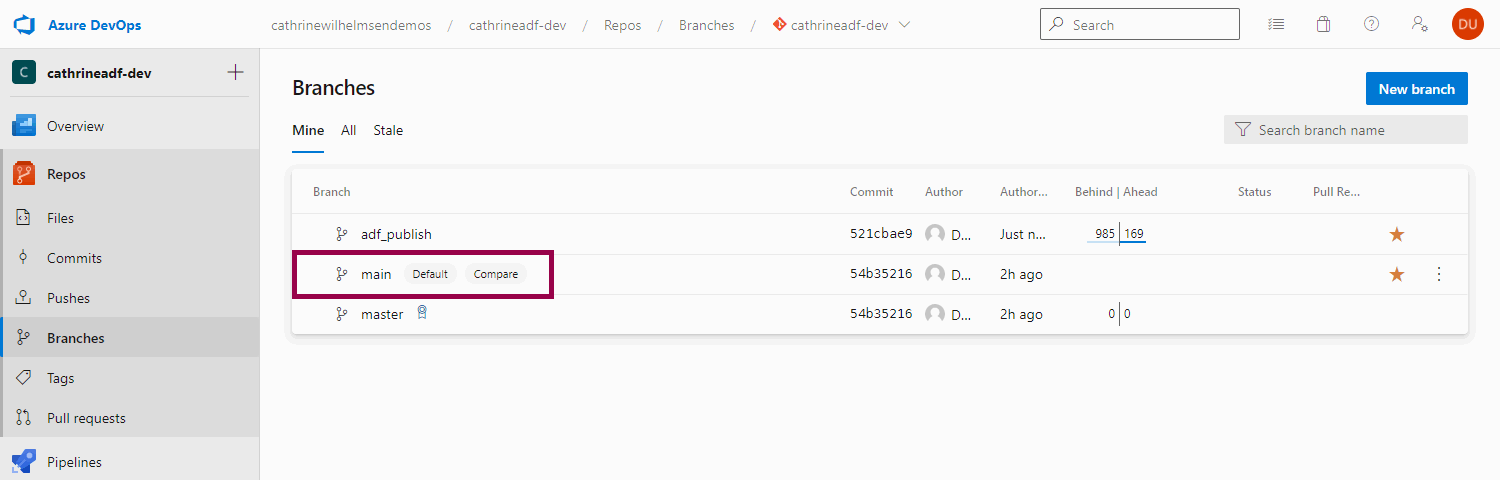
Click on the vertical ellipsis button next to the old “master” branch to open the “More…” menu, then click on Delete branch:

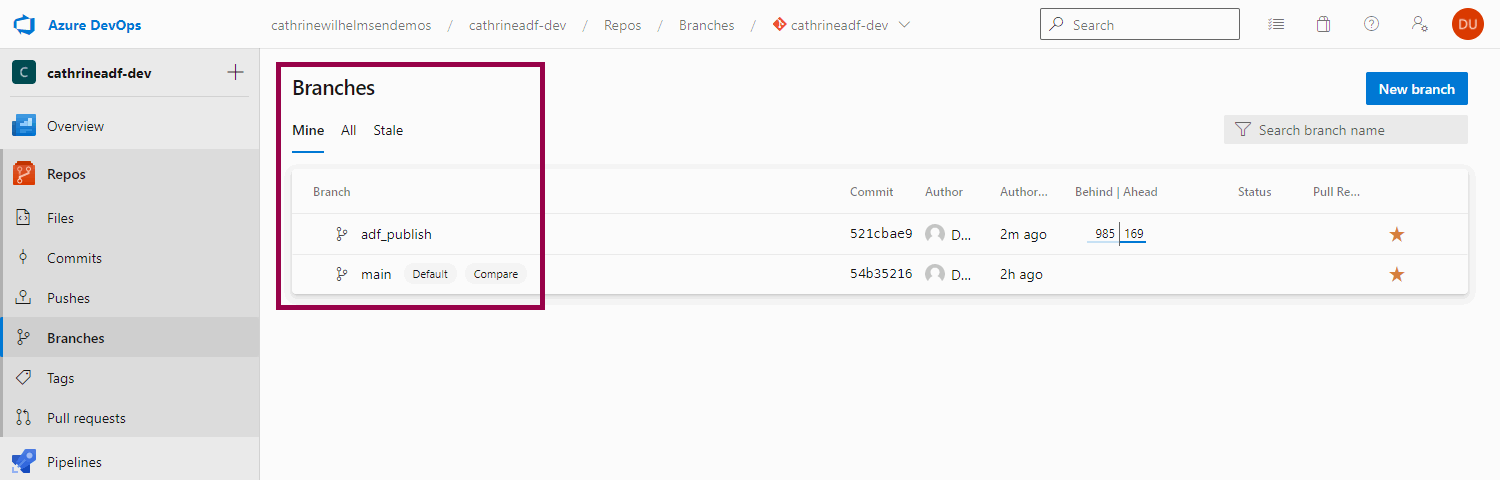
The “master” branch is now deleted:
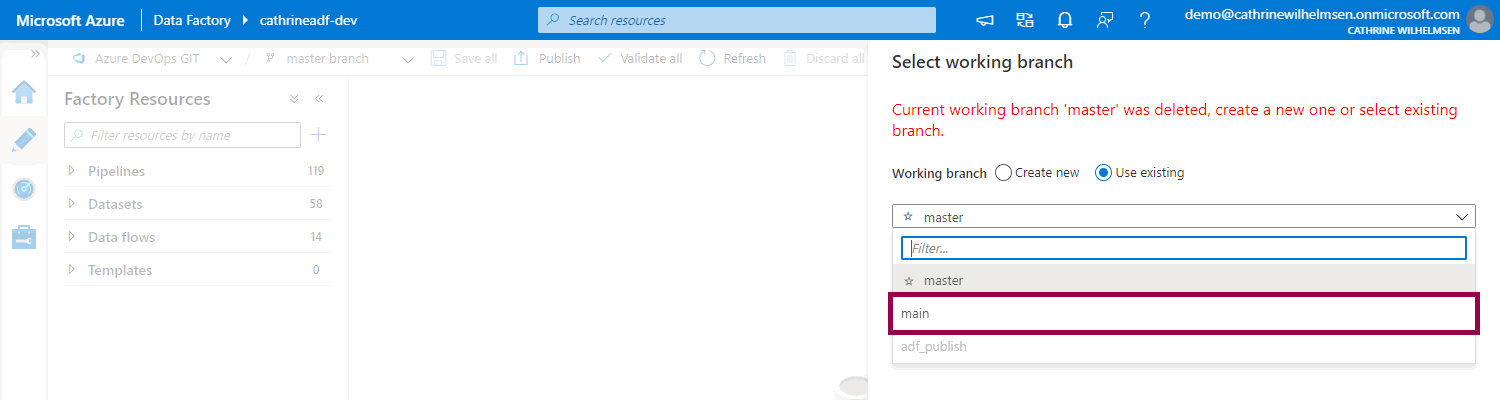
Open or switch back to your Azure Data Factory. If you get a notification that the current working branch was deleted, use the new “main” branch instead:
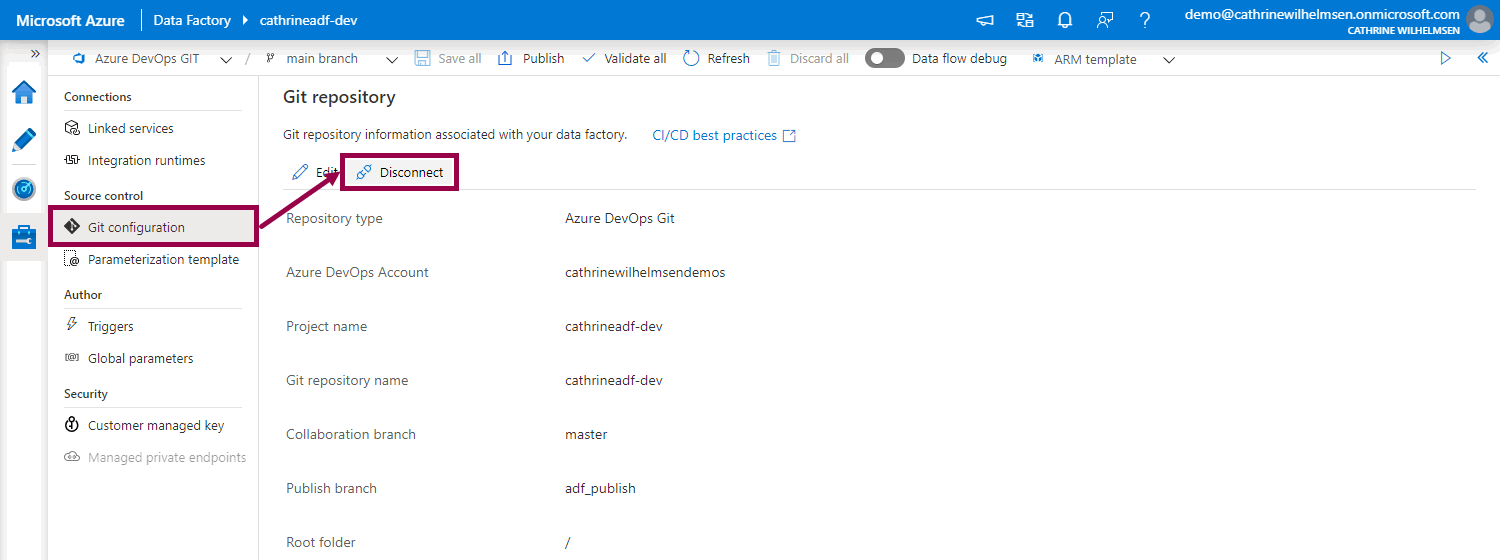
Go to the Manage page and click on Git Configuration. Then click on Disconnect:
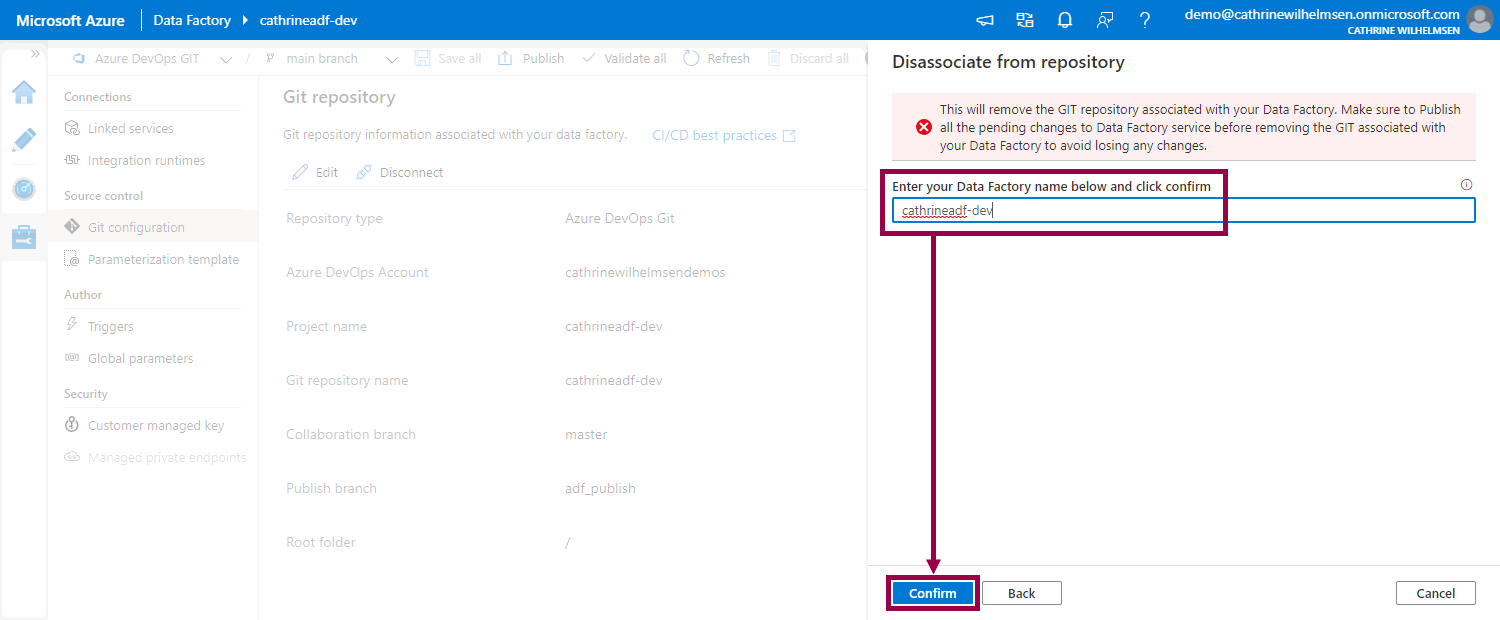
You will see a warning that you should publish all pending changes before disconnecting to avoid losing any changes. I always recommend that you do this just in case, but since we will immediately reconnect to our Git repository, you don’t have to do it in this case. Type the name of your data factory and click on Confirm:
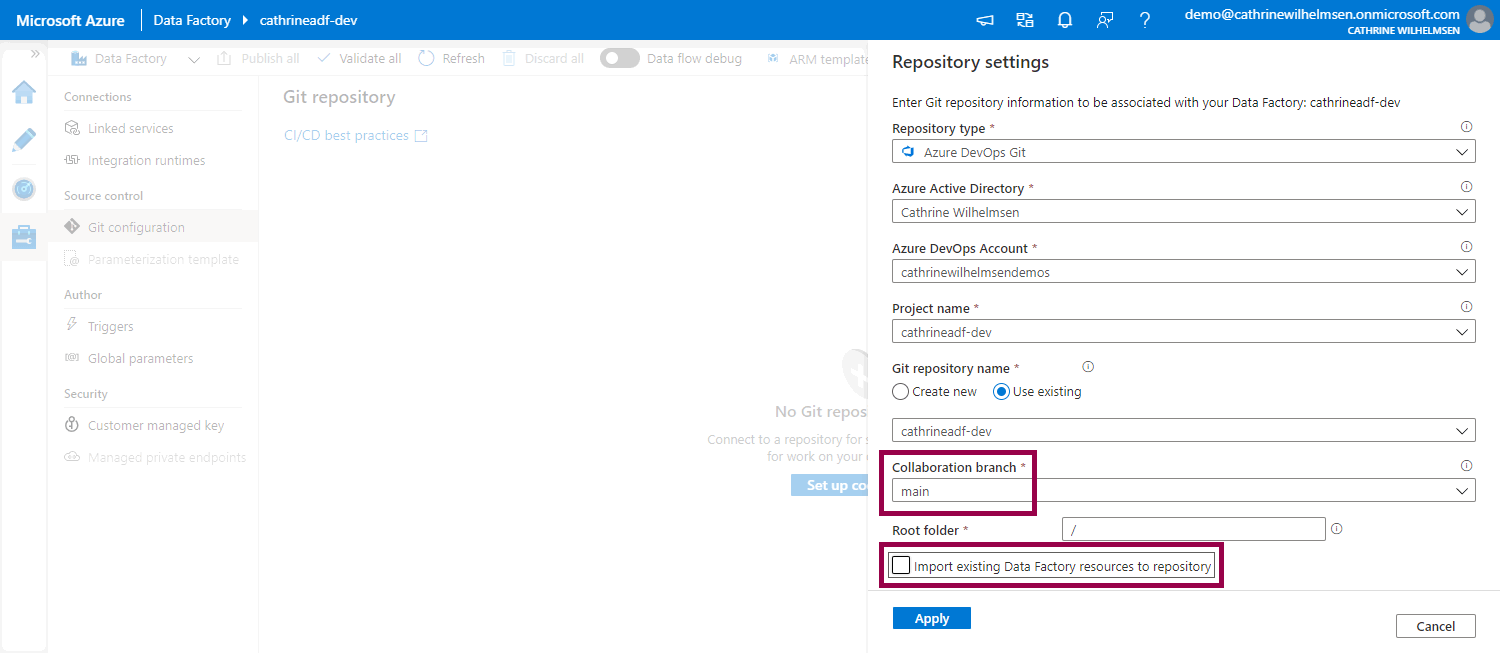
Now we can reconnect. Click on Set up code repository:
Select the new "main" branch as the collaboration branch and make sure you uncheck Import existing Data Factory resources to repository. This ensures that you keep what is in the “main” branch as-is. Then click on Apply:
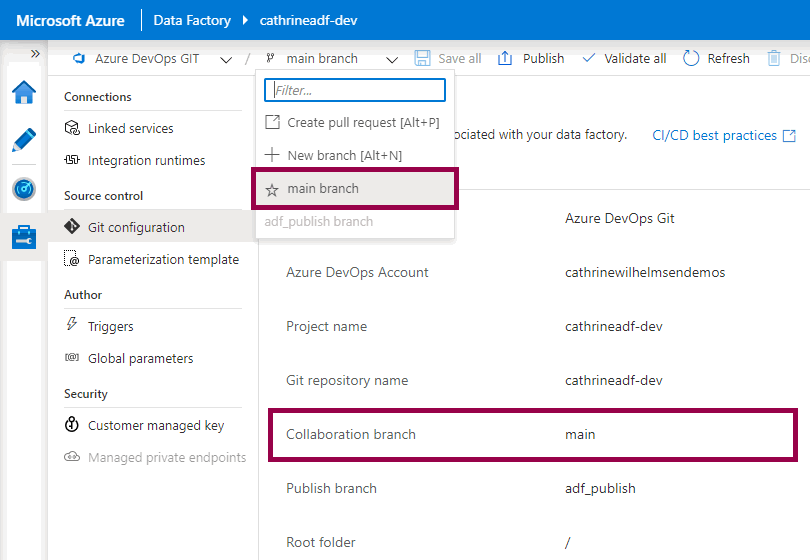
That’s it! The new “main” branch is now the collaboration branch and has a star icon next to it in the branch dropdown:
Summary
In this post, we looked at how to rename the default branch in GitHub and Azure DevOps, and how to reconnect Azure Data Factory to use the new default branch as the collaboration branch:
- Create a new “main” branch in your Git repository
- Set the new “main” branch as the default branch in your Git repository
- Delete the old “master” branch in your Git repository
- Disconnect from your Git repository in Azure Data Factory
- Reconnect to your Git repository in Azure Data Factory using the new “main” branch as the collaboration branch
That’s it! 🤓
About the Author
 Cathrine Wilhelmsen is a Microsoft Data Platform MVP, international speaker, author, blogger, organizer, and chronic volunteer. She loves data and coding, as well as teaching and sharing knowledge - oh, and sci-fi, gaming, coffee and chocolate 🤓