Ingest and Explore LEGO Datasets using Pipelines and Serverless SQL in Azure Synapse Analytics

In the April session of the Azure Synapse Analytics and Microsoft MVP series, I got to show one of my favorite demos: ingesting and exploring LEGO datasets! 🤓 In just a few minutes, I grab a compressed file from the web, decompress it, store it as a Parquet file in my data lake, and run SQL queries on it using Serverless SQL. It really is that simple:
If you want to try this demo yourself, you can follow the detailed steps below. Have fun! 😃
Prerequisites
Azure Subscription: If you don’t already have an Azure Subscription, you can create a free account on azure.microsoft.com/free. Some of the Azure services will always be free, while some are free for the first 12 months. You get $200 worth of credits that last 30 days so you can test and learn the paid Azure services.
Azure Synapse Analytics workspace: You can follow Microsoft’s Quickstart or Microsoft’s other Quickstart 😅 While creating the Azure Synapse Analytics workspace, you will also create an Azure Data Lake Storage Gen2 Account. In my video, I had created a separate Data Lake for my demo data. However, in the steps below, I will keep it simple and just use the primary storage account.
LEGO Datasets from Rebrickable
LEGO! Yay! I love LEGO. Rebrickable will show you which LEGO sets you can build from the sets and parts you already own.
They also have a database of all official LEGO sets and parts (including themes and colors) that you can download for free from rebrickable.com/downloads. The database consists of multiple compressed CSV files which are updated daily:
- colors.csv.gz
- elements.csv.gz
- inventories.csv.gz
- inventory_parts.csv.gz
- inventory_sets.csv.gz
- inventory_minifigs.csv.gz
- minifigs.csv.gz
- part_categories.csv.gz
- part_relationships.csv.gz
- parts.csv.gz
- sets.csv.gz
- themes.csv.gz
Ingesting LEGO Datasets using Pipelines in Azure Synapse Analytics
In this example, we are going to ingest the sets.csv.gz file from Rebrickable into a container called raw in our Azure Data Lake Storage Account.
From the Azure Synapse Analytics Home page, click Ingest:
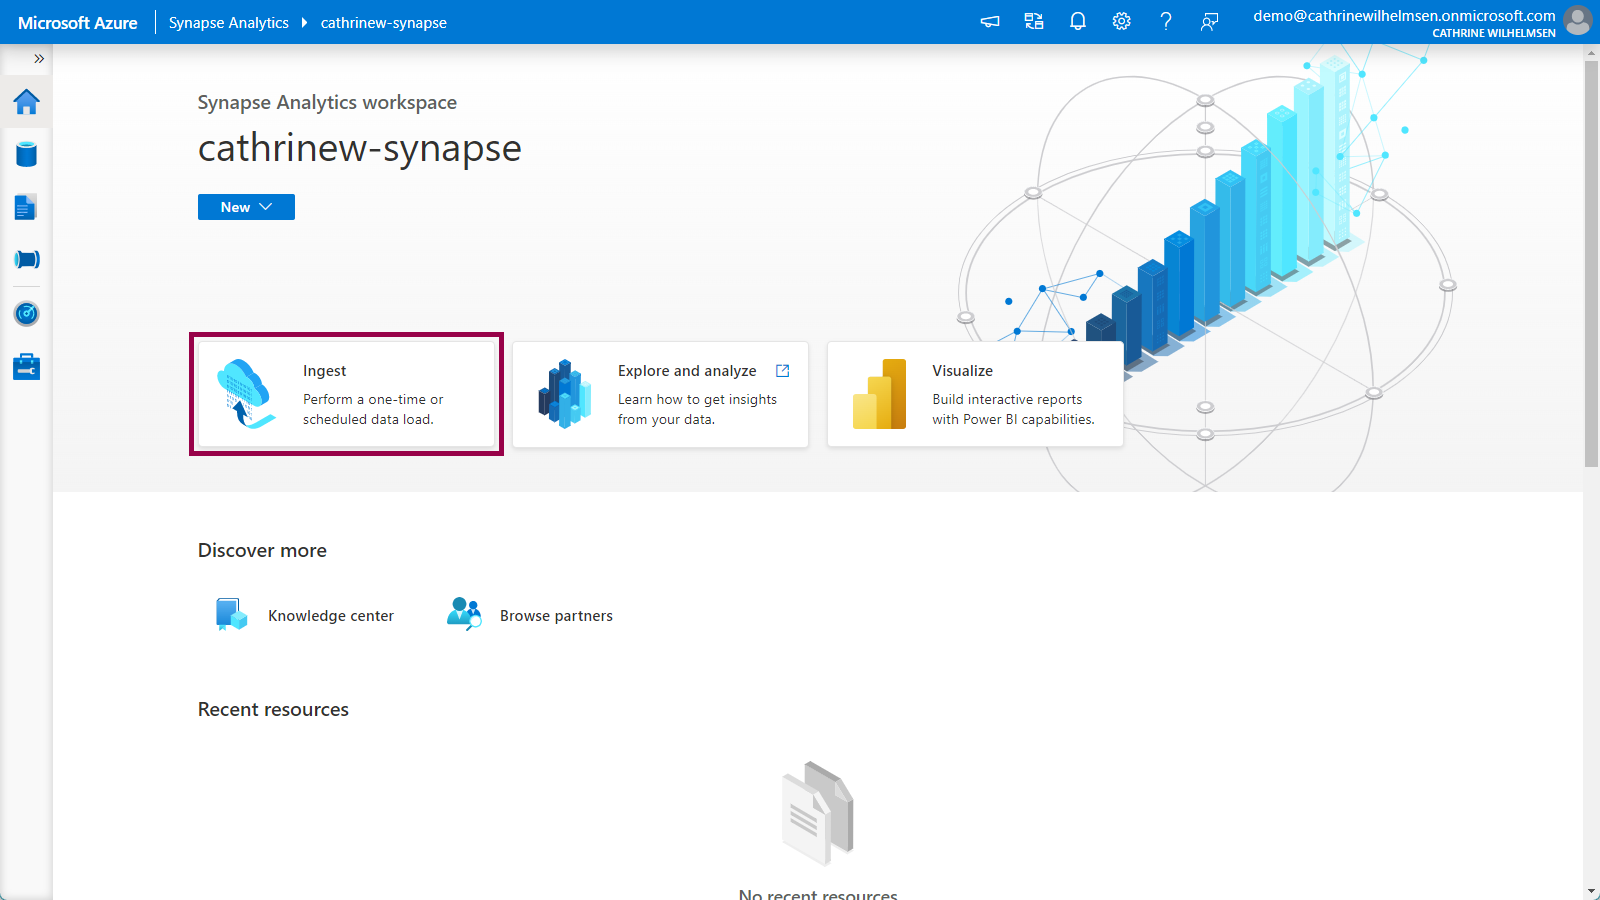
This opens the Copy Data Tool. Let’s walk through each step!
1. Properties
On the Properties page, choose the built-in copy task. This will create a single pipeline. (The other option, metadata-driven copy task, was released in July 2021. It will create a full, dynamic, metadata-driven framework.) Keep the default run once now option:
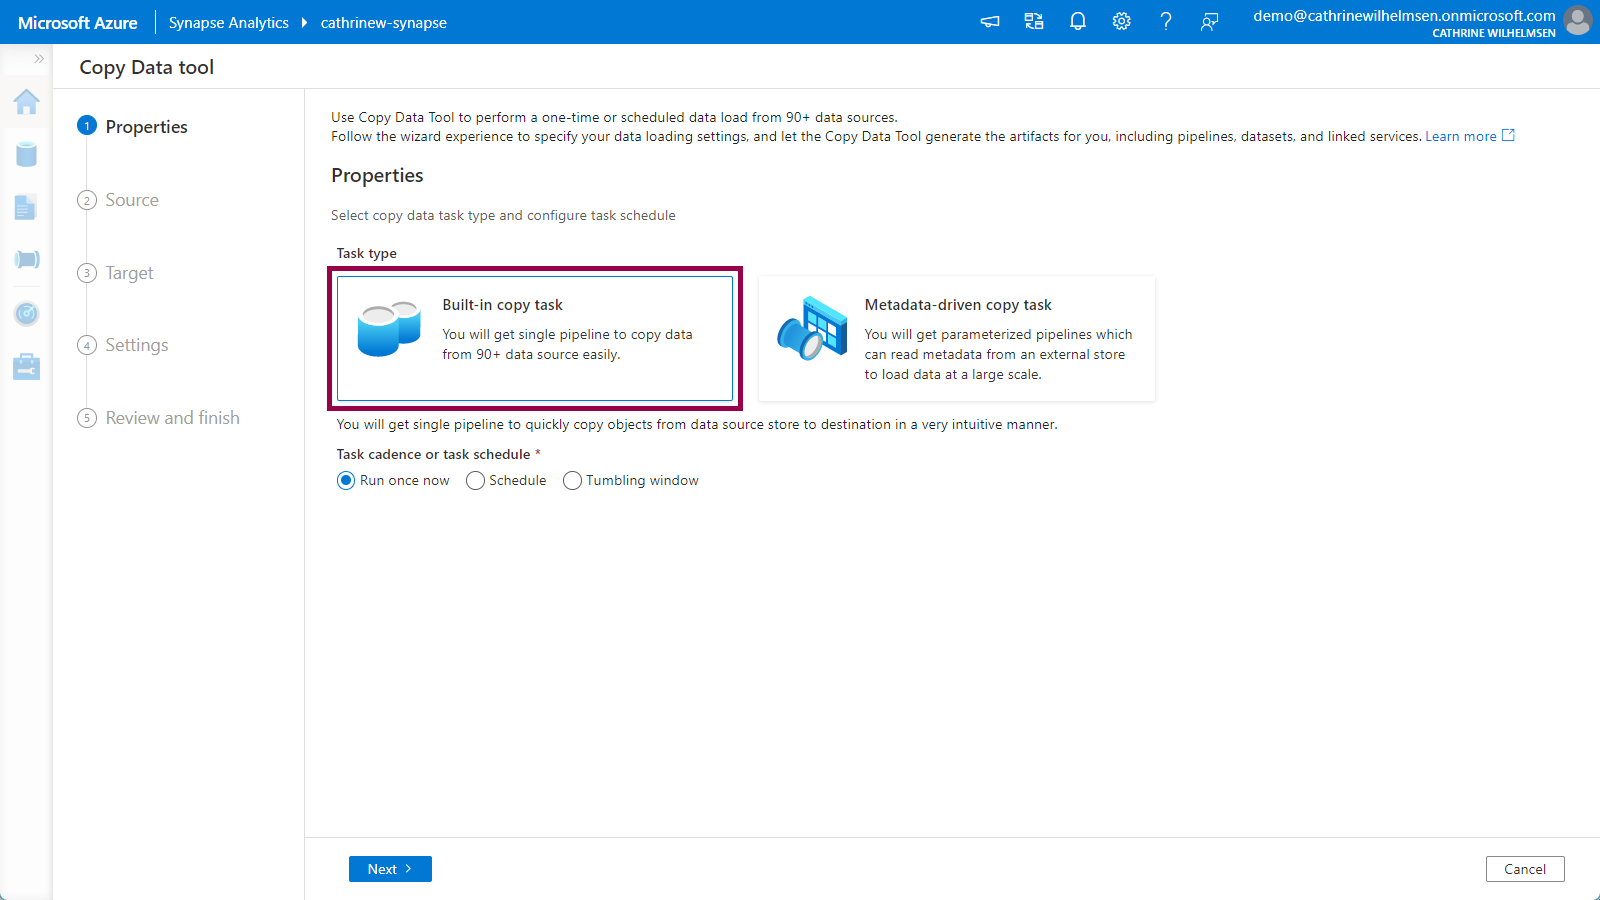
Click next to move on to the Source properties.
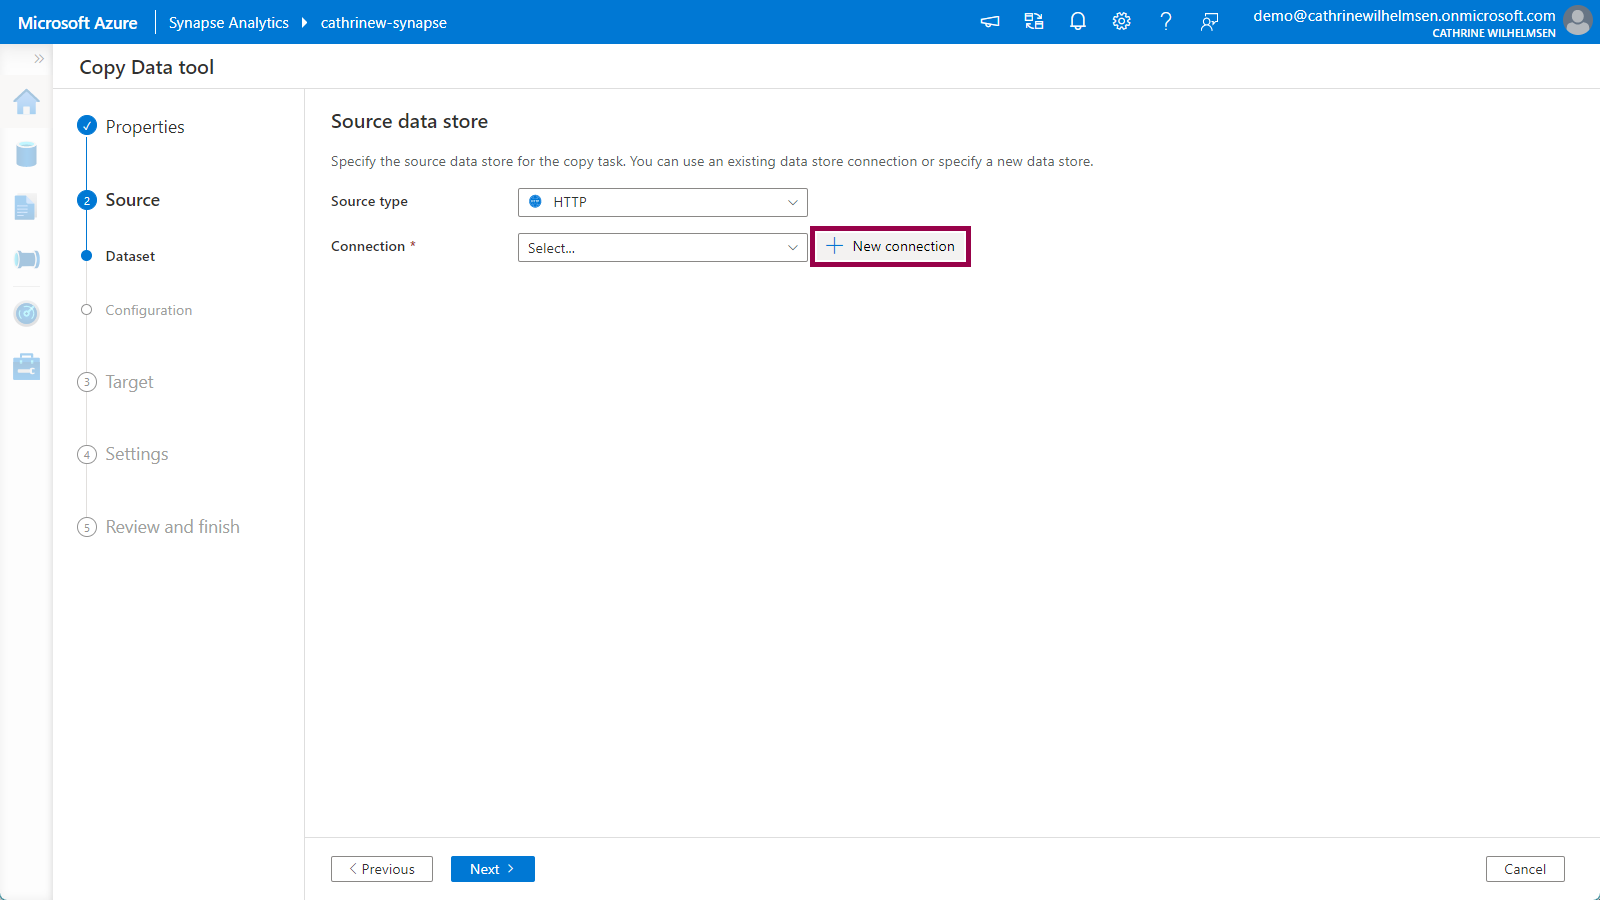
2. Source
On the Source Dataset page, choose HTTP from the source type dropdown, then click new connection:
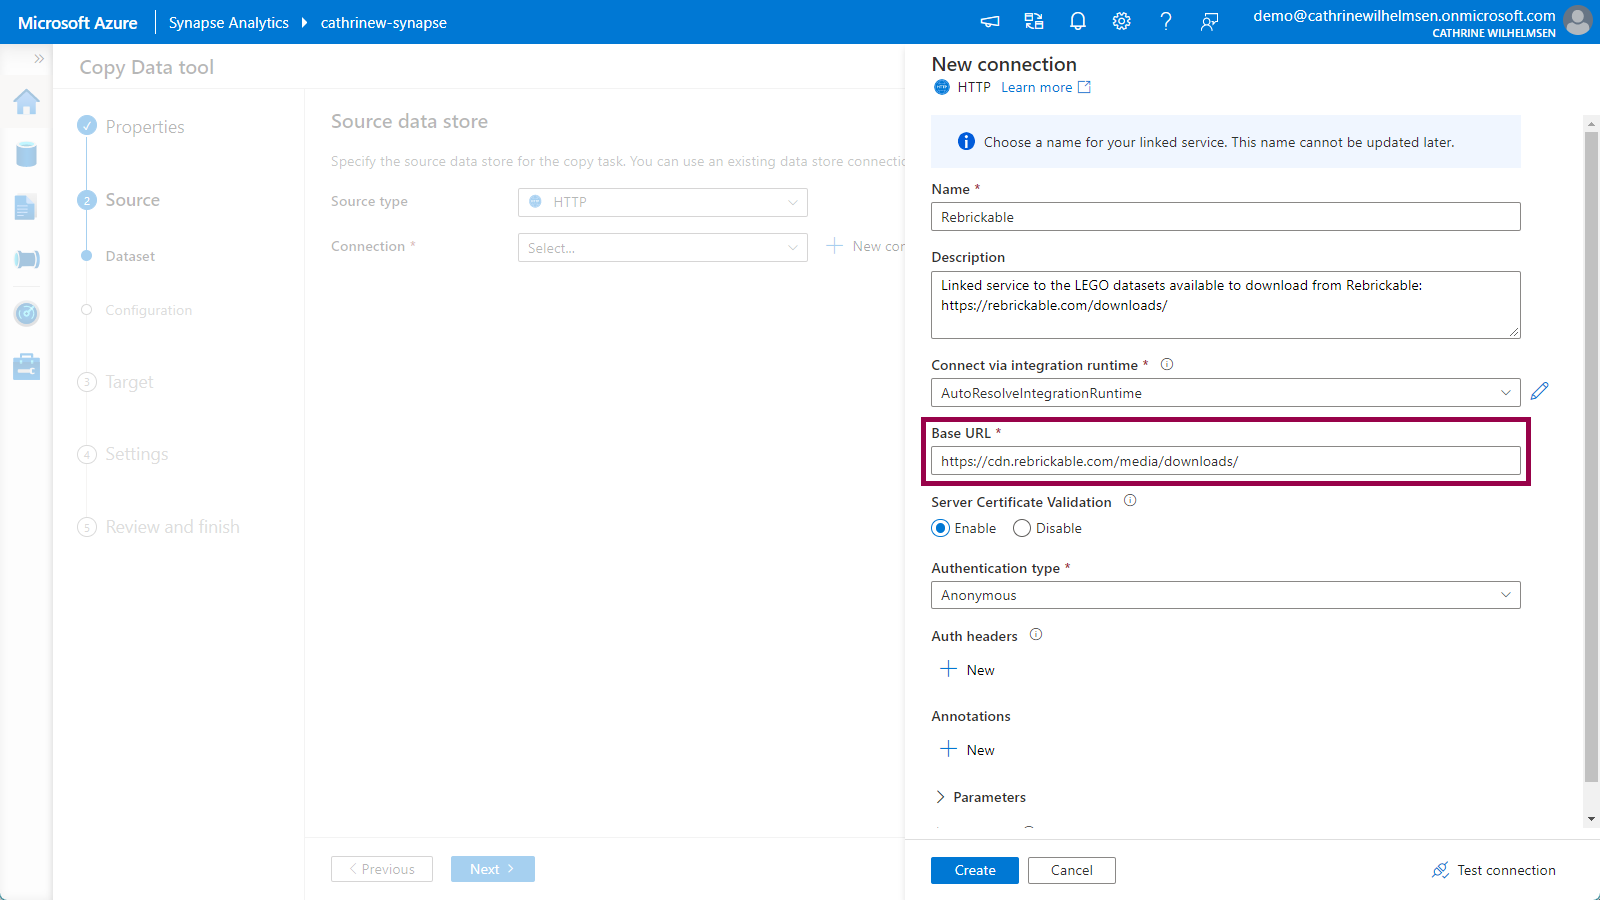
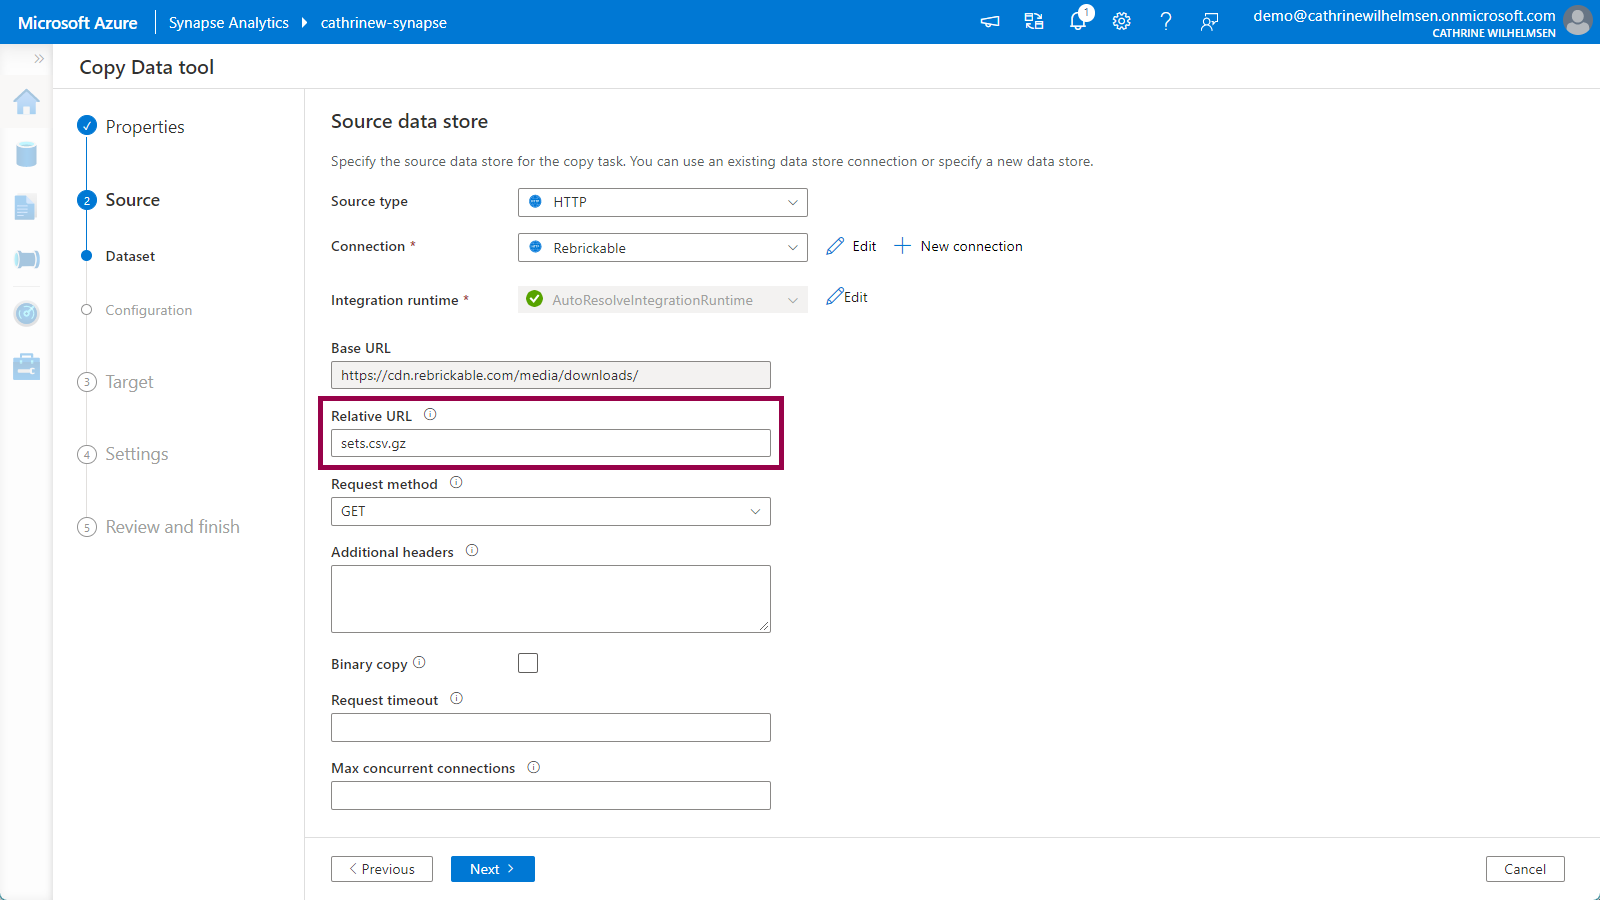
Give the linked service a name and description, and use the base URL https://cdn.rebrickable.com/media/downloads/. (You can find this URL by inspecting the links on rebrickable.com/downloads. Keep the last slash.) Change authentication type to anonymous. Click create:
Since we specified the base URL in the linked service, we only have to specify the file name sets.csv.gz in the relative URL. Keep the other default options. Click next:
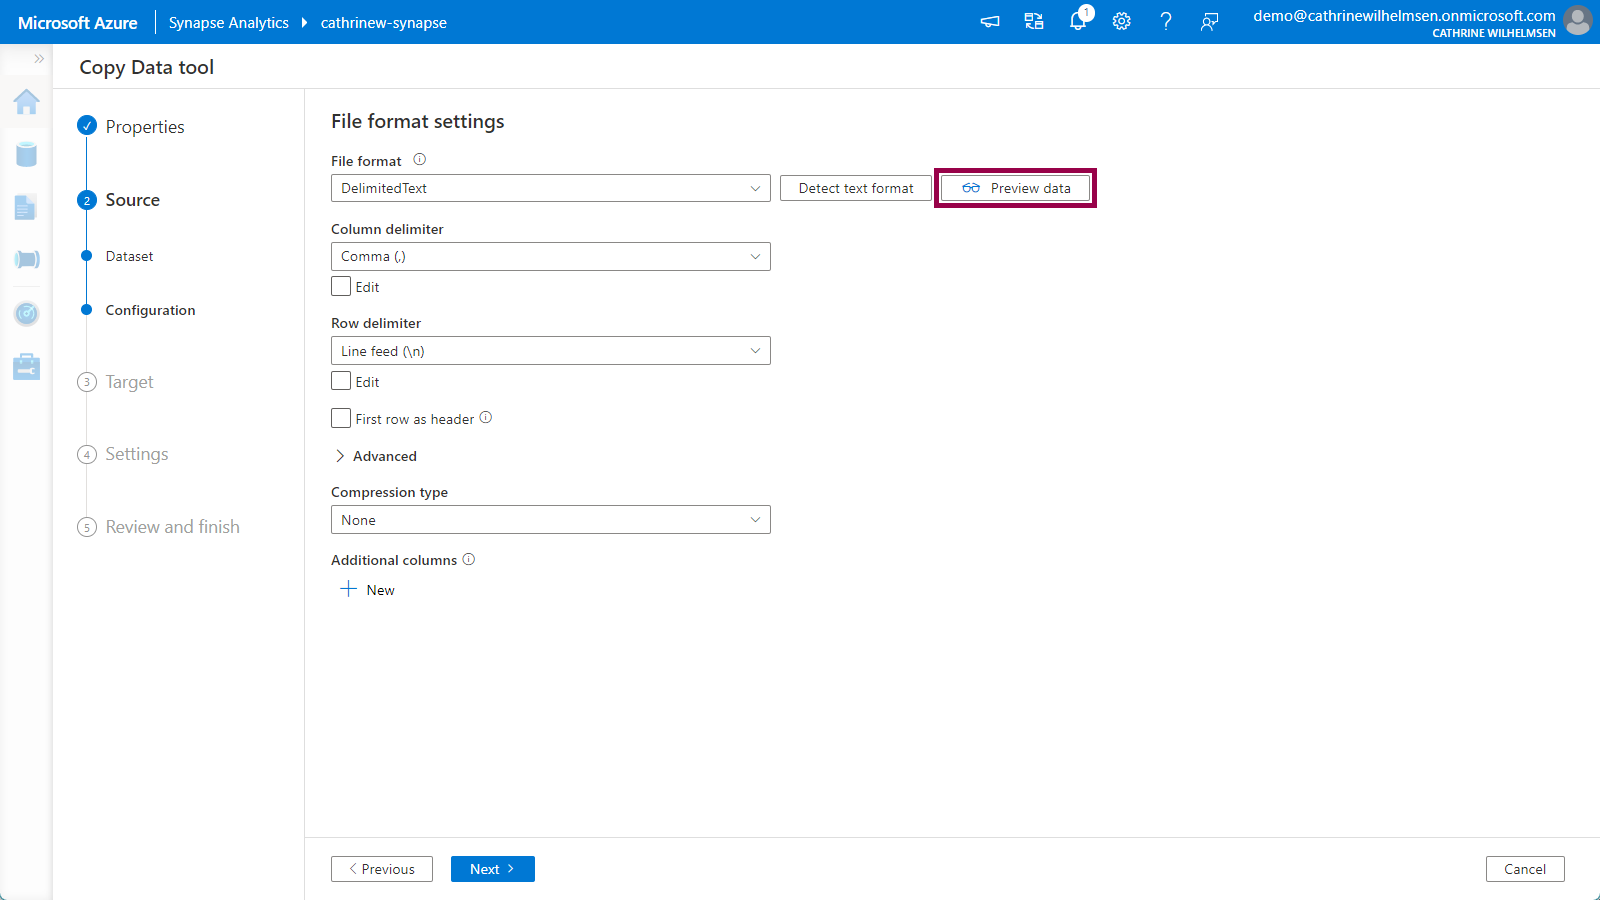
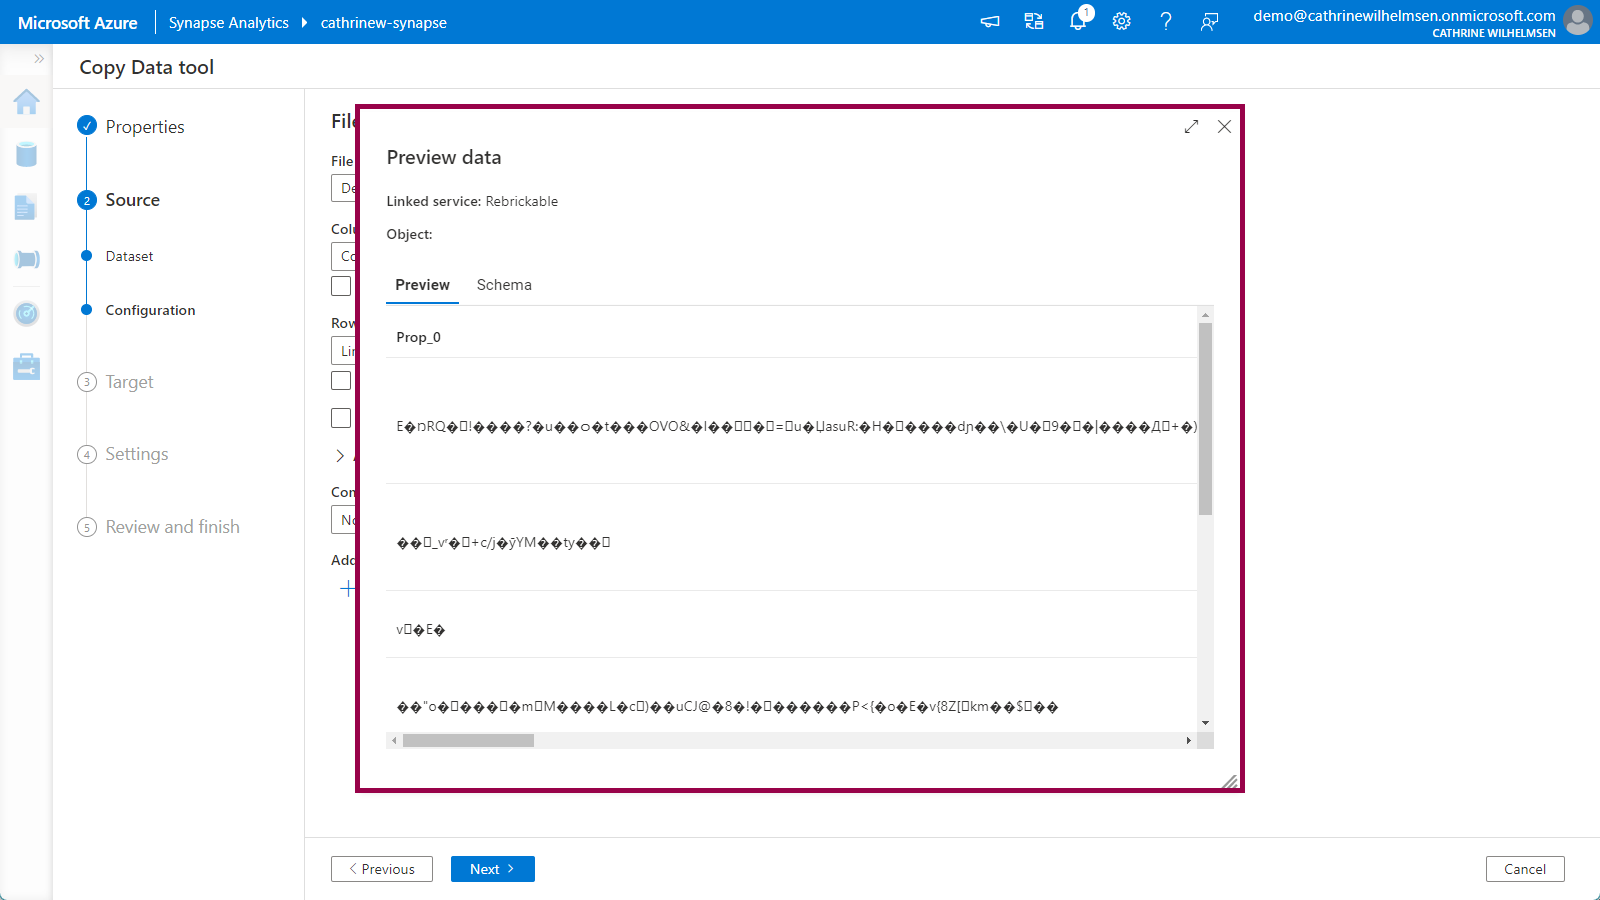
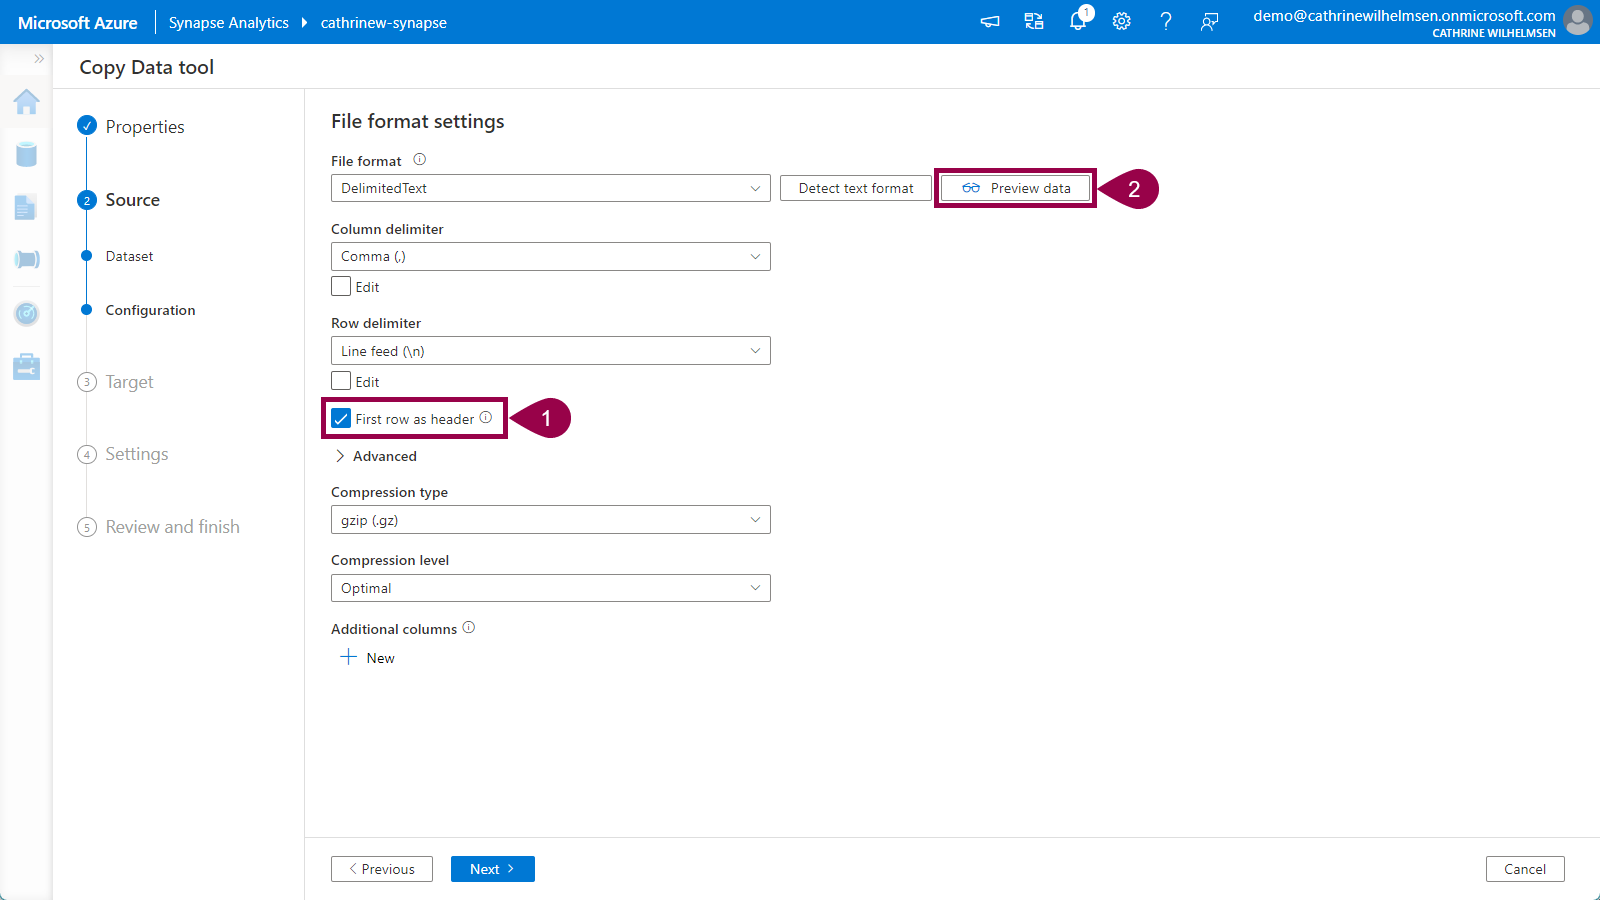
On the Source Configuration page, we have to specify the file format settings. If we immediately click on preview data, nothing really makes sense…
Let’s fix that! Change the compression type to gzip (.gz), and set the compression level to optimal. Click detect text format:
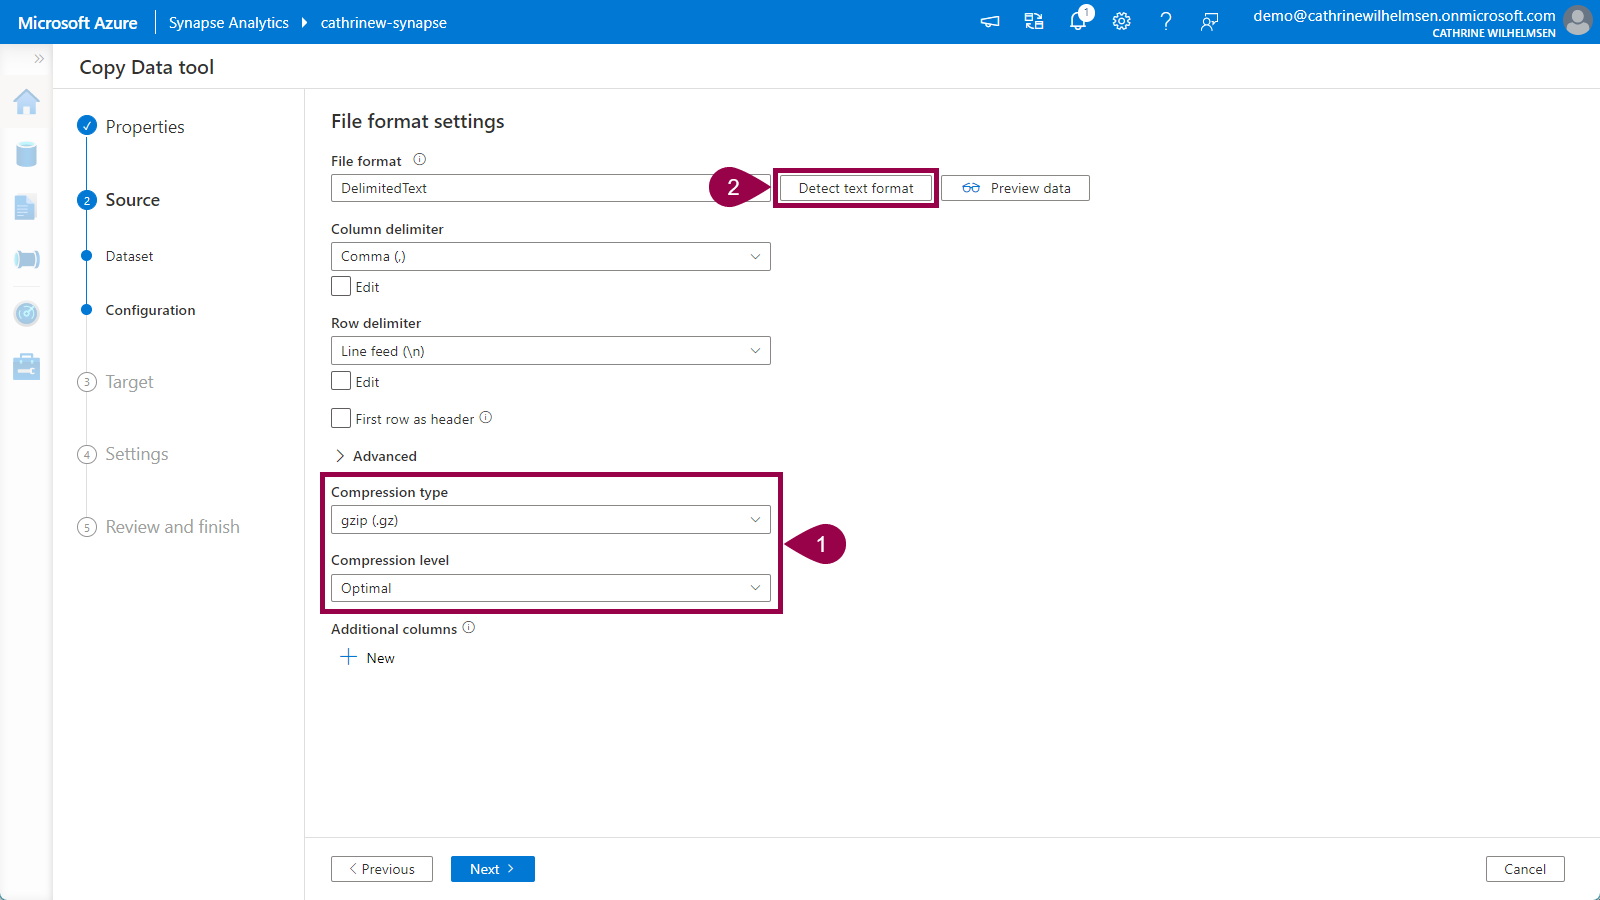
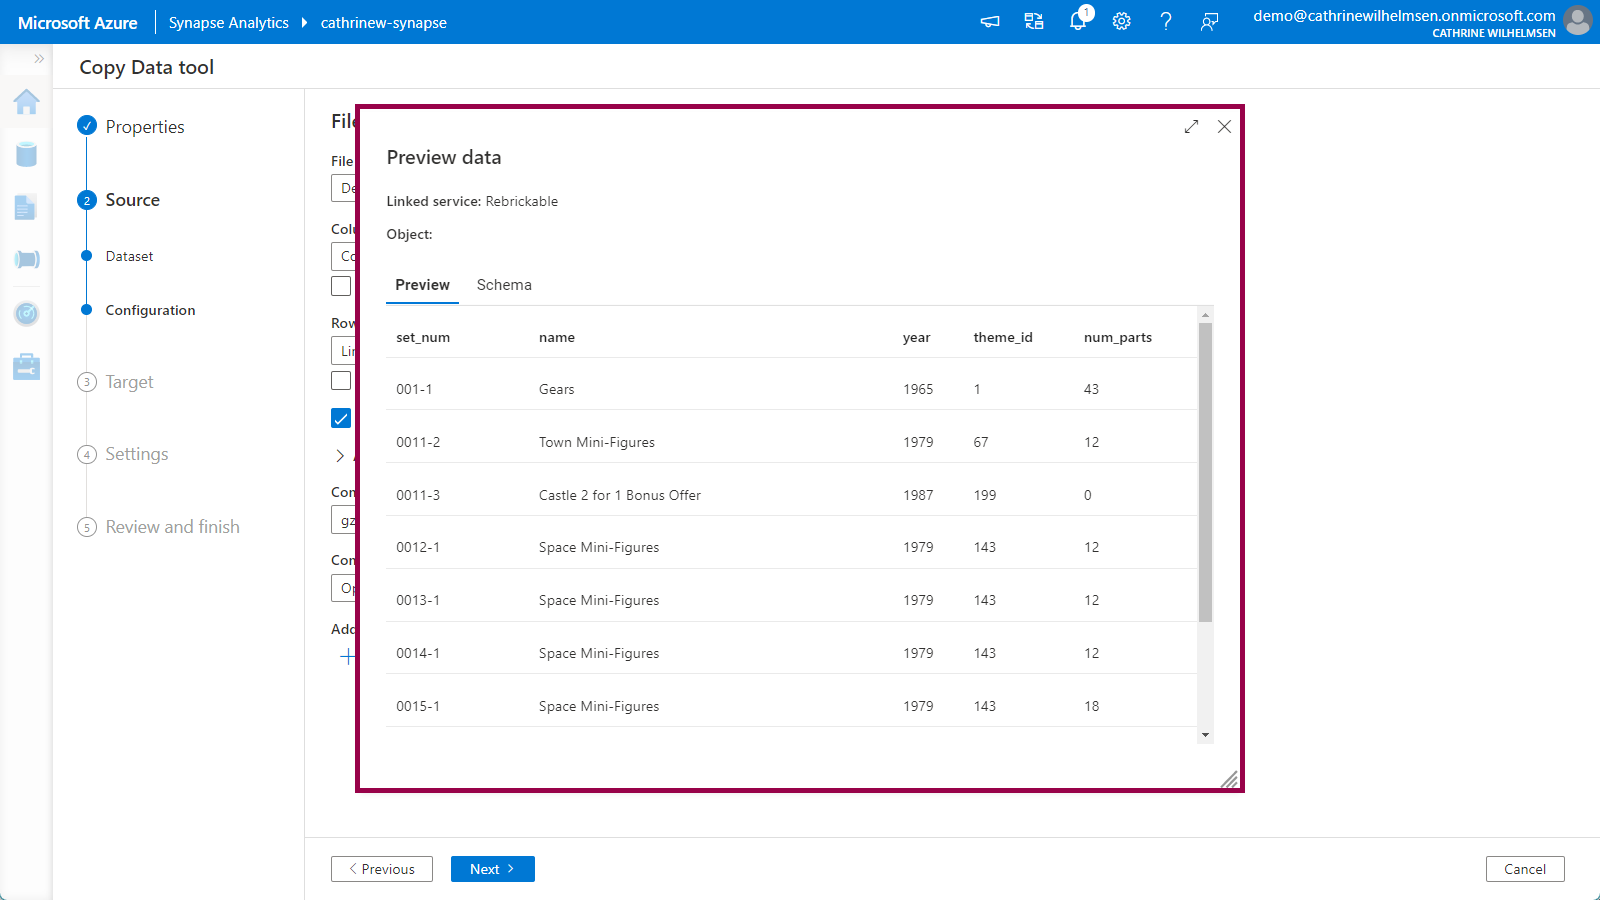
Verify that the first row as header option gets selected automatically. Then click preview data again. Tadaaa! Magic! We can now preview the data inside the gzipped file without having to download or unzip it manually! Amazing 🤩
Click next to move on to the Target properties.
3. Target
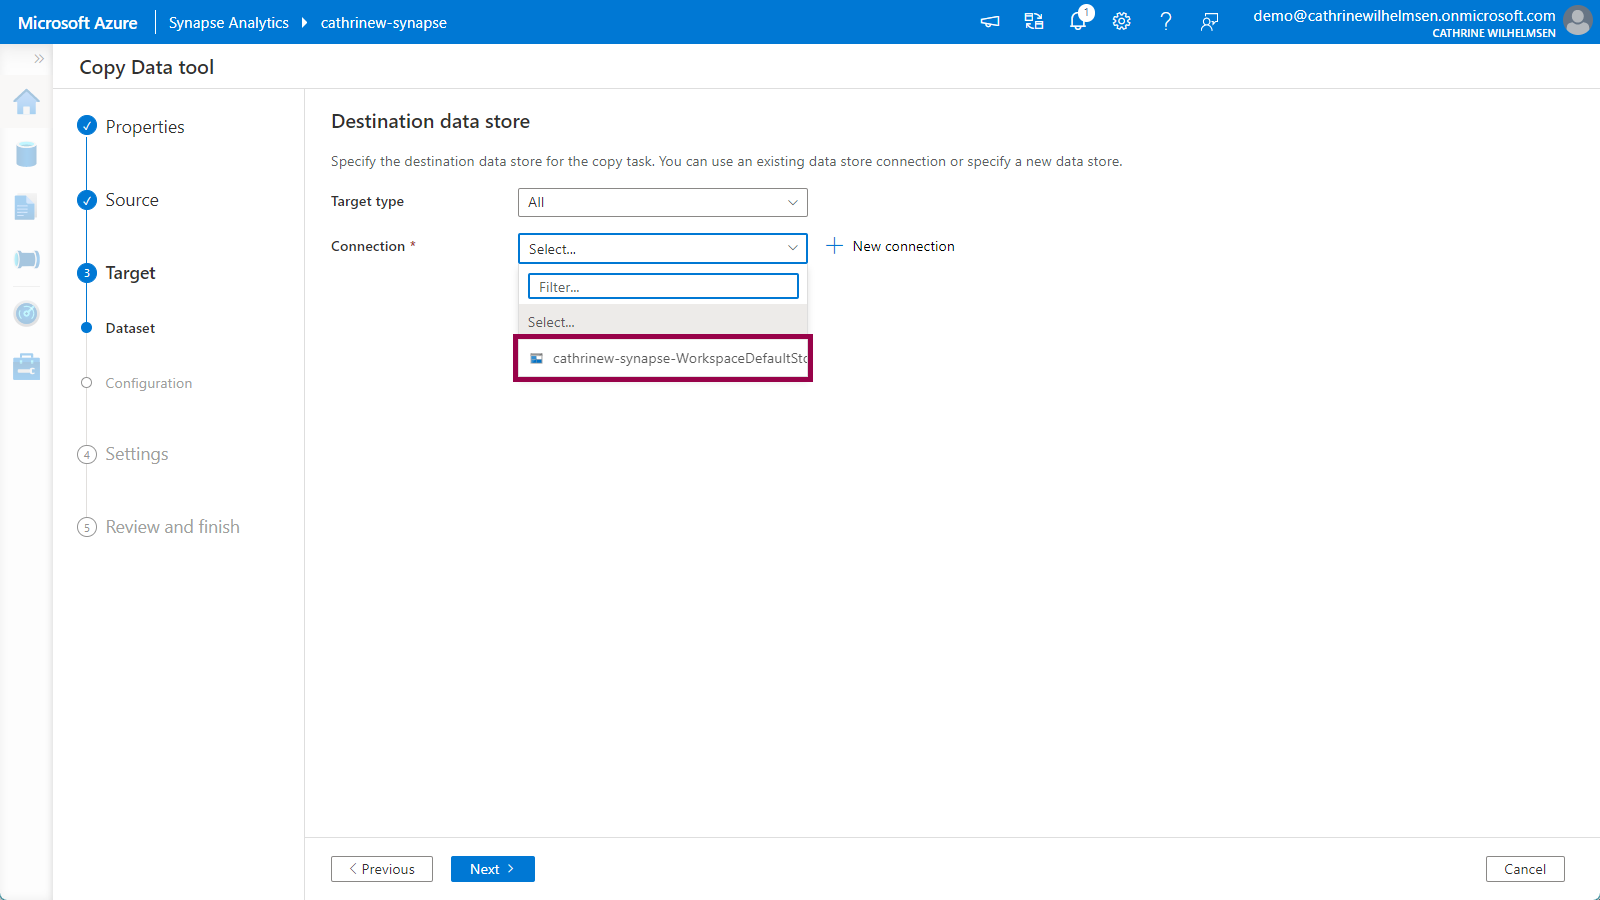
On the Target / Destination Dataset page, choose your WorkspaceDefaultStorage connection:
Specify raw/rebrickable as the folder path, and sets.parquet as the file name. Keep the other default options. Click next:
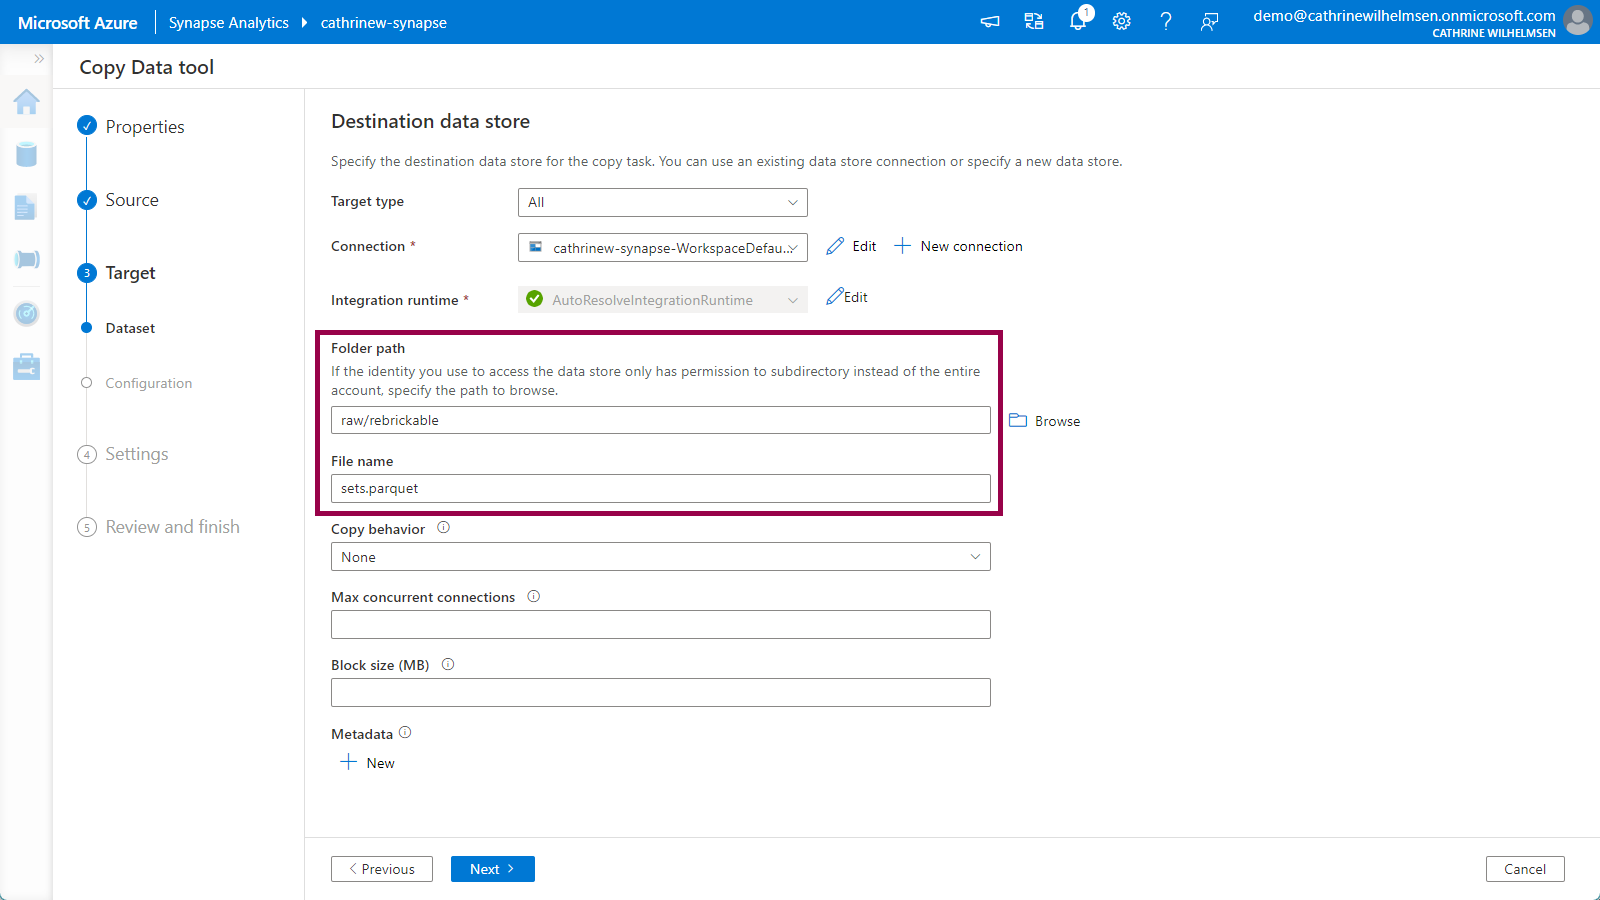
Verify that the file format is automatically set to Parquet with the snappy compression after specifying .parquet as the file name in the previous step:
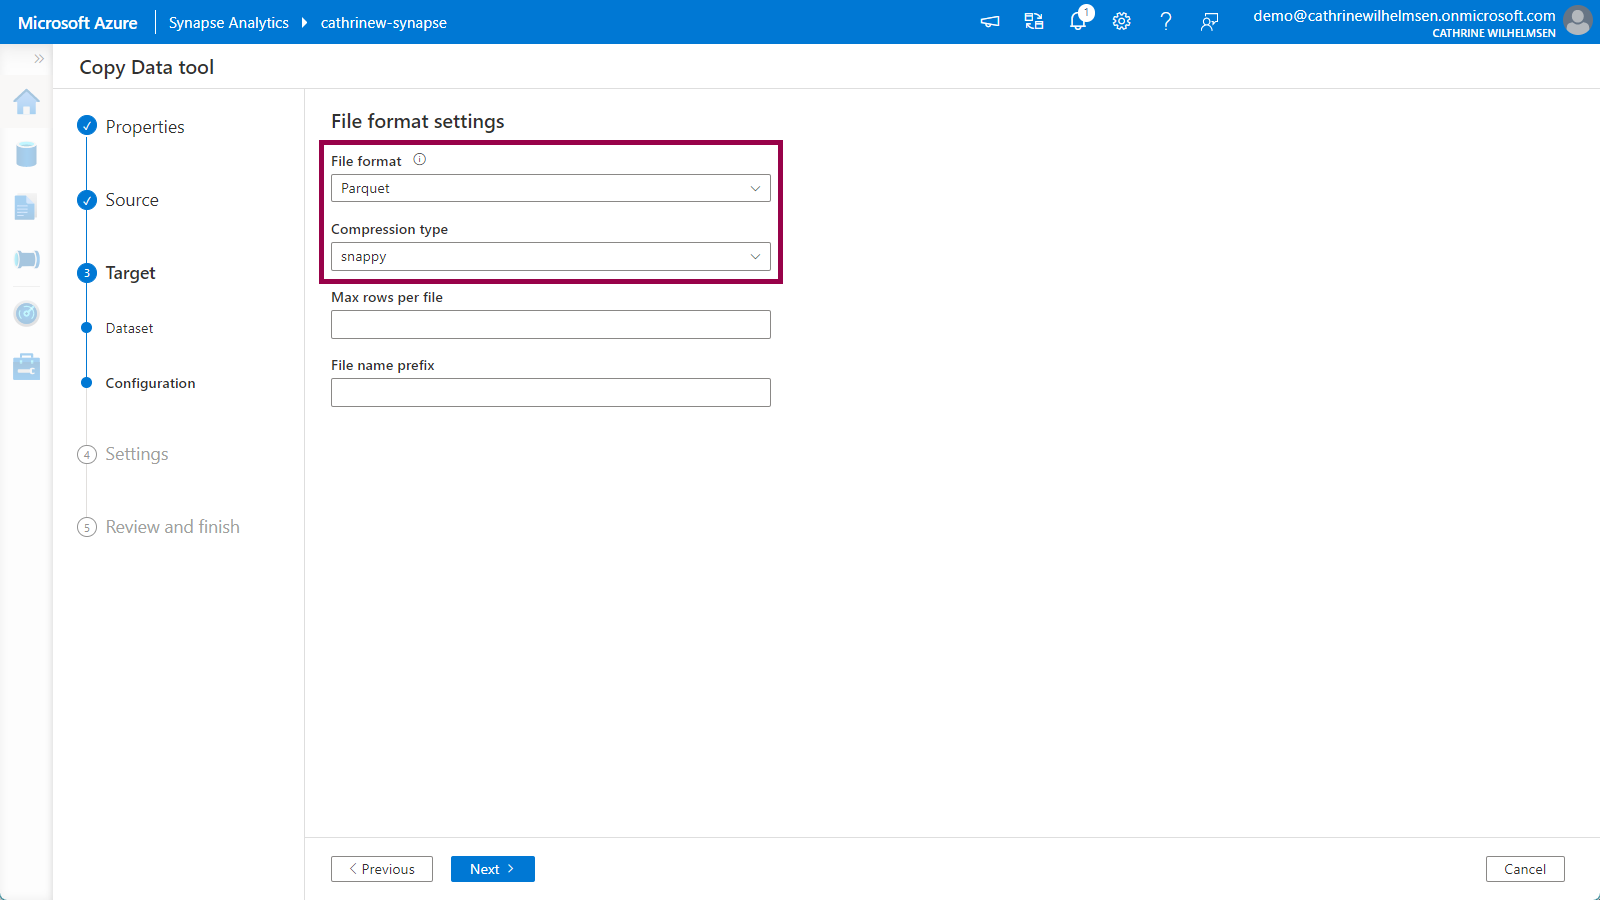
Click next to move on to the Settings.
4. Settings
On the Settings page, give the task a better name, for example Copy_Rebrickable_Sets:
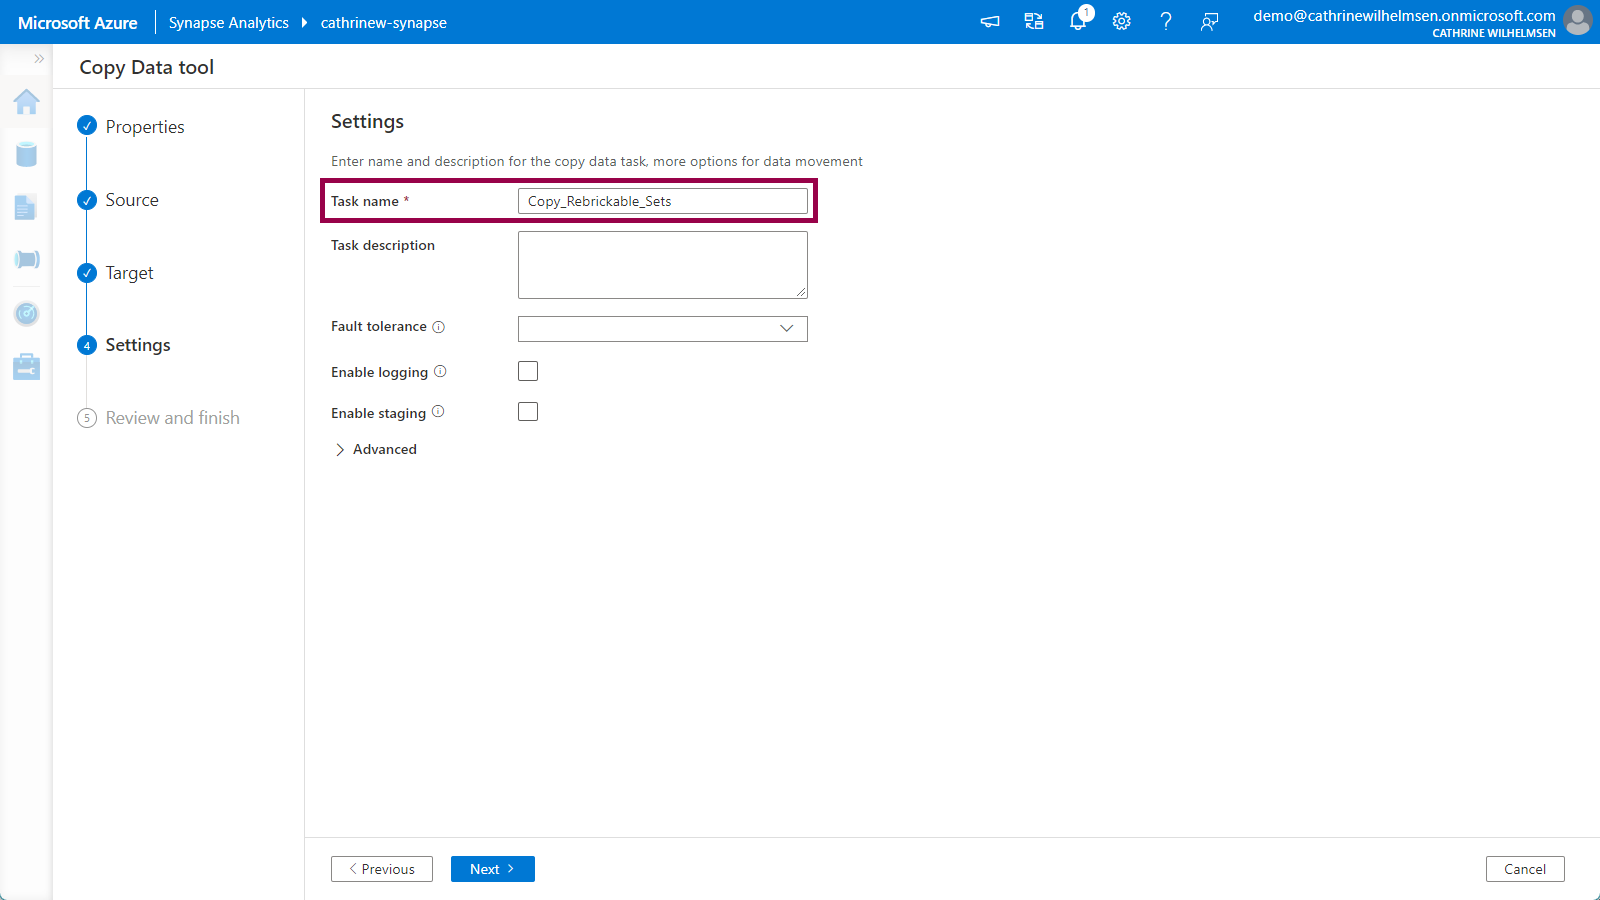
Click next to move on to Review and Finish.
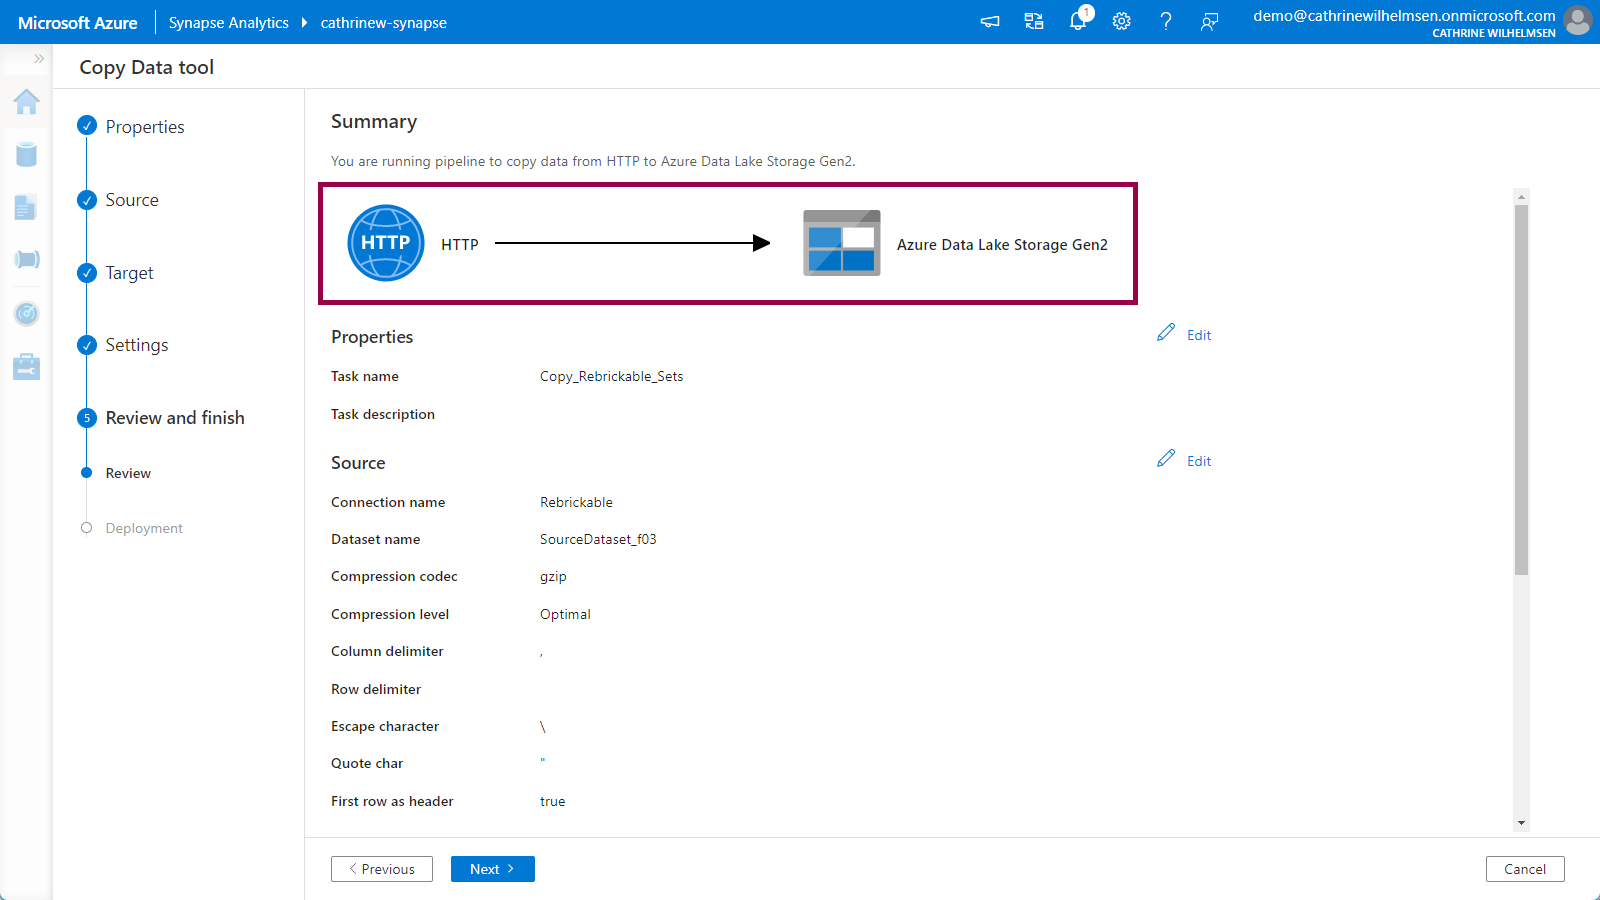
5. Review and Finish
On the Review page, you will see a pretty graphic illustrating that you are copying data from an HTTP source to an Azure Data Lake Storage Gen2 target:
The dataset names have been given a generic name with a random suffix. Click on edit next to each of them and give them more appropriate names. Remember to click save:
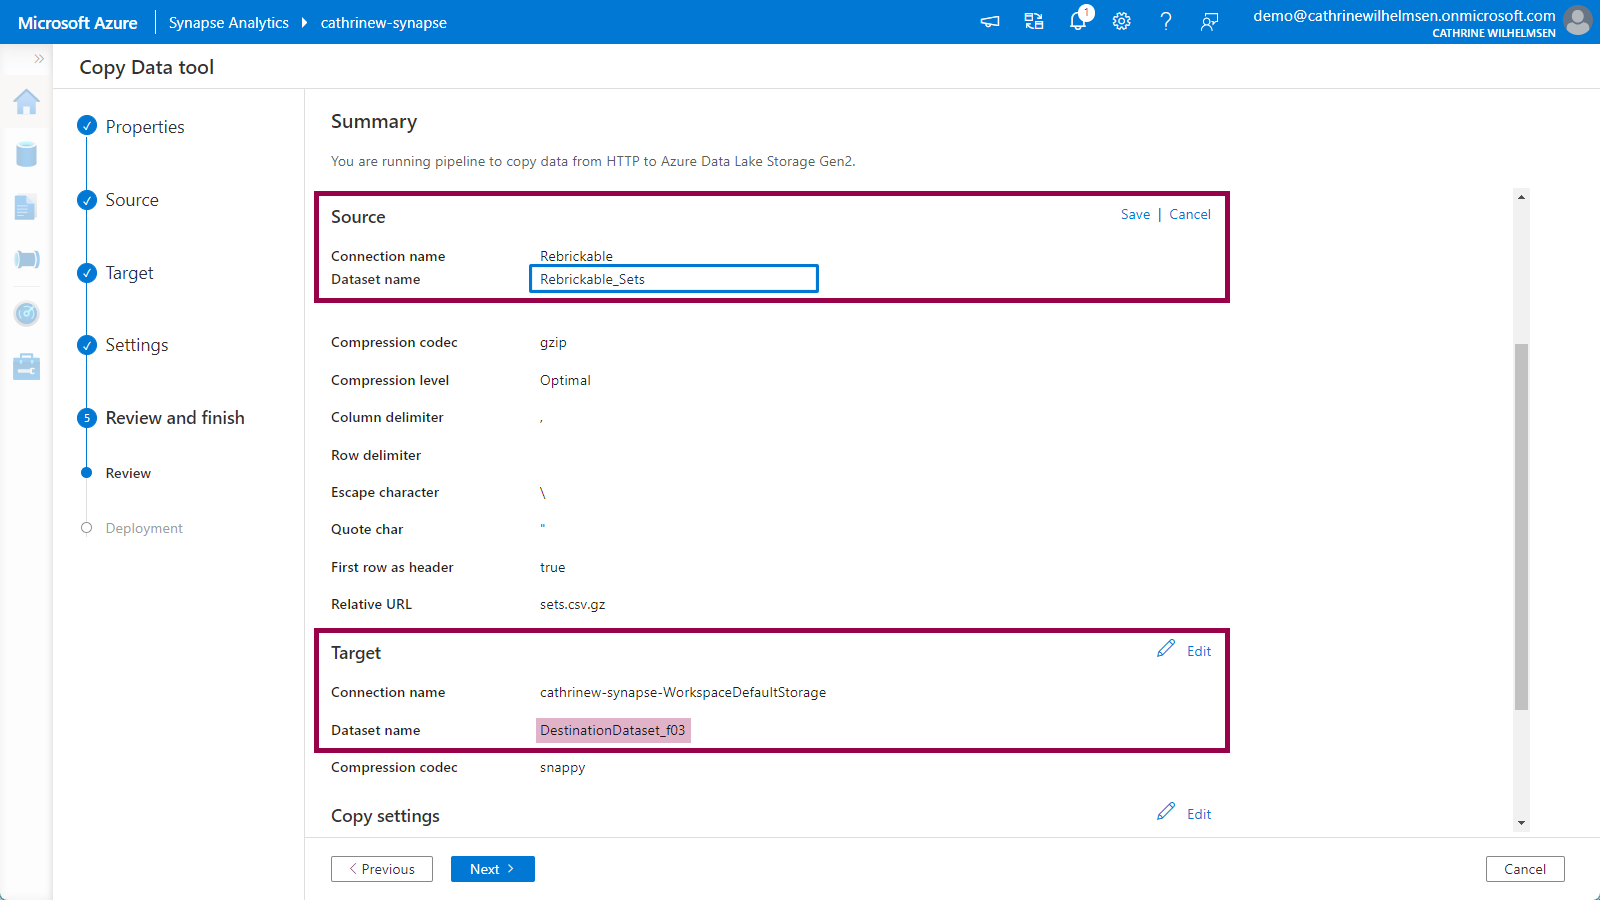
⚠️ Make sure that everything looks ok before you click next, because once you move on to Deployment, things will happen!
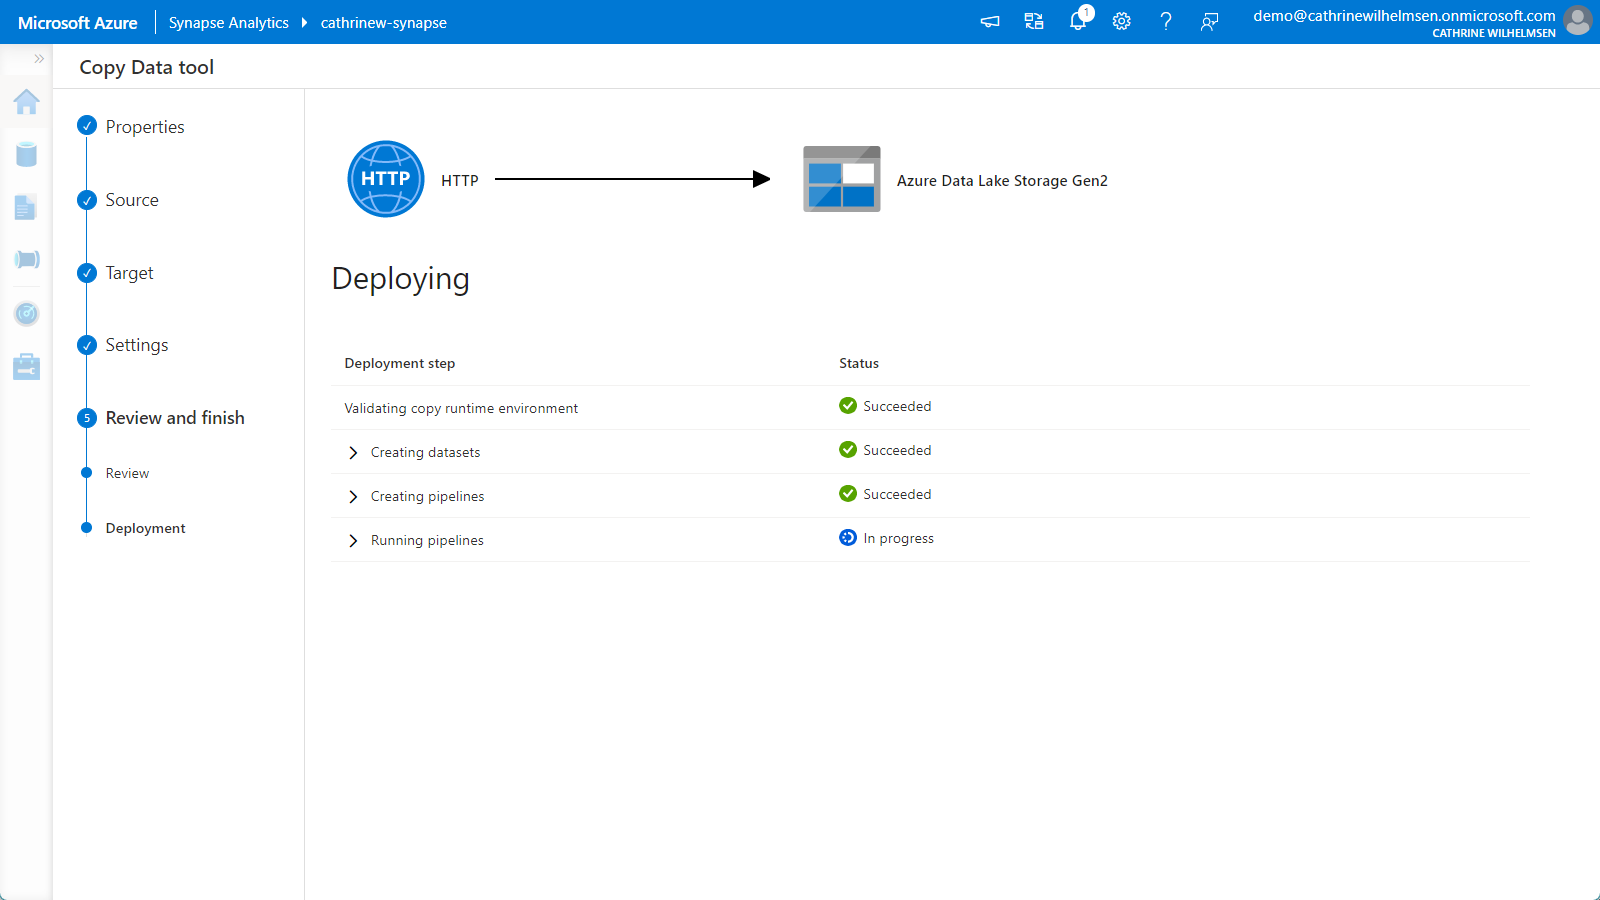
The final step, Deployment, will create the datasets and pipeline. Since we chose the “run once now” setting in the first Properties step, the pipeline will be executed immediately after deployment:
Once the deployment is complete, click finish:
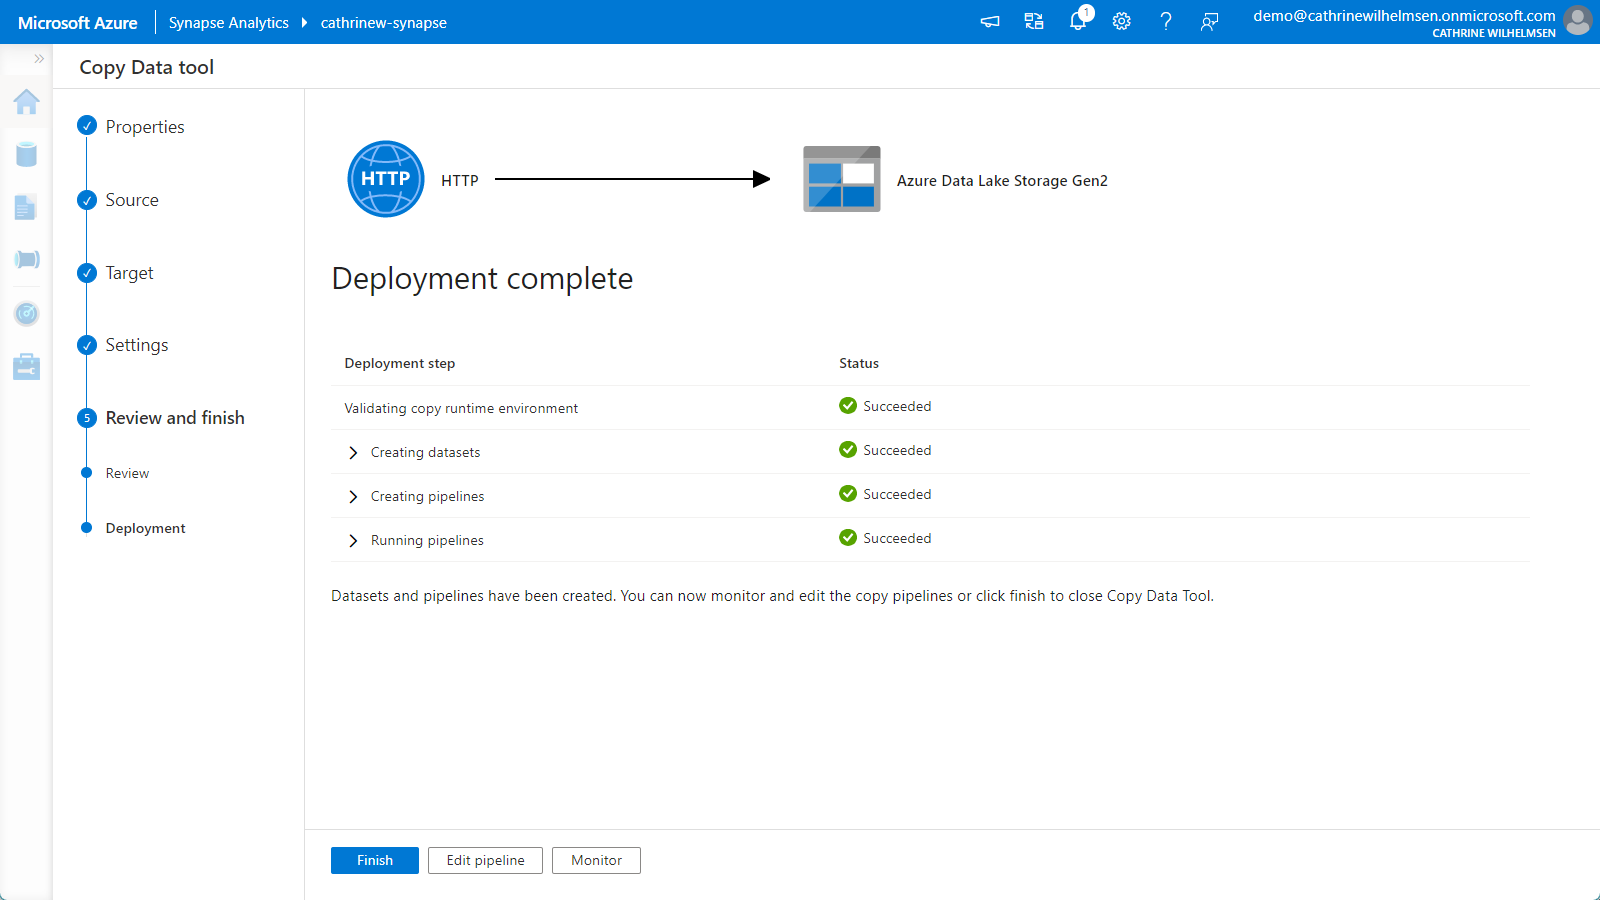
Let’s explore our newly ingested data! 😃
Exploring LEGO Datasets using Serverless SQL in Azure Synapse Analytics
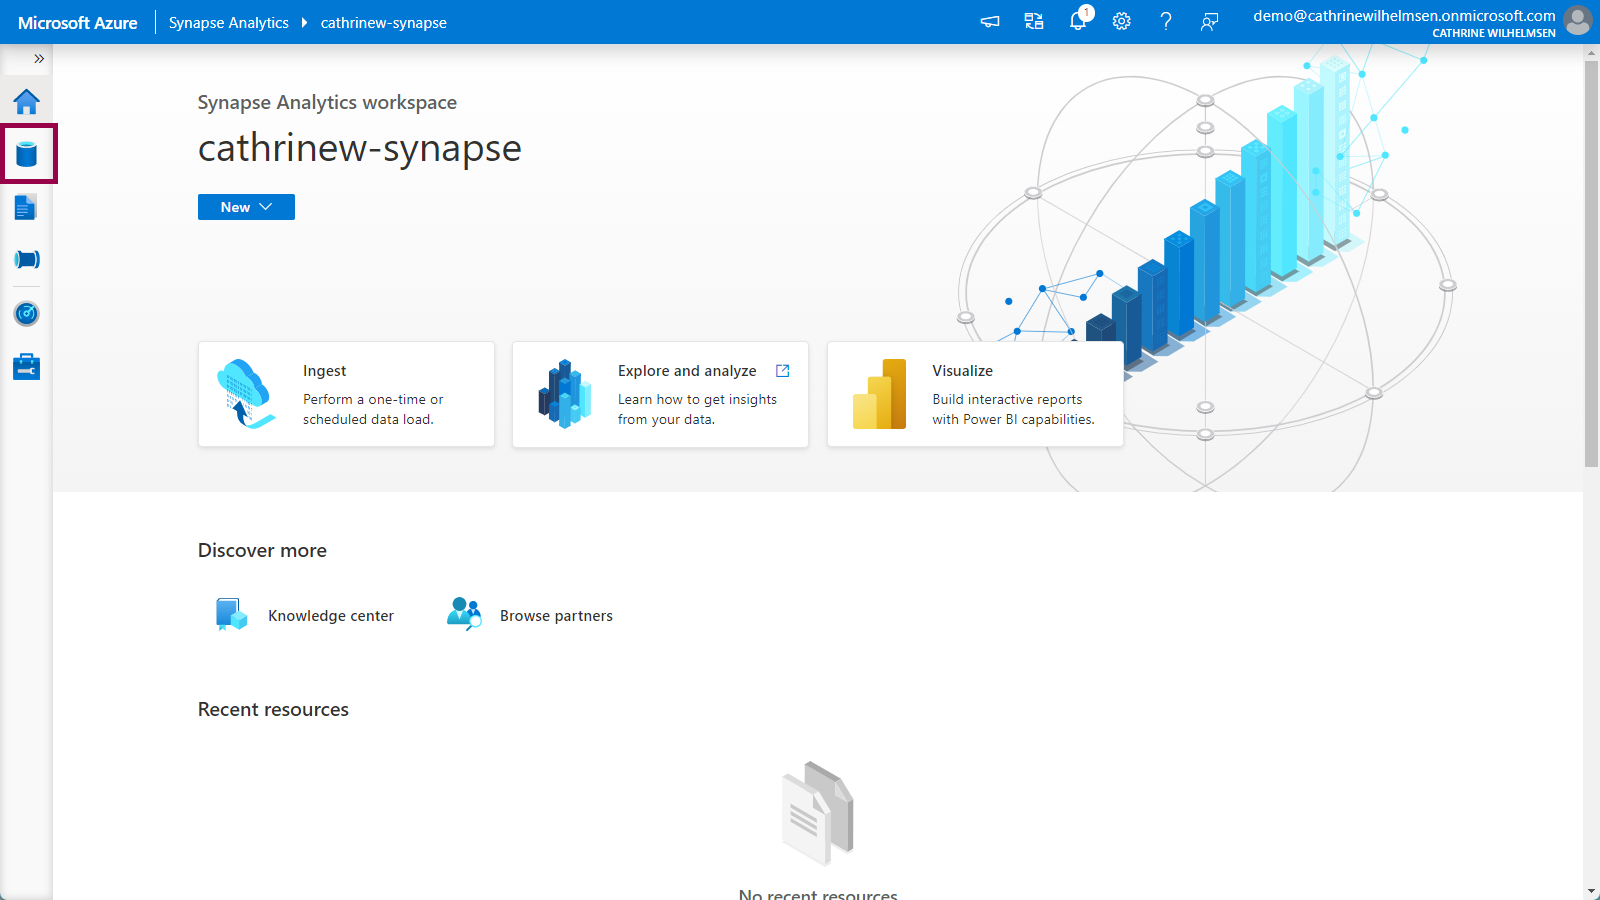
From the Home page, click on the database icon to open the Data hub:
Navigating to the LEGO Datasets
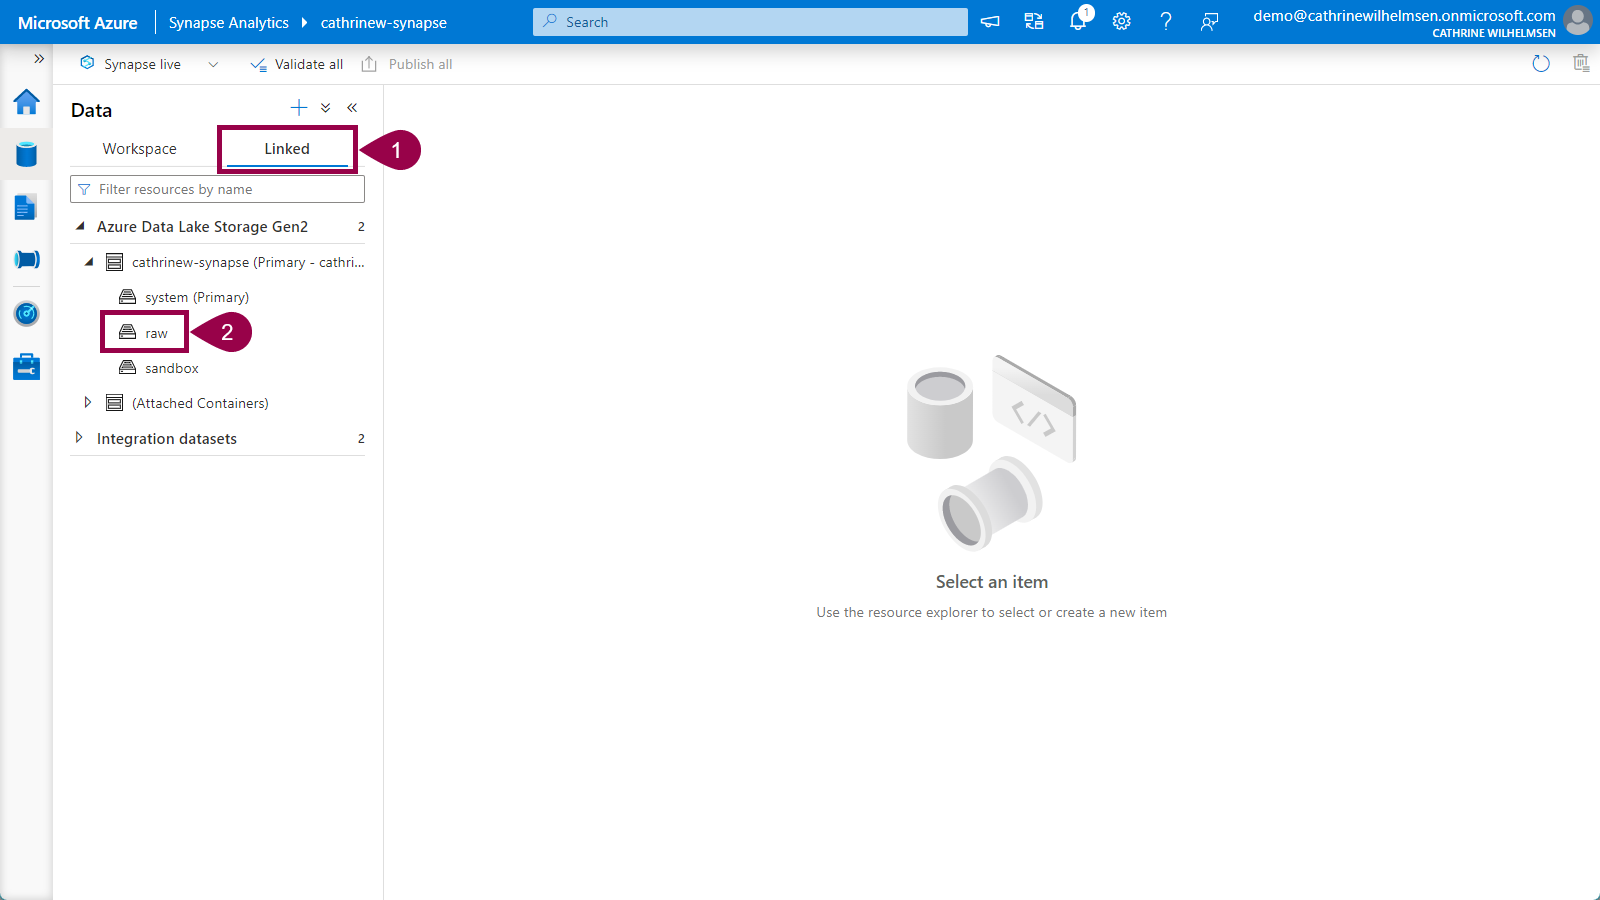
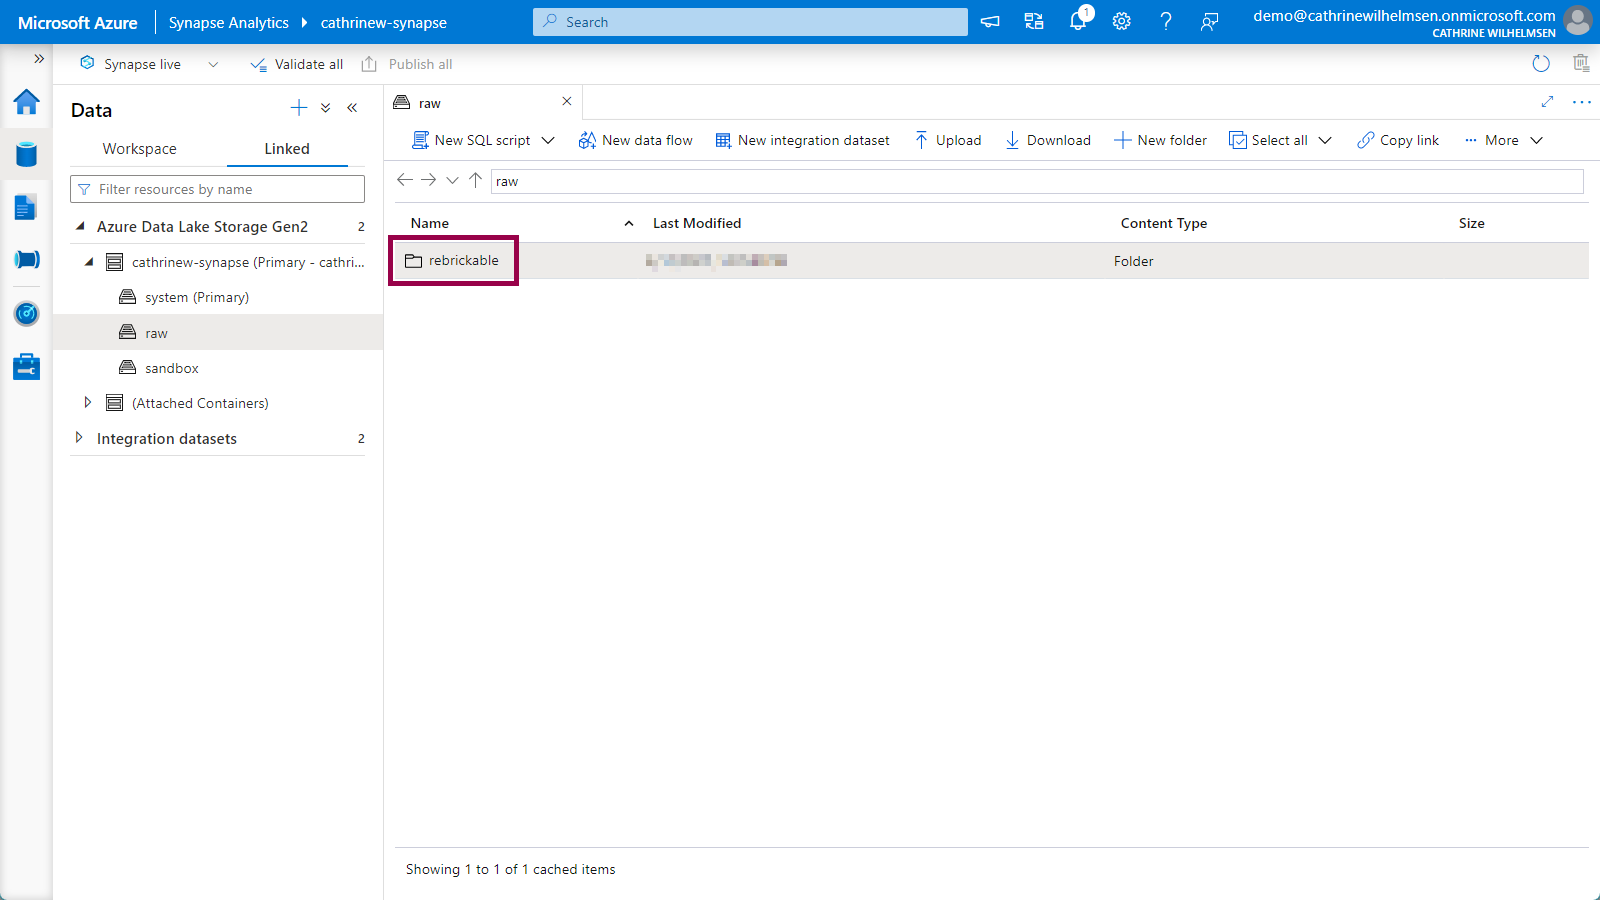
In the Data hub, click on linked, and then navigate down to the new raw container inside your primary storage account:
When you click on a container, you will open the storage explorer view. Double-click on the new rebrickable folder:
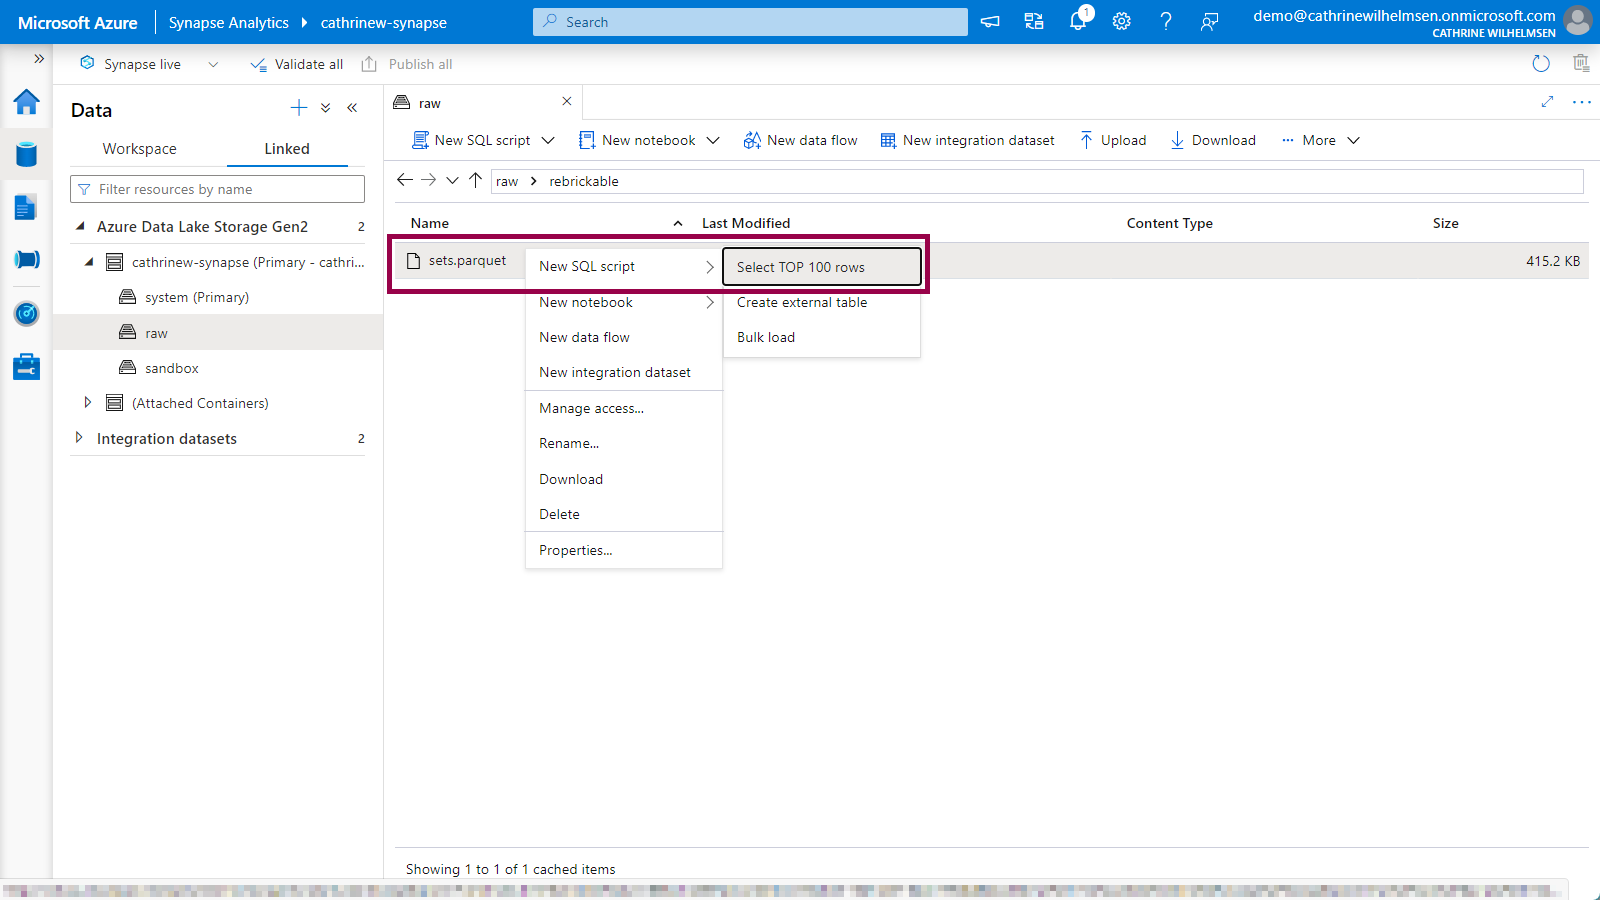
Right-click on the new sets.parquet file, choose new SQL script and click on select top 100 rows:
Querying the LEGO Datasets
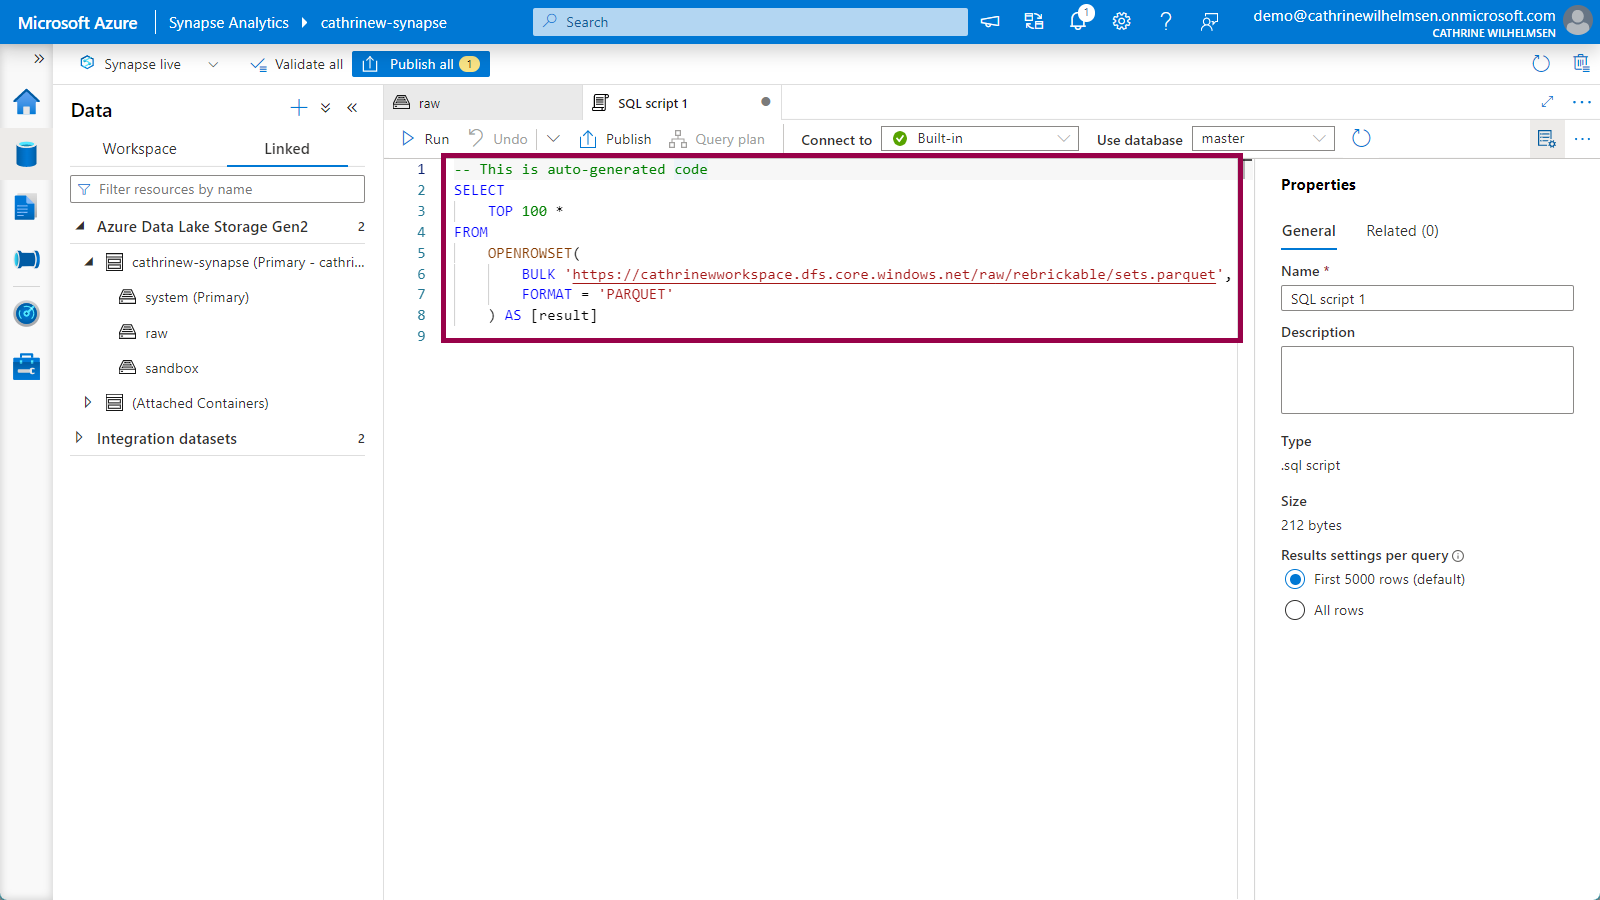
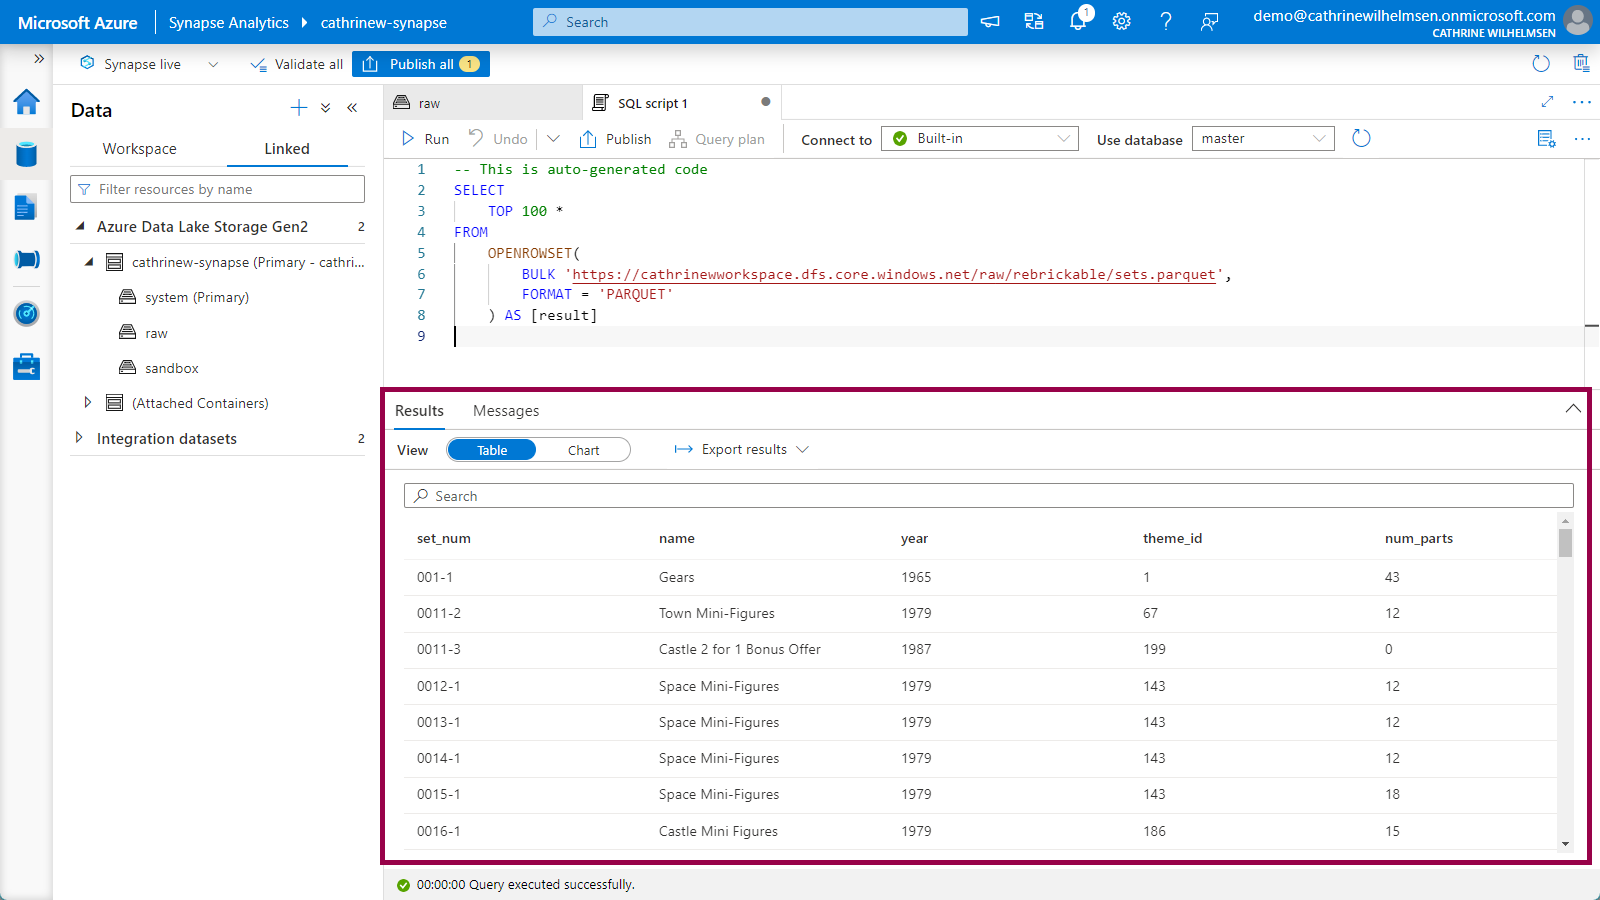
This will open a new Serverless SQL tab with the OPENROWSET code auto-generated, so you don’t have to remember the syntax yourself:
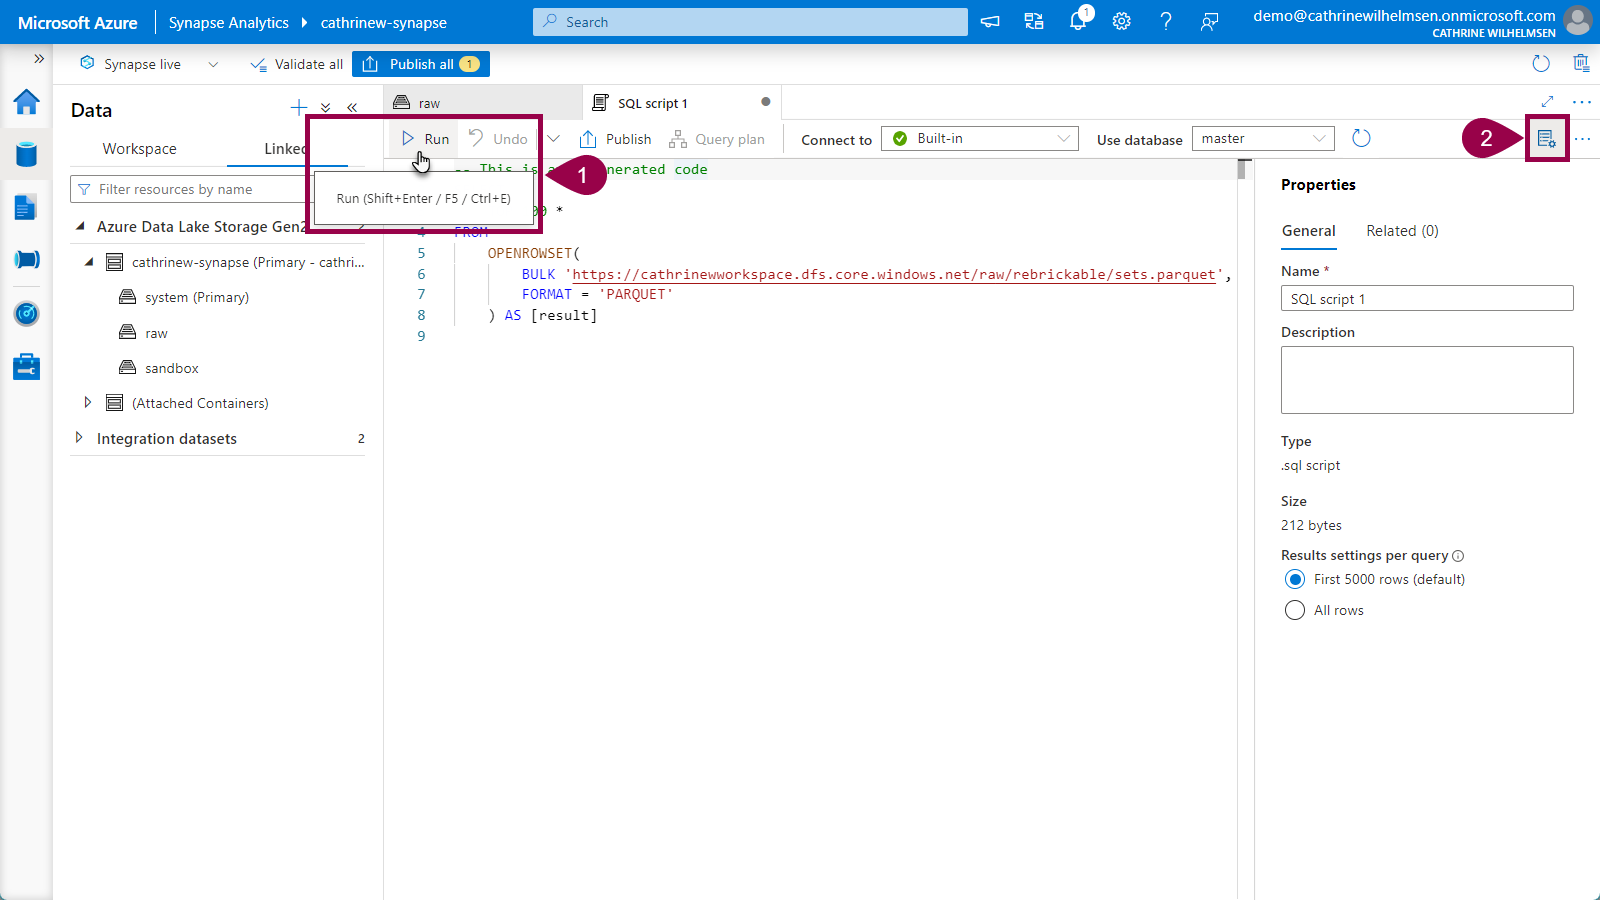
Execute the query by clicking on run, or by pressing Shift+Enter or F5. You can also click on the properties button in the top right corner to close the properties pane:
You are now viewing the content of the sets.parquet file as if it were any other table in a database! 🤩
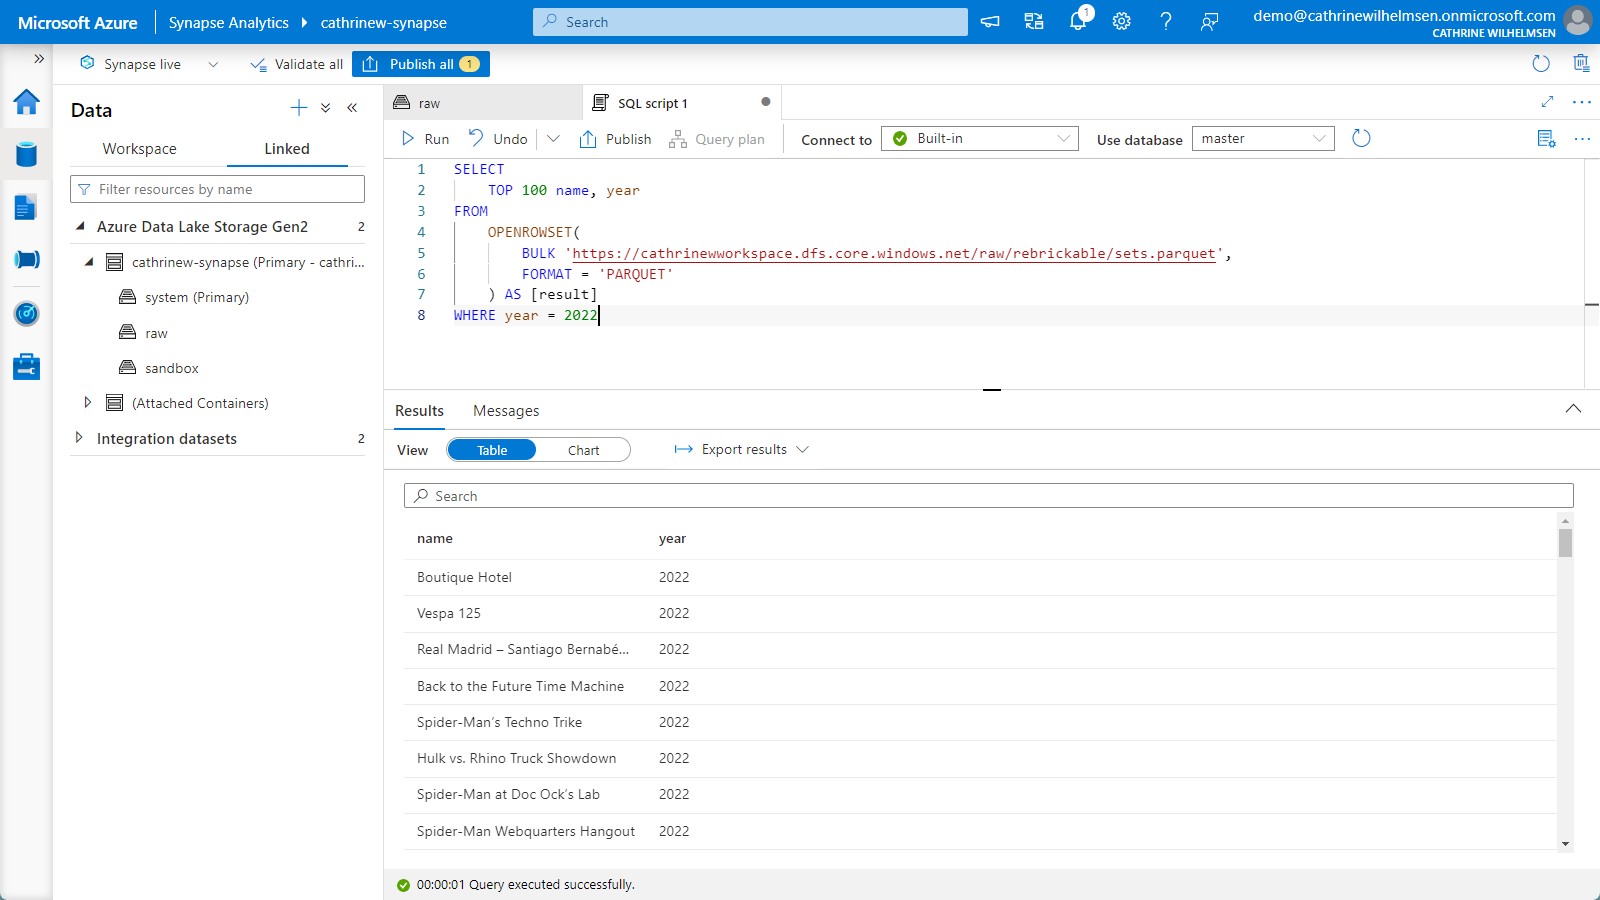
And like with any other table in a database, you can query it exactly the way you want, for example by selecting specific columns and adding WHERE clauses:
Summary
In this post, we walked through one of my favorite demos: ingesting and exploring LEGO datasets. It really only takes minutes to grab a compressed file from the web, decompress it, store it as a Parquet file in my data lake, and run SQL queries on it using Serverless SQL. I love it! 🤓
About the Author
 Cathrine Wilhelmsen is a Microsoft Data Platform MVP, international speaker, author, blogger, organizer, and chronic volunteer. She loves data and coding, as well as teaching and sharing knowledge - oh, and sci-fi, gaming, coffee and chocolate 🤓